NextPCB Capabilities
 PCB Assembly
 Layer Buildup
 SMD-Stencils
 PCB Design-Aid & Layout
 Mechanics
 Quality
 Drills & Throughplating
 Factory & Certificate



Unlike a game console replica or a cosplay prop, a bench tool has to actually work every time you reach for it. The five projects below are built by makers who needed something specific — a programmable power source, an accurate LC meter, a precise servo controller — and didn't want to pay lab-equipment prices for it. Each one links back to the original build log with full schematics, firmware, and bills of materials.
- In This Article
- 1. PowerPD — A USB-C PD/PPS Programmable Bench Supply
- 2. DIY High-Precision Auto-Ranging LC Meter
- 3. Robotic Arm Seven — A 3-DOF Arduino-Controlled Arm
- 4. DC Pump Driver With Custom PCB Breadboard
- 5. DIY LM317-Based Buck Converter
1. PowerPD — A USB-C PD/PPS Programmable Bench Supply
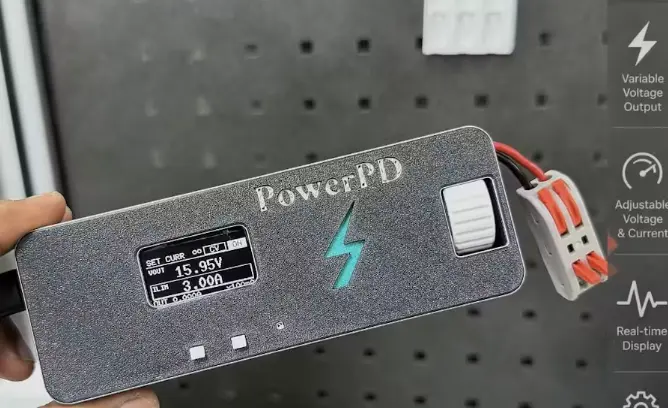
Most USB-C PD chargers can already deliver 5–20V at real current, they just don't let you choose the voltage. PowerPD turns a standard PD charger into a small programmable bench supply: an AP33772S PD sink controller negotiates the voltage profile, an INA226 monitor reports real-time voltage/current/power over I2C, and an ESP32 handles the negotiation logic, OLED display, and rotary-encoder input. If the charger supports PPS, output can be fine-tuned in small steps rather than jumping between fixed 5/9/12/15/20V levels.
The creator had the board professionally assembled rather than hand-soldered, citing the fine-pitch USB-C connector and PD controller footprints — and notes that the Gerber files, BOM, and schematic can be uploaded directly to NextPCB for manufacturing and assembly.
Components:
- ESP32
- AP33772S USB-C PD/PPS Sink Controller
- INA226 Power Monitor
- MP1584 Buck Converter
- MOSFET Output Stage
- SH1106 OLED Display, Rotary Encoder
Full build log on Hackster.io, additional coverage on Hackaday.io, and a companion guide on Instructables.
2. DIY High-Precision Auto-Ranging LC Meter
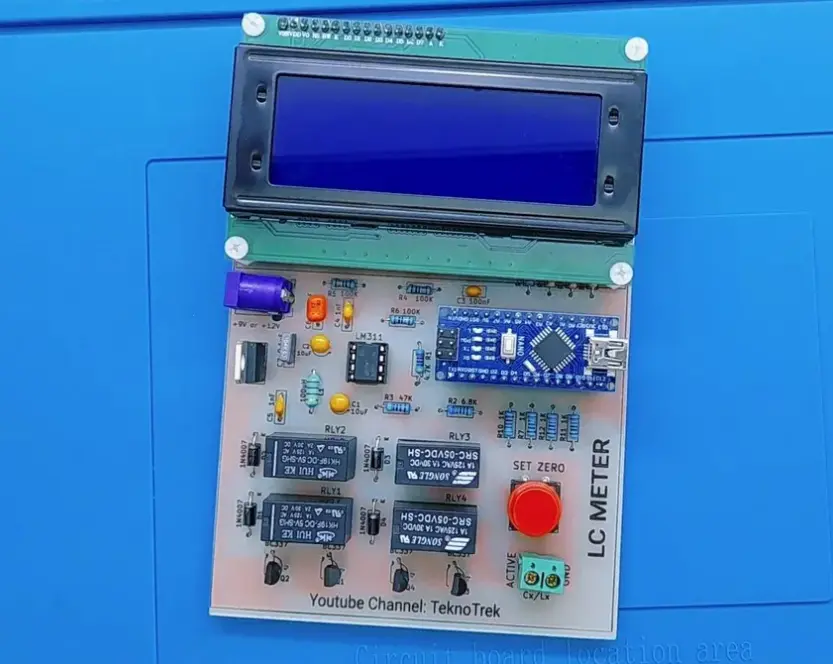
A multimeter measures voltage, current, and resistance, but most bench-level meters stop there — leaving inductance and capacitance to guesswork or an expensive dedicated LCR bridge. This build fills that gap with an Arduino Nano running custom firmware that handles measurement timing, frequency calculation, and auto-ranging, paired with low-tolerance, temperature-stable reference inductors and capacitors that the design leans on for accuracy.
Components:
- Arduino Nano
- Low-Tolerance Reference Inductors/Capacitors
- 16×2 LCD Display
- Custom PCB
Full build on Instructables.
3. Robotic Arm Seven — A 3-DOF Arduino-Controlled Arm
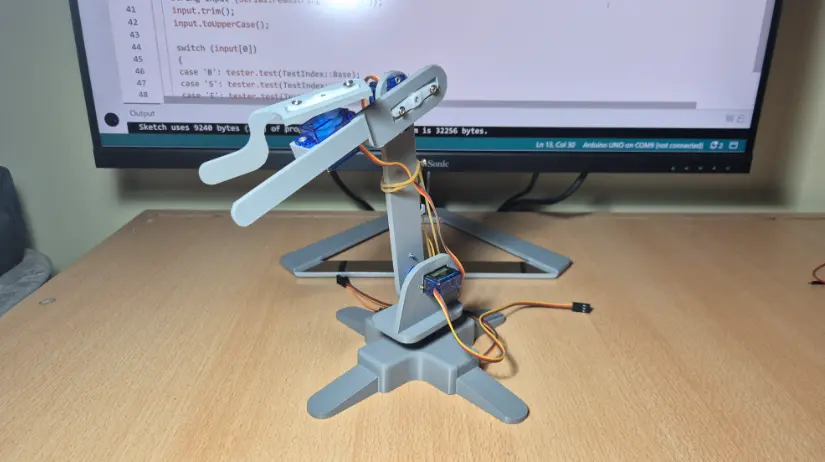
Robotic Arm Seven is a 3-degree-of-freedom arm built from 3D-printed parts and SG90 hobby servos, controlled by an Arduino Uno over serial. What sets it apart from a typical servo-arm tutorial is the software: it supports manual joint control, inverse kinematics (so you send a target X/Y/Z coordinate rather than individual joint angles), gripper control, waypoint list programming for up to 25 recorded positions, and a handshake protocol for external software integration.
For anyone learning inverse kinematics, this is a genuinely useful reference implementation — the repository's code is organized into separate modules for the kinematics math, servo configuration, and command handling, which makes it easier to follow than a single monolithic sketch.
Components:
- Arduino Uno
- SG90 Micro Servo Motors (×3–4)
- 3D-Printed Structural Parts
Full source code, STL files, and wiring diagrams on GitHub.
4. DC Pump Driver With Custom PCB Breadboard
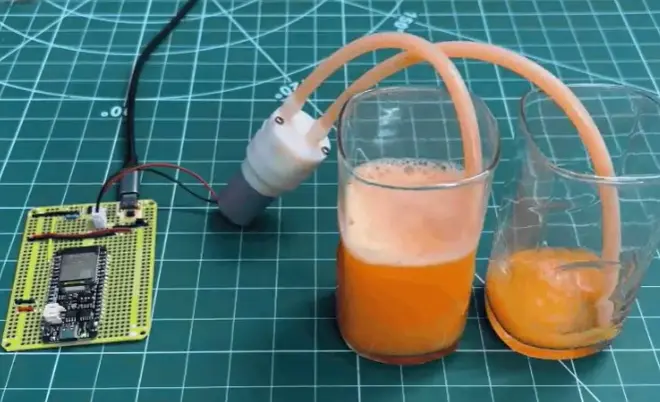
Small DC pumps and motors draw more current than a microcontroller pin can safely switch, so this project builds a dedicated MOSFET driver stage around an ESP32, using an AO4406 SOIC-8 N-channel MOSFET to handle the switching. It is built on the same reusable custom PCB breadboard format the creator uses across several other projects — a general-purpose prototyping board rather than a single-use design, which is a pattern worth borrowing for anyone who prototypes a lot of small motor or actuator drivers.
Components:
- ESP32
- AO4406 N-Channel MOSFET (SOIC-8)
- Custom PCB Breadboard
Full build log on Hackster.io, with additional coverage on Hackaday.io and Instructables.
5. DIY LM317-Based Buck Converter
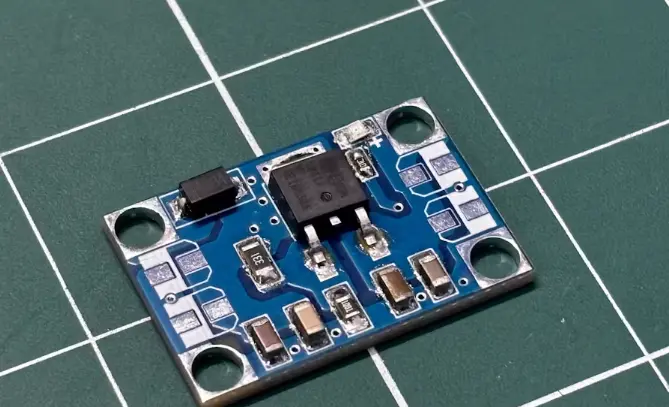
Not every voltage regulation problem needs a switching converter. This project packages the classic LM317 adjustable linear regulator, in a compact DPAK package, onto a small PCB alongside a handful of SMD passives to deliver a stable 5V output — a straightforward, low-noise option any time a project needs to step a higher DC voltage down to 5V without the switching noise a buck converter can introduce into sensitive analog circuits.
Components:
- LM317 Adjustable Linear Voltage Regulator (DPAK)
- SMD Passive Components
- Custom PCB
Full build log on Hackster.io, with a companion guide on Instructables.
Building Something Similar?
If you are prototyping a power or precision-tool project of your own, NextPCB's free online Gerber Viewer and DFM tool is worth running your design through before ordering, and the NextPCB Accelerator program covers PCBA costs for qualifying open-source hardware projects.