Learn How Flashlight Circuits Work from the Ground Up
A flashlight circuit is a simple electrical circuit that consists of a power source. Usually a battery, an LED or a light bulb, and a switch to turn the light on and off. Moreover, wires connect everything together. When the switch is turned on, the battery provides electrical energy. That flows through the wires and into the LED or light bulb. This causes it to emit light.
The basic components of a flashlight circuit include:
- Battery: A power source that provides the necessary electrical energy to power the LED or light bulb.
- LED or light bulb: If you want to build a really bright flashlight, you might need a bigger battery. That can hold more energy. But if you want a smaller flashlight that doesn't need to be too bright. A smaller battery might do the trick.
- Switch: A component that allows the user to turn the flashlight on and off.
- Wires: Conductive materials that connect the components together and allow the flow of electrical energy through the circuit.
- Resistor: A resistor helps to regulate the flow of electricity. By making sure that the light bulb or LED doesn't get too much electricity and burn out.
- Capacitor: A component that stores electrical energy and releases it when needed, helping to stabilize the circuit.
Understanding these basic components and their functions is crucial. By properly selecting and assembling these components, you can create a functional flashlight.
Assembling the Essential Tools and Materials
It's important to gather all the necessary tools and materials. Here's a more detailed list of the essential items you'll need:
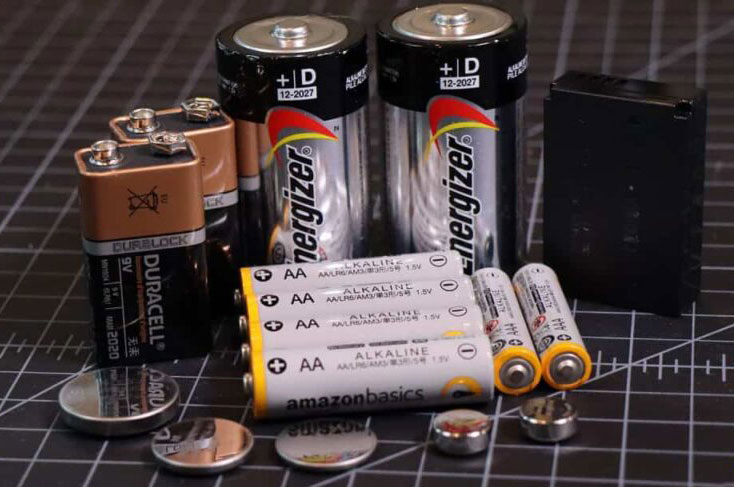
- Battery: Choose a battery based on the flashlight's size and brightness. Common types include AA, AAA, CR123, and 18650 batteries. Make sure to choose a high-quality battery that is suitable for your flashlight circuit.
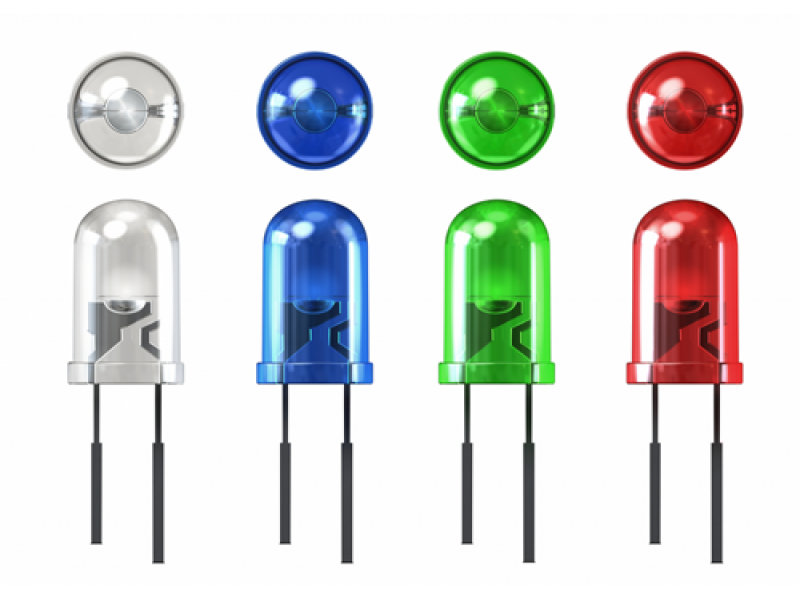
- LED: Choose a high-quality LED that is compatible with the battery you've chosen. Make sure to check the specifications of the LED to ensure it can handle the voltage and current. You may also want to consider the brightness level of the LED.
- Resistor: Select a resistor with the appropriate resistance value to protect the LED from too much current flow. A 220-ohm resistor is commonly used with a 5-volt power supply. But the resistance value may need to be adjusted depending on the battery voltage.
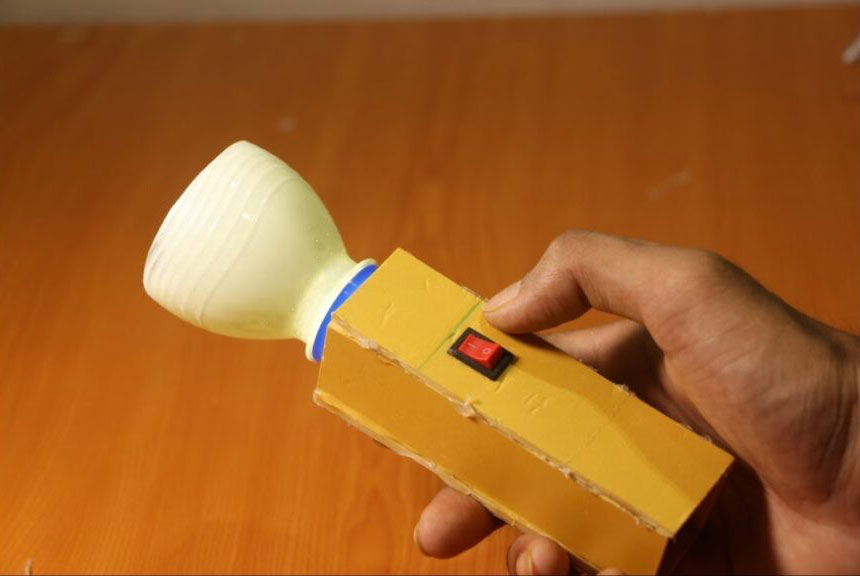
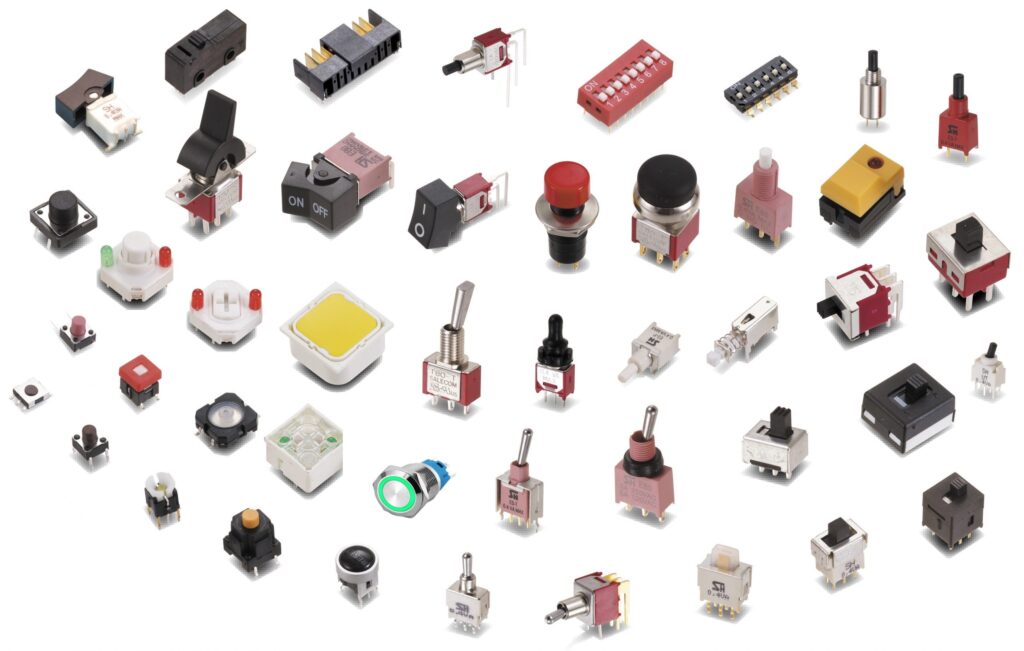
- Switch: Choose a switch that is appropriate for your flashlight design. There are many different types of switches available, including push-button switches, toggle switches, and rotary switches.
- Wires: Use high-quality wires with proper insulation to connect the components together. Therefore, choose wires of the appropriate gauge based on the current flow in the circuit. Solid core wires are recommended for the breadboard stage.
- Breadboard: A breadboard is a convenient tool for prototyping. Additionally testing the circuit before soldering the components onto a PCB board. Make sure to choose a breadboard with enough power rails.
- PCB board: Once the circuit underwent testing, transfer the circuit onto a permanent PCB board. Choose a PCB board that is appropriate for your circuit size.
- Soldering iron and solder: Use a soldering iron and solder to make permanent connections.
- Multimeter: Use a multimeter to test the voltage, current, and resistance of the circuit at various points. This can help identify any issues or problems with the circuit.
Finding the Proper Battery and LED for Your Needs
Choosing the right battery and LED is a critical step in building a DIY flashlight circuit. When choosing these components, consider these factors.
- Battery type: The type of battery you choose will depend on the size and brightness of the flashlight you want. Common types include AA, AAA, CR123, and 18650 batteries. Make sure to choose a high-quality battery that is suitable for your flashlight circuit and has a long lifespan.
- Battery voltage: The voltage of the battery will determine the number of LEDs that is possible to use in the circuit. For example, a 3-volt battery can power one LED, while a 9-volt battery can power multiple LEDs.
- Battery capacity: The capacity of the battery determines how long the flashlight can run before needing to be recharged. Choose a battery with a high capacity if you need the flashlight to run for a long time.
- LED type: Choose an LED that is compatible with the battery you've chosen. Make sure to check the specifications of the LED to ensure it can handle the voltage and current.
- LED forward voltage and current: The voltage and current of the LED will determine the resistor value needed. Therefore, make sure to choose a resistor with the appropriate resistance value based on the LED specifications.
- Efficiency: Choose a battery and LED with high efficiency to maximize the lifespan of the battery and the brightness of the LED.
- Size and weight: The size and weight of the battery and LED will affect the overall size and weight of the flashlight. Because of that choose components that are appropriate for your desired flashlight size and weight. By considering these factors, you can choose the right battery and LED for your DIY flashlight circuit
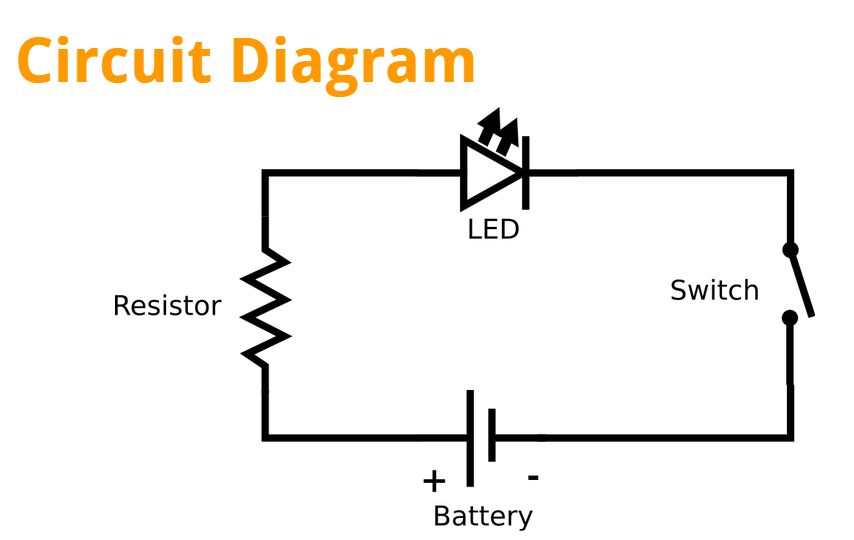
Creating the Wiring Diagram for the Flashlight Circuit
Designing a circuit schematic is an important step in building a DIY flashlight circuit. It helps to visualize the connections between the components and ensure that the circuit is designed correctly. Here are the steps to design a circuit schematic:
- Determine the battery and LED specifications: Based on the battery and LED specifications, determine the forward voltage and current of the LED. After that determine the voltage and capacity of the battery.
- Determine the resistor value: Calculate the resistor value needed to protect the LED from too much current flow. Use Ohm's law (V = IR) to calculate the resistance value needed based on the forward voltage and current of the LED.
- Draw the schematic diagram: Draw the schematic diagram of the circuit, showing the battery, LED, resistor, and switch. Connect the components in the correct orientation and order, making sure to include the appropriate labels and symbols.
- Add additional components: Depending on the complexity of the circuit, additional components such as capacitors and diodes may be needed to improve performance or protect the circuit from voltage spikes. Include these components in the schematic diagram as needed.
- Test the circuit: Before building the circuit, test the schematic diagram using a simulation tool or software. This can help to identify any issues or problems with the circuit design and make any necessary changes.
- Build the circuit: Once the schematic diagram underwent the testing, build the circuit using a breadboard or a PCB board. Use a soldering iron to make permanent connections between the components and the board.
Building the Flash Circuit on a Breadboard
Building a DIY flashlight circuit on a breadboard is a great way to prototype and test the circuit design before making it permanent on a PCB board. Here are the steps to build the circuit on a breadboard:
- Gather the necessary components: Gather the battery, LED, resistor, switch, and wires needed to build the circuit.
- Insert the battery: Insert the battery into the breadboard, making sure to connect the positive and negative terminals to the appropriate power rails.
- Insert the LED: Insert the LED into the breadboard, making sure to align the positive and negative legs with the appropriate rows.
- Insert the resistor: Insert the resistor into the breadboard, making sure to connect one end to the positive row of the LED and the other end to the negative power rail.
- Insert the switch: Insert the switch into the breadboard, making sure to connect one end to the positive power rail and the other end to the positive row of the resistor.
- Connect the wires: Use wires to connect the negative leg of the LED to the negative power rail and the positive leg of the LED to the positive row of the resistor.
- Test the circuit: Test the circuit by turning on the switch and checking that the LED lights up. If not, examine connections and components.
- Make adjustments: If necessary, make adjustments to the circuit design, such as changing the resistor value or adjusting the placement of the components.
By following these steps, you can build a DIY flashlight circuit on a breadboard, allowing you to test the circuit and make any necessary adjustments before making it permanent on a PCB board.
Testing the Flashlight Circuit for Functionality
Testing the functionality of a DIY flashlight circuit is important to ensure that it works as intended and to identify any potential issues or errors in the circuit design. Here are the steps to test the circuit for functionality:
- Check the connections: Double-check all of the connections in the circuit, including the battery, LED, resistor, switch, and wires. Make sure everything is connected correctly and securely.
- Turn on the switch: Turn on the switch to power the circuit and check that the LED lights up. If the LED does not light up, double-check the connections and make sure the components are inserted correctly.
- Measure the voltage: Use a multimeter to measure the voltage across the LED and resistor. The voltage should be close to the forward voltage of the LED, which can be found in the LED datasheet.
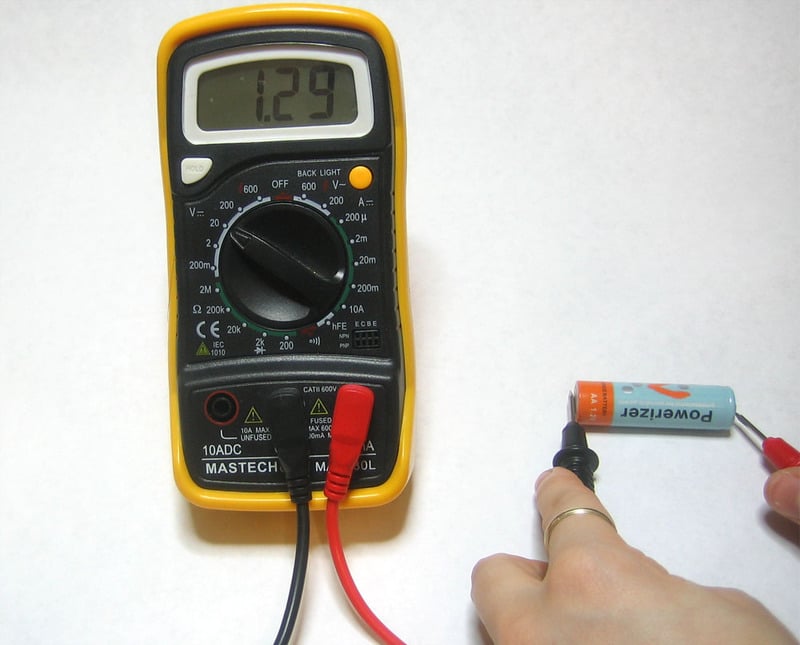
- Measure the current: Use a multimeter to measure the current flowing through the circuit. The current should be within the range specified in the LED datasheet, which will depend on the LED forward current and the resistor value.
- Check the brightness: Check the brightness of the LED and compare it to the desired brightness level. If the brightness is too low, increase the resistor value to decrease the current flow. If the brightness is too high, decrease the resistor value to increase the current flow.
- Check the battery life: Check the battery life by running the circuit continuously and measuring the voltage over time. The voltage should decrease slowly over time, indicating that the battery is providing a steady source of power.
By following these steps, you can test the functionality of a DIY flashlight circuit, ensuring that it works as intended and meets your requirements.
Transferring the Flashlight Circuit to a Permanent PCB Board
Once the DIY flashlight circuit has been tested on a breadboard and is confirmed to be working correctly. The circuit is possible to transfer to a permanent PCB board. Here are the steps to transfer the circuit to a PCB board:
- Design the PCB layout: Use PCB design software to create the layout of the circuit on the board. Place the components in the correct positions and connect them with traces that follow the schematic diagram.
- Print the PCB layout: Print the PCB layout onto a transparent sheet or film using a laser printer.
- Transfer the layout to the board: Use a heat transfer method or a UV exposure method to transfer the PCB layout onto the board. This will create a resist layer on the board that will protect the copper underneath.
- Etch the board: Etch the board using a chemical etching solution to remove the copper that is not protected by the resist layer. This will create the circuit traces on the board.
- Drill the holes: Use a drill or a drill press to drill the holes in the board where the components will be inserted.
- Solder the components: Insert the components into the holes and solder them onto the board, following the layout and schematic diagram.
- Test the circuit: Test the circuit again to ensure that it works correctly and that there are no errors or issues.
By following these steps, you can transfer the DIY flashlight circuit from a breadboard to a permanent PCB board, creating a more durable and professional-looking circuit.
Troubleshooting and Fixing Circuit Issues
Troubleshooting and fixing issues with a DIY flashlight circuit can be challenging, but here are some steps you can take to identify and fix the problem:
- Check the connections: Double-check all of the connections in the circuit to ensure that they are correct and secure. Loose or incorrect connections can cause issues with the circuit.
- Check the components: Check the components to make sure they are inserted correctly and functioning properly. Replace any faulty components with new ones.
- Check the power source: Check the power source, such as the battery or power supply, to ensure that it is providing the correct voltage and current to the circuit.
- Check the resistance: Use a multimeter to check the resistance of the circuit components, such as the resistor or LED. If the resistance is too high or too low, it could indicate a faulty component.
- Check for shorts: Check for any short circuits in the circuit by looking for unintended connections between the traces or components. Additionally, use a multimeter to check for continuity between different points in the circuit.
- Use a scope or logic analyzer: Use an oscilloscope or logic analyzer to analyze the circuit signals and identify any issues with the circuit waveform or timing.
- Make adjustments: Based on the results of the troubleshooting, make adjustments to the circuit design, such as changing the component values or adjusting the circuit layout.
By following these steps, you can troubleshoot and fix issues with a DIY flashlight circuit.
Conclusion
Building a DIY flashlight circuit can be a fun and rewarding project for electronics enthusiasts, but it requires careful planning and execution to ensure that the circuit works correctly and meets your requirements. By understanding the basics of flashlight circuits, gathering the necessary tools and materials, choosing the right battery and LED, designing the circuit schematic, building the circuit on a breadboard, testing the circuit for functionality, and transferring the circuit to a permanent PCB board, you can create a durable and professional-looking circuit that provides reliable lighting. In the event of any issues or errors, troubleshooting and fixing the circuit can be challenging, but by following the steps outlined in this guide, you can identify and resolve any problems and ensure that your DIY flashlight circuit is a success.

 NextPCB Capabilities
 PCB Assembly
 Layer Buildup
 SMD-Stencils
 PCB Design-Aid & Layout
 Mechanics
 Quality
 Drills & Throughplating
 Factory & Certificate
 PCB Assembly Factory Show
Certificate
PCB Assembly Factory Show
Certificate


 Surface

