
 NextPCB Capabilities
 PCB Assembly
 Layer Buildup
 SMD-Stencils
 PCB Design-Aid & Layout
 Mechanics
 Surface
 Quality
 Drills & Throughplating
 Factory & Certificate


How to Export Centroid (Pick and Place) Files for PCB Assembly?
- Table of Contents
- What are Centroid Files?
- How to Export KiCad XY Centroid Data
- How to Export Centroid Data from Autodesk Eagle
- How to Export Centroid Data from DipTrace
- How to Export Centroid XY Data from EasyEDA
- Other Software (Coming Soon)
What are Centroid Files?
Centroid files are also known as pick & place files, XY files, component placement files, SMT files. These are required for HQ NextPCB PCB Assembly orders except if all the parts on the board are through-hole parts. Here we made some gifs to show how to export these files from common PCB CAD software:
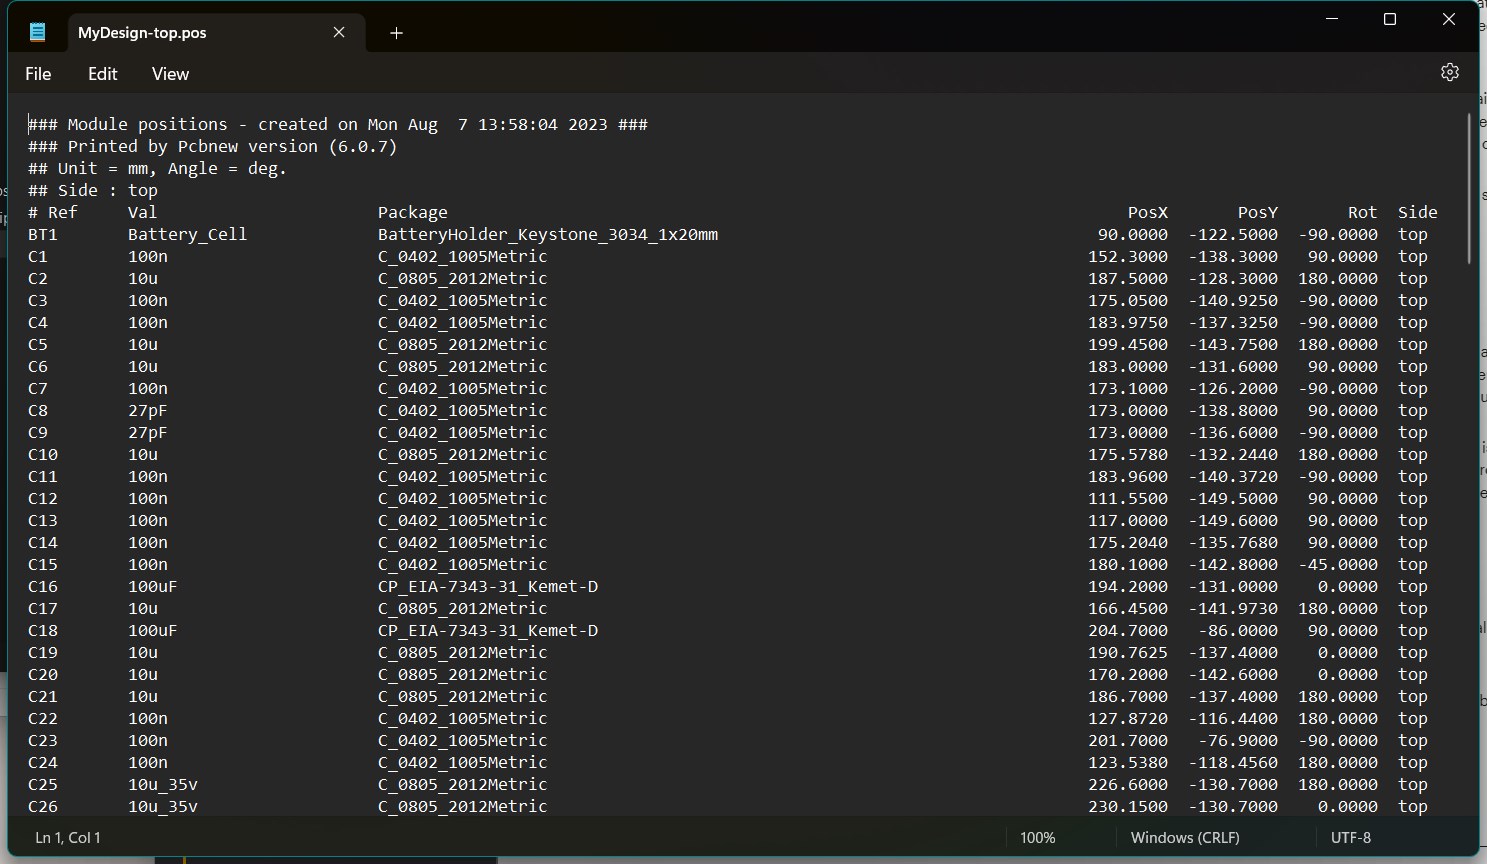
How to Export KiCad XY Centroid Data
KiCad
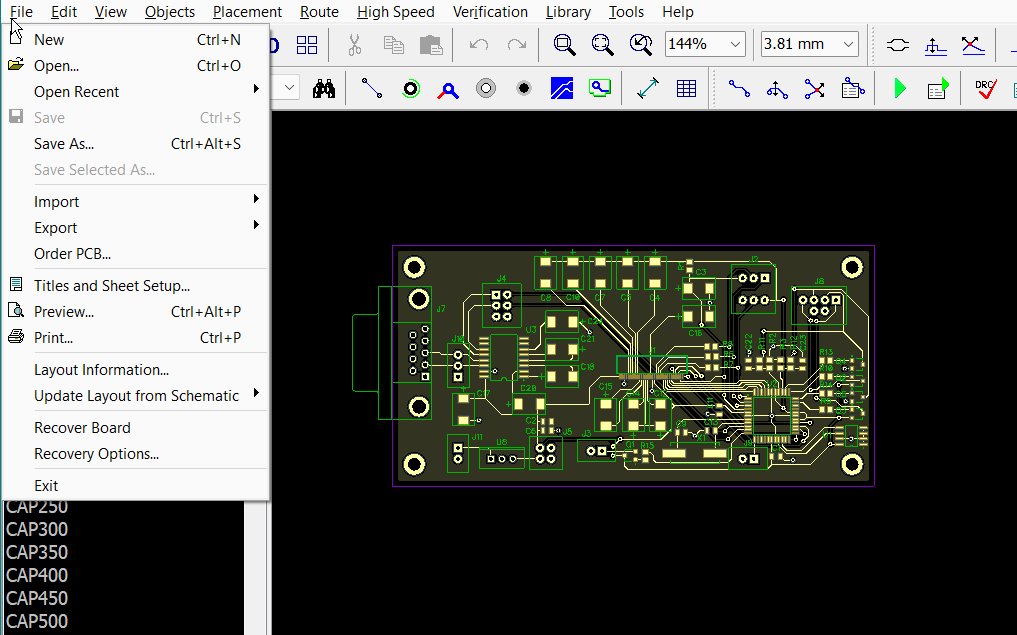
- From the PCB Editor, go to File -> Fabrication Outputs -> Component Placement (.pos)...
- Choose the output directory and click Generate Position File (default settings are fine)
- The centroid files should have the extension .pos. Package these and other assembly information into a .zip or .rar file and upload them on the NextPCB PCBA order page when you are ready to place an order.
The KiCad centroid file looks like this when opened in a text editor:
How to Export Centroid Data from Autodesk Eagle
Autodesk Eagle
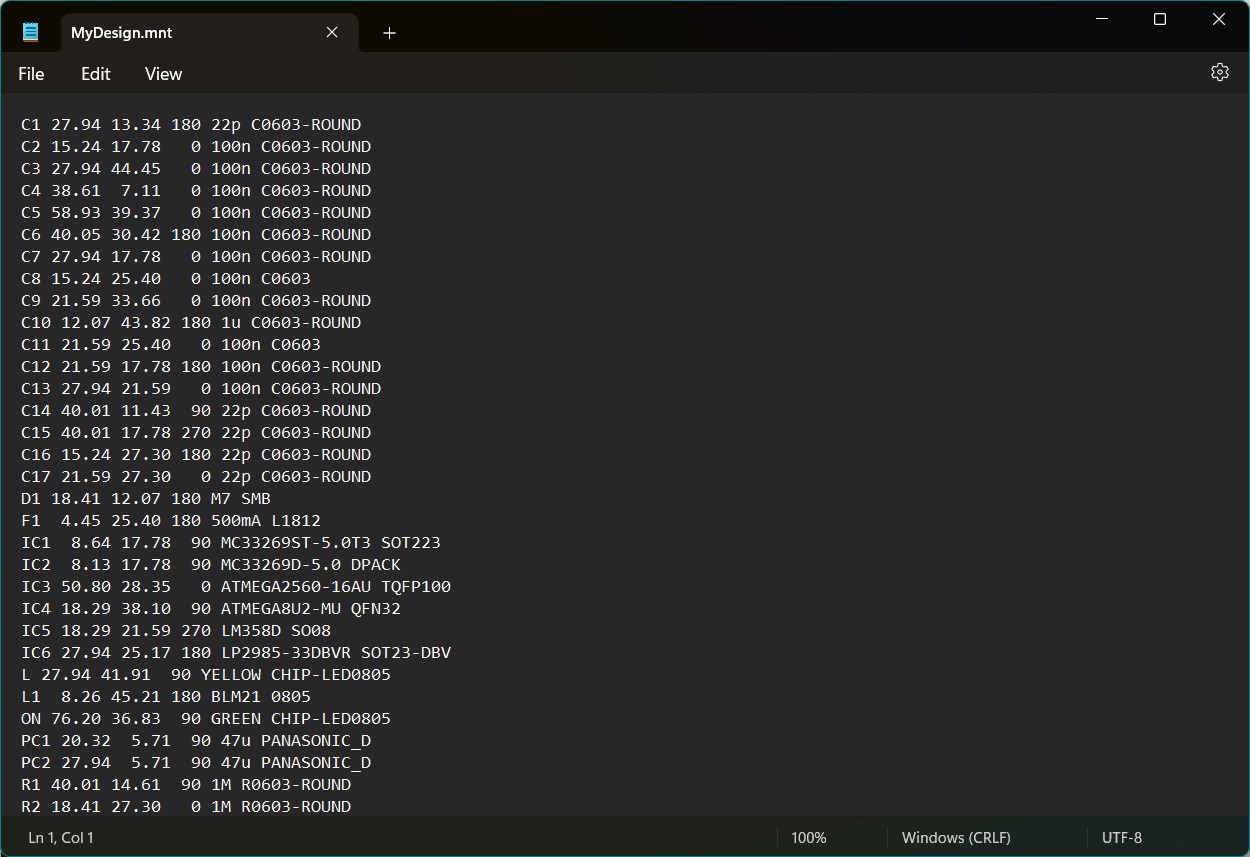
In Board view, go to File -> Export -> Mount SMD. Eagle will export separate files for the top and bottom sides by default for double-sided boards. First, save the top file (.mnt), then the bottom (.mnb) centroid file, and package both into a single .zip or .rar file with any other assembly information. You can now upload these onto the NextPCB PCBA order page when you are ready to place an order.
Eagle centroid data looks like this in a text editor:
How to Export Centroid Data from DipTrace
DipTrace
- Open the PCB Layout file and go to File -> Export -> Pick and Place...
- In the new window ensure the "Use Design Origin" checkbox is selected. The rest can be kept as the default values.
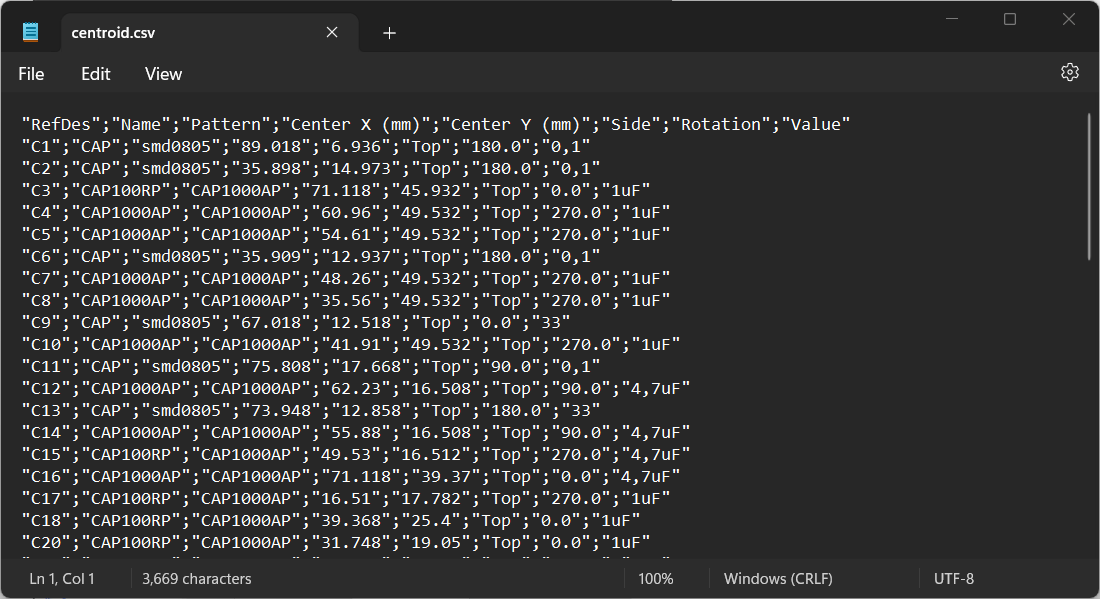
- The centroid files should have the extension .csv or .txt, depending on the format selected during export. Package these and other assembly information into a .zip or .rar file and upload them on the NextPCB PCBA order page when you are ready to place an order.
DipTrace centroid data looks like this in a text editor:
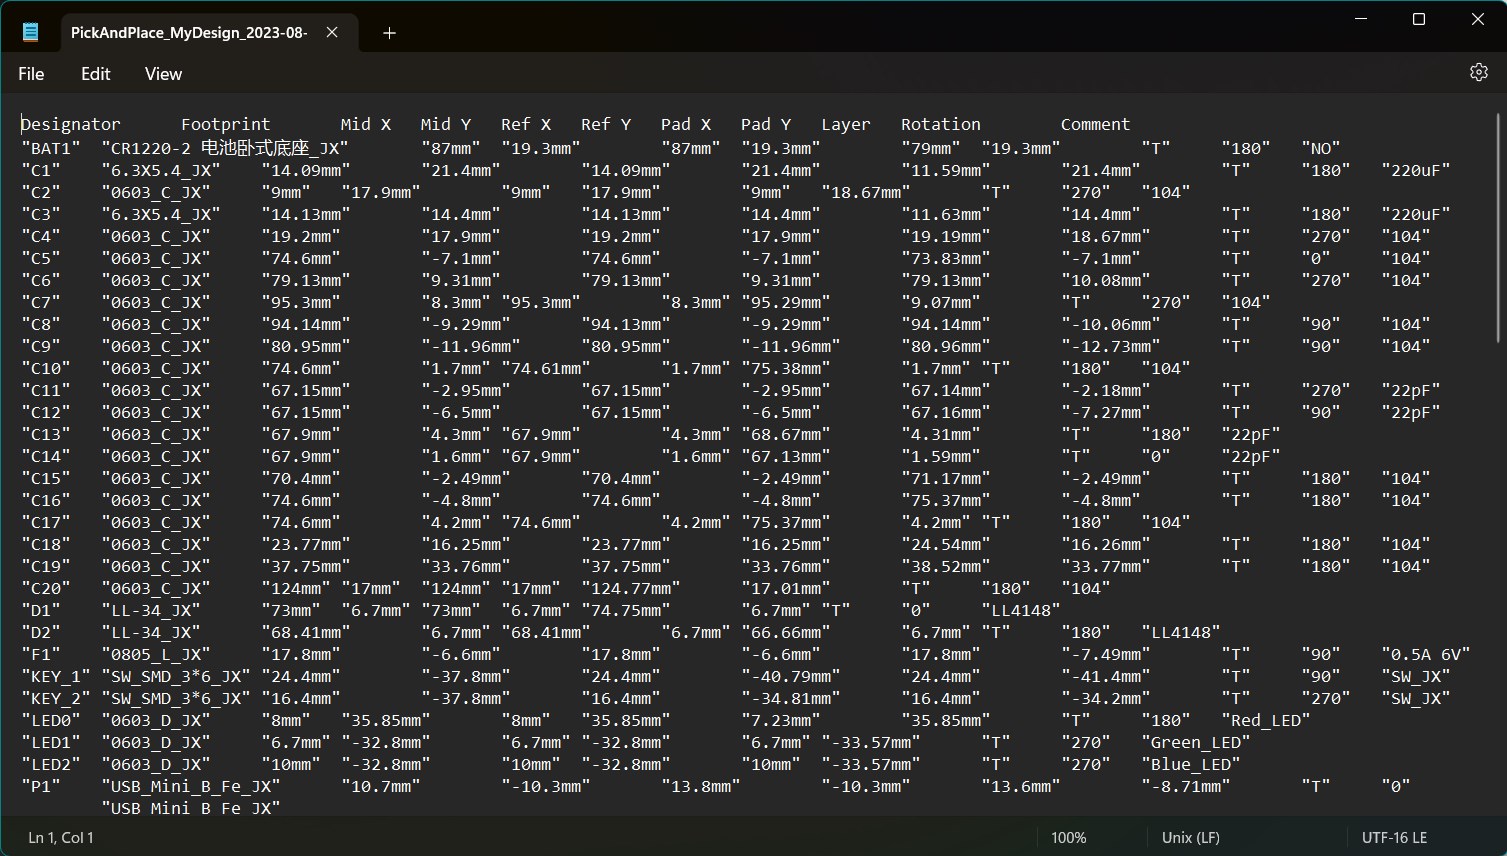
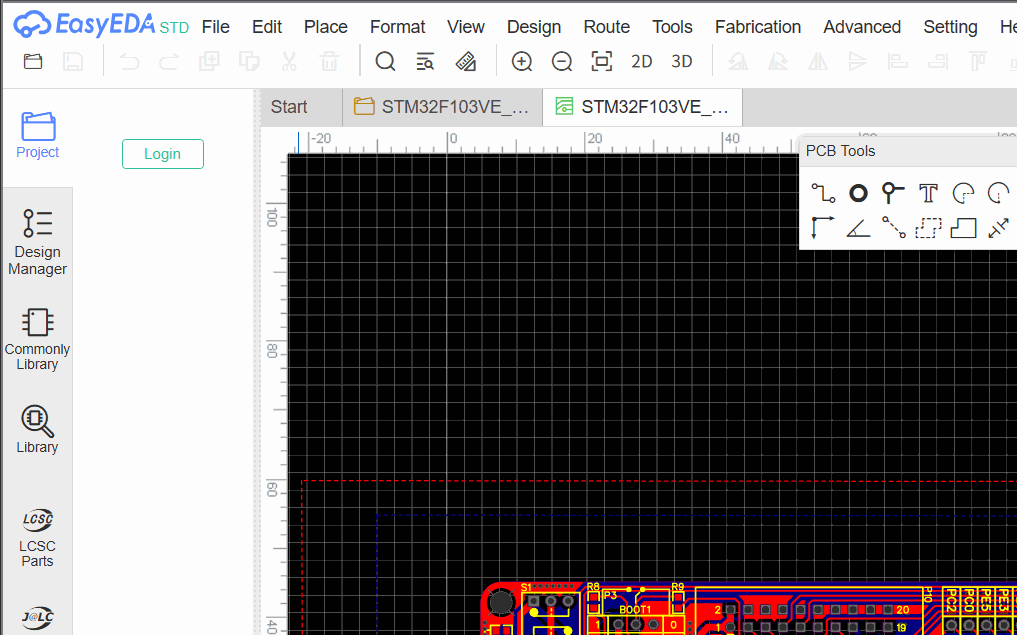
How to Export Centroid XY Data from EasyEDA
EasyEDA
Open the PCB file and go to File -> Export Pick and Place File... Your browser will then download the file. The file has the extension .csv. Package it and any other assembly information into a single .zip or .rar file. You can now upload these onto the NextPCB PCBA order page when you are ready to place an order.
EasyEDA centroid data looks like this when opened in a text editor:
Other Software (Coming Soon)
- Altium Designer - Coming soon
- Allegro/OrCad - Coming soon
- DesignSpark - Coming soon
Recommend reading:
>> How to generate pick and place (centroid) files in KiCad? (Updated for KiCad 9)
>> How to Create a Centroid (Pick and Place) File Instantly?
Ready to get started or have more questions?
Return to the NextPCB Home Page or Contact Us for further assistance. Our team is here to help you with your PCB needs.