NextPCB Capabilities
Printed Circuit Boards
NextPCB Capabilities
Printed Circuit Boards
 PCB Assembly
 Layer Buildup
 SMD-Stencils
 PCB Design-Aid & Layout
 Mechanics
 Quality
 Drills & Throughplating
 Factory & Certificate
 PCB Assembly Factory Show
Certificate
PCB Assembly Factory Show
Certificate
Support Team
Feedback:
support@nextpcb.com


LED light strips have become a popular choice for adding vibrant and customizable lighting to various spaces. When coupled with Arduino, a versatile open-source electronics platform, the possibilities for creative lighting projects are endless. This ultimate guide will walk you through the process of connecting LED light strips to Arduino, allowing you to unleash your creativity and bring your ideas to life.
But first, what is an LED strip? An LED strip is like a flexible tape with tiny colored lights on it. These lights are called LEDs (Light Emitting Diodes). The strip usually comes with a sticky side so you can easily attach it to surfaces. LED strips are commonly used for decorative lighting, and because each LED can have its color, they can create various colorful patterns and effects. You can control LED strips using a device like a remote control or a computer to change colors, make them blink, or even create moving light patterns. They're popular for adding fun and dynamic lighting to spaces or DIY projects.
There are programmable and non-programmable LED strips. Programmable LED strips feature individually addressable LEDs controlled digitally through microcontrollers (like the Arduino), enabling intricate color patterns and dynamic lighting effects. Suited for applications requiring high customization, such as decorative lighting and art installations, these strips offer versatility and complexity.
Non-programmable LED strips, often single-colored or with pre-set patterns, lack individual addressability and are controlled as a unit through analog signals. These simpler strips are suitable for applications like basic accent lighting or backlighting where advanced customization is not necessary. The choice between programmable and non-programmable LED strips depends on the level of control and complexity required for a specific project or application.
Components Free Worldwide Shipping
From here on out, we will be talking only about programmable LED strips. But before diving into the world of Arduino-powered lighting, it's essential to choose the right strip for your project.
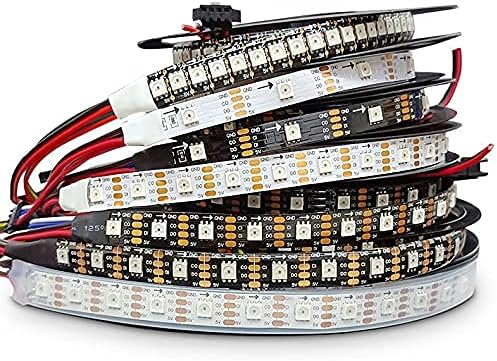
LED strips come in various types, such as WS2812B, APA102, and SK6812, each with its unique features. Consider factors like color accuracy, brightness, and individual addressable LEDs when making your selection.
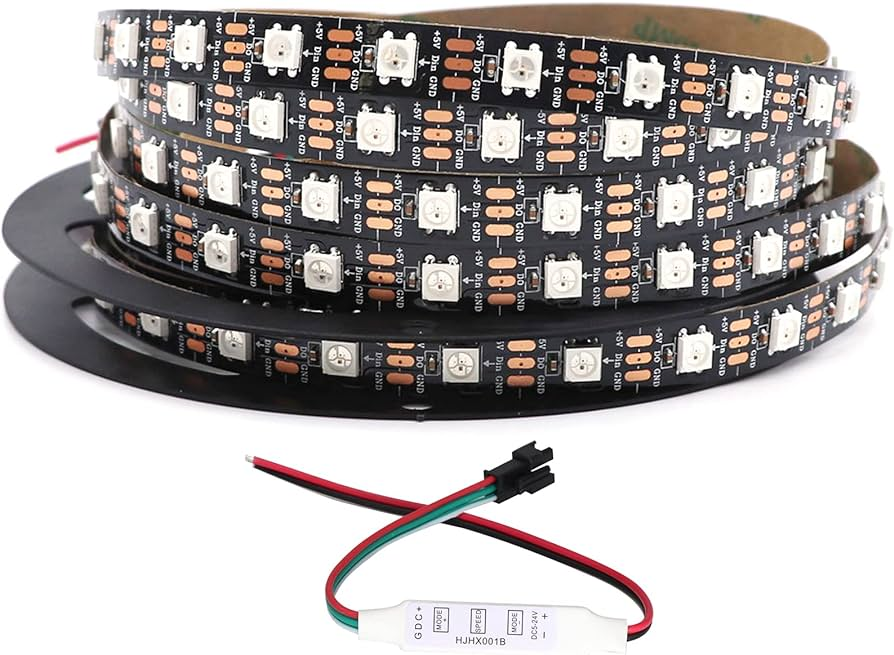
The WS2812B LED strip is a versatile and popular form of individually addressable RGB LED lighting. Each LED on the strip is equipped with a built-in control circuit, enabling independent control over color and brightness. The LEDs communicate via a serial protocol, allowing for easy daisy-chaining and integration with microcontrollers like Arduino or Raspberry Pi. Operating at around 5 volts, these strips find application in diverse projects such as decorative lighting, stage setups, and creative DIY endeavors. With a chainable design, programmability, and compatibility with various controllers, WS2812B LED strips offer a customizable and dynamic lighting solution for a wide range of applications.
The APA102 LED strip, also known as DotStar, is another type of individually addressable RGB LED strip with distinct features. Similar to the WS2812B, each APA102 LED includes an integrated control circuit, allowing for independent control over color and brightness. What sets APA102 apart is its use of a two-wire communication protocol, providing more straightforward and efficient data transmission. This design enables faster refresh rates and precise color control. APA102 LED strips are characterized by their high refresh rates, making them suitable for applications with rapid color changes and animations. Like the WS2812B, APA102 LED strips are compatible with microcontrollers such as Arduino and Raspberry Pi, offering a flexible and dynamic solution for lighting projects requiring advanced control and performance.
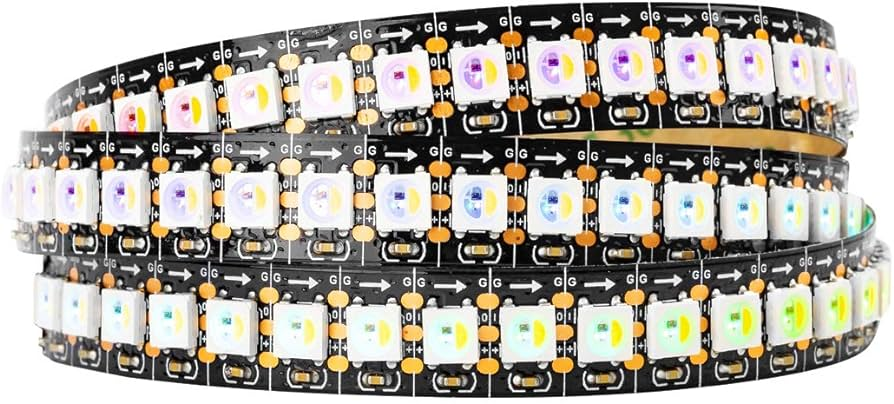
The SK6812 LED strip, similar to the WS2812B and APA102, belongs to the category of individually addressable RGB LED strips. Each SK6812 LED integrates a control circuit for independent control of color and brightness. Notable for its compatibility with the NeoPixel library, which is widely used with Arduino platforms, the SK6812 employs a one-wire communication protocol for data transmission. This LED strip is known for its ease of use and seamless integration into various projects. With a 5-volt operating voltage and a chainable design, SK6812 LED strips are suitable for diverse applications, including decorative lighting, signage, and dynamic visual displays, offering a balance between simplicity and versatility in programmable LED lighting projects.
Connecting LED light strips to Arduino involves a few key steps. Start by gathering the necessary materials, including your chosen LED strip, an Arduino board, jumper wires, and a power supply. Follow these general steps:
Identify Connections: Examine your LED strip and Arduino board to identify the input and output pins. Commonly, the data input pin, ground, and power pins are essential for connectivity.
The pinouts for LED strips can vary depending on the specific type or model of the LED strip. However, I'll provide a general overview of the common pinouts for RGB LED strips, such as the WS2812B, WS2813, APA102, or SK6812. Always refer to the datasheet or documentation provided by the manufacturer for your specific LED strip for accurate information.
Power (V+): This is the power supply pin. It usually requires a positive voltage, commonly around 5 volts. Connect this pin to the positive terminal of your power supply.
Ground (GND): This is the ground pin. Connect this pin to the ground (0V) of your power supply.
Data In (DI): This is the input for data signals. Connect this pin to the data output of your microcontroller or LED controller. For WS2812B and similar types, this pin might be labeled as "DIN" or "DI."
Data Out (DO): This is the output for data signals. If you are connecting multiple LED strips in series, you would connect the DO of one strip to the DI of the next strip. For some LED strips, this might be labeled as "DOUT" or "DO."
Clock (CI or CLK): For LED strips like APA102, which use a clock signal along with the data signal, there might be a clock input. Connect this pin to the clock output of your microcontroller or LED controller.
Clock Out (CO or CLK): Similarly, if you are connecting multiple APA102 LED strips in series, you would connect the CO of one strip to the CI of the next strip.
Always check the datasheet or documentation for your specific LED strip model to ensure you are connecting the pins correctly and to confirm any additional features or requirements specific to that strip.
Wiring Connections: Connect the data input pin of the LED strip to a digital pin on the Arduino, the ground pin to the ground on the Arduino, and the power pin to an external power supply. Use jumper wires for these connections.
Power Supply: Ensure that your LED strip receives an adequate power supply. Depending on the strip's requirements, you may need an external power source in addition to the power provided by the Arduino.
In the wiring diagram above, you can see that a 5V, 2A power supply is used to power up the LED strip. Some strips need 12V and with higher amperage. Again, read the LED strip specifications before using them.
Code Upload: Upload a sample Arduino sketch for LED strips to your Arduino board. Libraries like FastLED or Adafruit NeoPixel can simplify the coding process.
Once your LED strip is connected, you may want to explore brightness adjustment options to achieve the desired lighting effect. Arduino allows you to control the brightness of your LED strip programmatically. Adjust the brightness level in your code by using functions like setBrightness() to create dynamic and visually appealing lighting atmospheres.
Here’s an example code that sets the brightness of a WS2812b LED strip using Adafruit’s NeoPixel library:
|
|
|
|
With the basics covered, it's time to explore bright ideas for your LED light strip projects. Consider incorporating sensors, such as motion sensors or sound sensors, to trigger specific lighting effects. Experiment with different color patterns, transitions, and animations to add a unique touch to your creations.
Take your LED light strip project to the next level by creating dancing lights. Utilize the power of Arduino to synchronize your LED strip with music or ambient sound. Implement algorithms that respond to changes in the audio environment, creating a dynamic and immersive lighting experience.
|
|
This code creates a simple dancing lights effect where the color of each LED is determined by a shifting color wheel. The dancingLights() function takes parameters for speed, intensity, and delay time between steps. Feel free to adjust these parameters to achieve the desired dancing lights effect. The Wheel function is used to generate color values for the rainbow effect.
Here’s another example code you can try, this time using the FastLED library:
|
|
In this code, the FastLED library is used to control the WS2812B LED strip. The dancingLights() function creates a dancing lights effect, and the Wheel function generates a color wheel value for the rainbow effect. Adjust the parameters in the dancingLights() function to control the speed, intensity, and delay of the dancing lights effect.
Connecting LED light strips to Arduino opens up a world of possibilities for creative expression. Whether you're looking to enhance your home decor, create interactive installations, or add flair to your DIY projects, the combination of LED light strips and Arduino provides a versatile platform for innovation. Experiment with different strips, explore coding possibilities and let your imagination run wild as you embark on a journey of illuminating creativity.
- ESP32 BLE(Bluetooth Low Energy) Control in Arduino IDE
- Types of Arduino Boards: Comparison of Specification and Features
- Free Worldwide Shipping on Over 600,000 Electronics Components with HQ Online
- Free PCB Assembly Offer is Now Live: Experience Reliable PCB Assembly from HQ NextPCB
- HQ NextPCB Introduces New PCB Gerber Viewer: HQDFM Online Lite Edition
Still, need help? Contact Us: support@nextpcb.com
Need a PCB or PCBA quote? Quote now


 Surface