NextPCB Capabilities
Printed Circuit Boards
NextPCB Capabilities
Printed Circuit Boards
 PCB Assembly
 Layer Buildup
 SMD-Stencils
 PCB Design-Aid & Layout
 Mechanics
 Quality
 Drills & Throughplating
 Factory & Certificate
 PCB Assembly Factory Show
Certificate
PCB Assembly Factory Show
Certificate
Support Team
Feedback:
support@nextpcb.com


Hi learners! I hope you are doing great. Welcome to the next episode of ESP32 training, where we are moving towards the ESP32 Bluetooth low energy (BLE) and will see a practical example at Arduino IDE. In the previous session, along with all the basic concepts, I discussed the basics of ESP32 in the Arduino IDE and mentioned the introduction of ESP32 BLE mode. Today, we will see the practical implementation of the ESP32 BLE functionality as a server. We know the ESP32 microcontroller board works like the Arduino but the major difference between these two is that the ESP32 has BLE and WiFi functionalities. Therefore, we are discussing the ESP32 BLE in detail.
In this article, we will start with the basic introduction of Bluetooth low energy. After that, we will see the key features of this module. We will compare the BLE with classic Bluetooth and use the tables for quick revision. After that, we will go through some important concepts that will help us in the practical example. We will create our own server and download the BLE scanner app to use as a client. In the end, we will see how the built-in examples of the Arduino IDE help us create different programs related to ESP32 BLE. Let us move towards the first section.
Bluetooth Low Energy (BLE) is a wireless communication technology that is designed for low-power applications. Hence, it is a power-conservative variant of Bluetooth that is designed for the transmission of small amounts of data among devices. This wireless personal area network technology is a popular choice for small and portable devices such as smart home appliances, smartphones, wearables, and many IoT (Internet of Things) devices. In such projects, Bluetooth low energy plays the basic role of connecting the devices wirelessly.
The BLE is designed in a specialized manner because it targets a wide range of devices. Here are some basic features of this technology that every user must know:
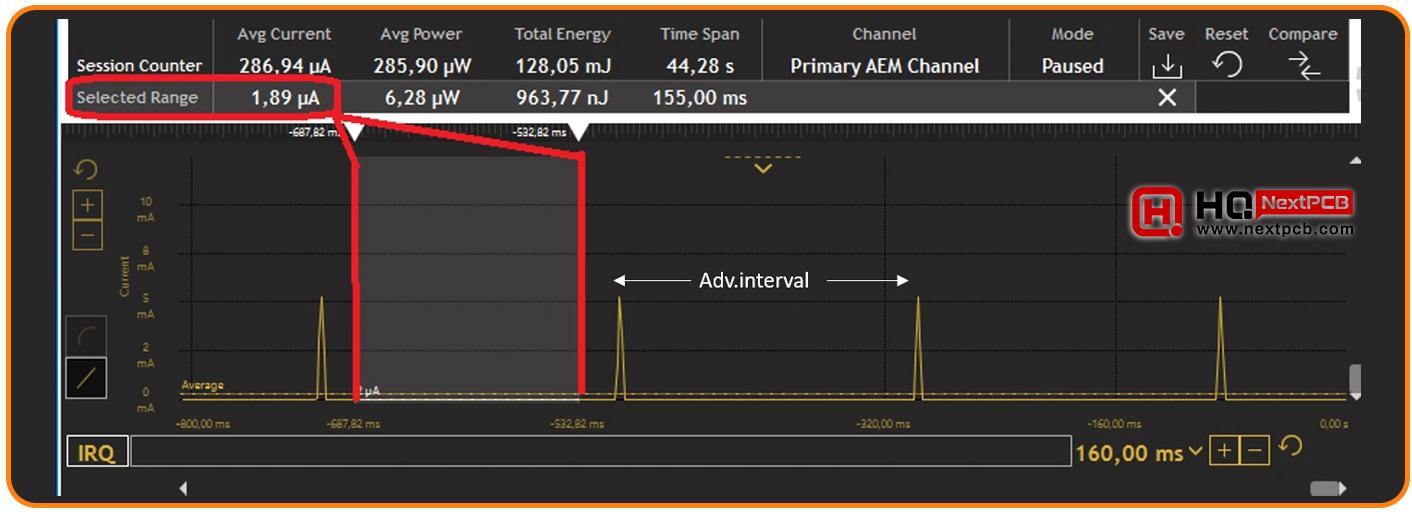
The basic feature of this technology is its low power consumption, which makes it ideal for a large range of wearable and portable devices. It uses short data packages and low-duty cycles, making it ideal for battery-operated devices. In this way, the BLE-operated devices can get power for a long time, even with small coin batteries.
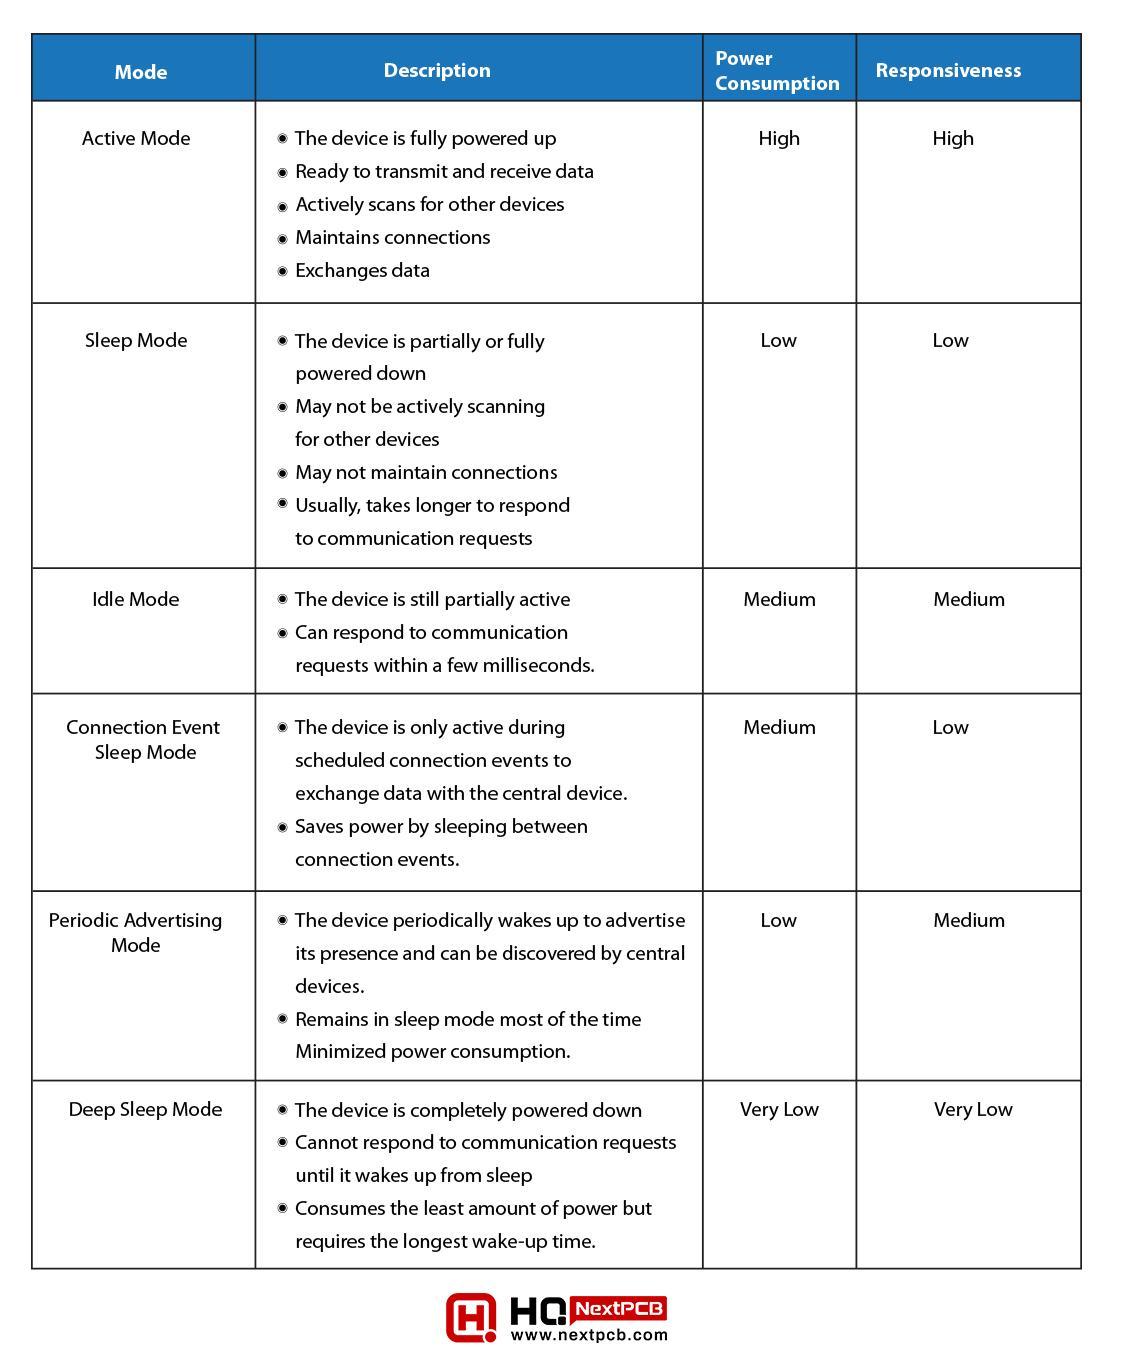
There are two basic types of power states for Bluetooth low-energy. These devices are designed to provide versatility; therefore, these modes help to maintain the ideal functionality with the least power consumption:
The average power consumption of the devices for BLE is usually 10 mA in active mode and less than 5 µA in sleep mode. The following table will show the summary of each mode:
|
|
|
|
|
|
|
|
|
|
|
|
|
|
|
|
|
|
|
|
|
|
|
|
|
|
|
|
|
|
|
|
|
|
|
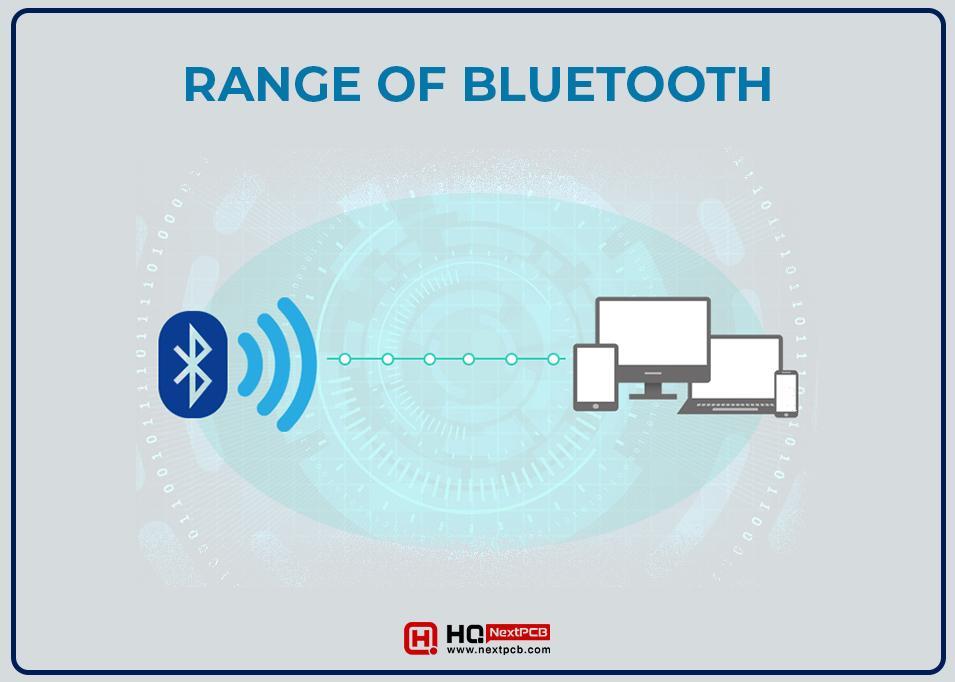
The BLE works on the short range of the device, which means it is not able to connect devices placed at a long distance. This range varies according to environmental factors.
Usually, the devices can be connected to each other within a range of 100 meters in an open area. The range of BLE devices in the closed rooms and areas is less than these because the wall acts like a hurdle in signal transmission.
The BLE module has a low cost and provides functionalities that are suitable for a large range of projects; therefore, it is considered one of the most affordable modules for wearables and other IoT devices.
On the other hand, it shows the low latency communication that enables the device to be a quick and responsive device with low power. It is an important feature because this module is usually used in wearable devices and IoT projects that require a quick response at the right time.
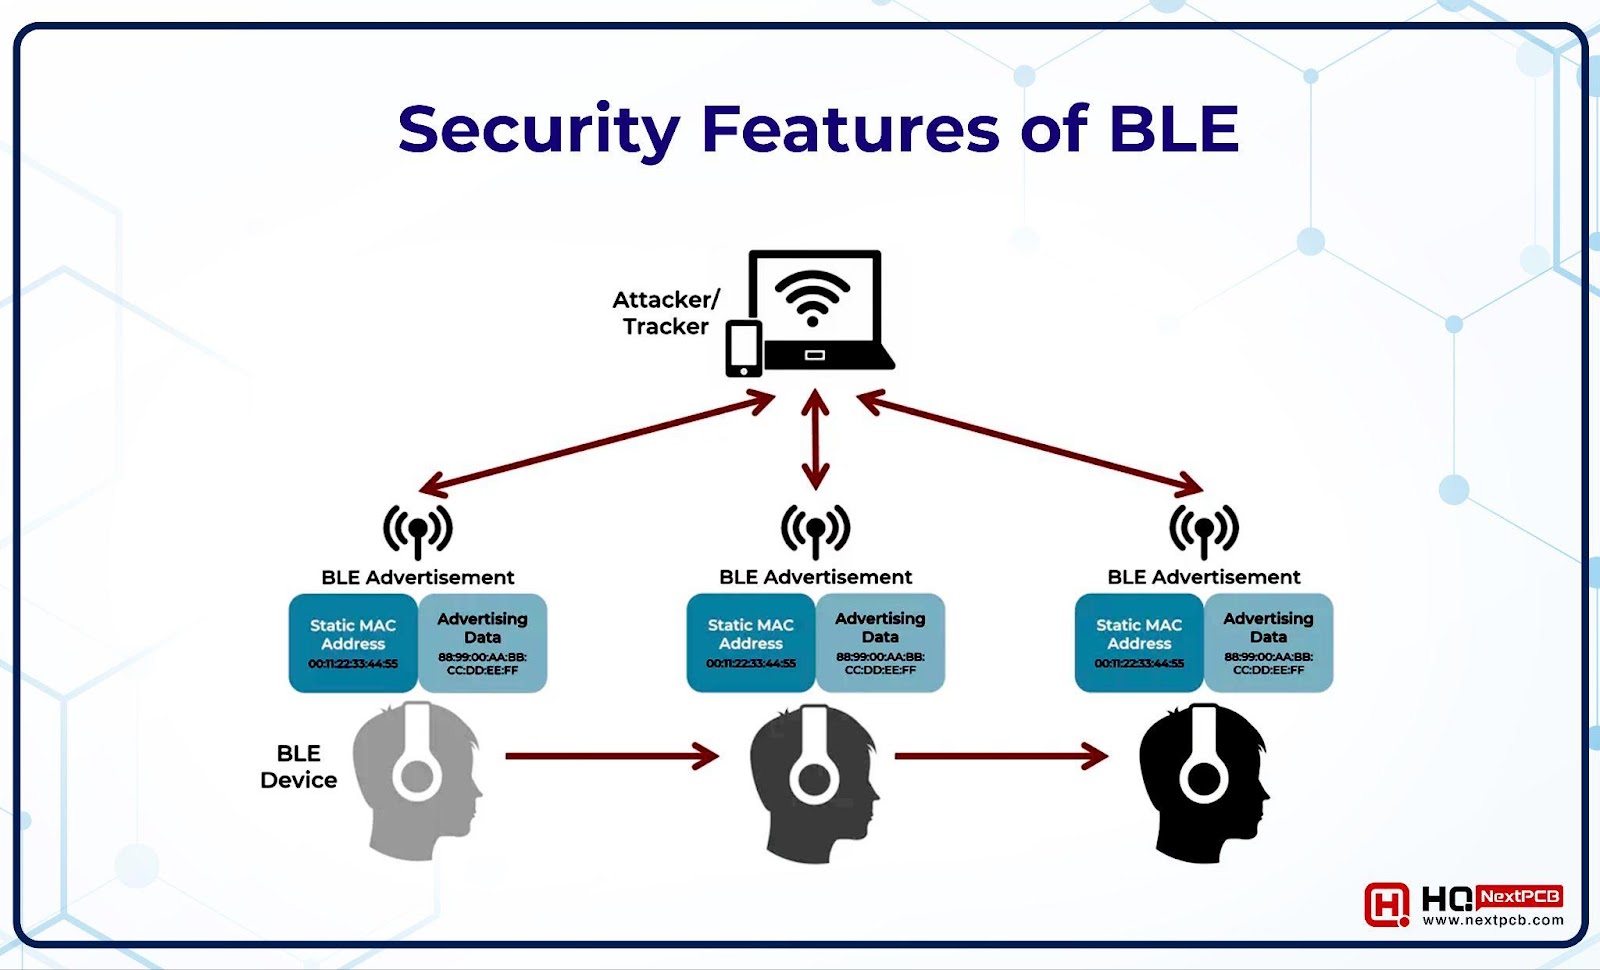
The BLE provides secure transmission of data among the devices; therefore, it is the main feature of multiple devices. It has the built-in features of encryption and authentication and can protect the data to ensure the privacy of the user. The good thing about this module is that it provides a secure connection and data exchange.
The BLE uses the GATT profile to simplify the services, characteristics, and attributes. You will see the details about it in the coming section. Through GATT, the BLE can be designed according to the user's requirements, and this provides versatility and variation in the features.
The Bluetooth Low Energy supports the mesh system for the networking of the devices. Therefore, the devices can form self-healing and large-scale networks. This is important in projects like smart lighting, smart buildings, and other types of IoT networks.
The BLE is suitable for a broad spectrum of use cases; therefore, it can support projects ranging from simple, low complexity to highly sophisticated applications. This makes it an ideal choice for IoT projects (as mentioned earlier). This module can be used to connect a wide range of sensors together that can be controlled with the help of a central device, such as a smartphone.
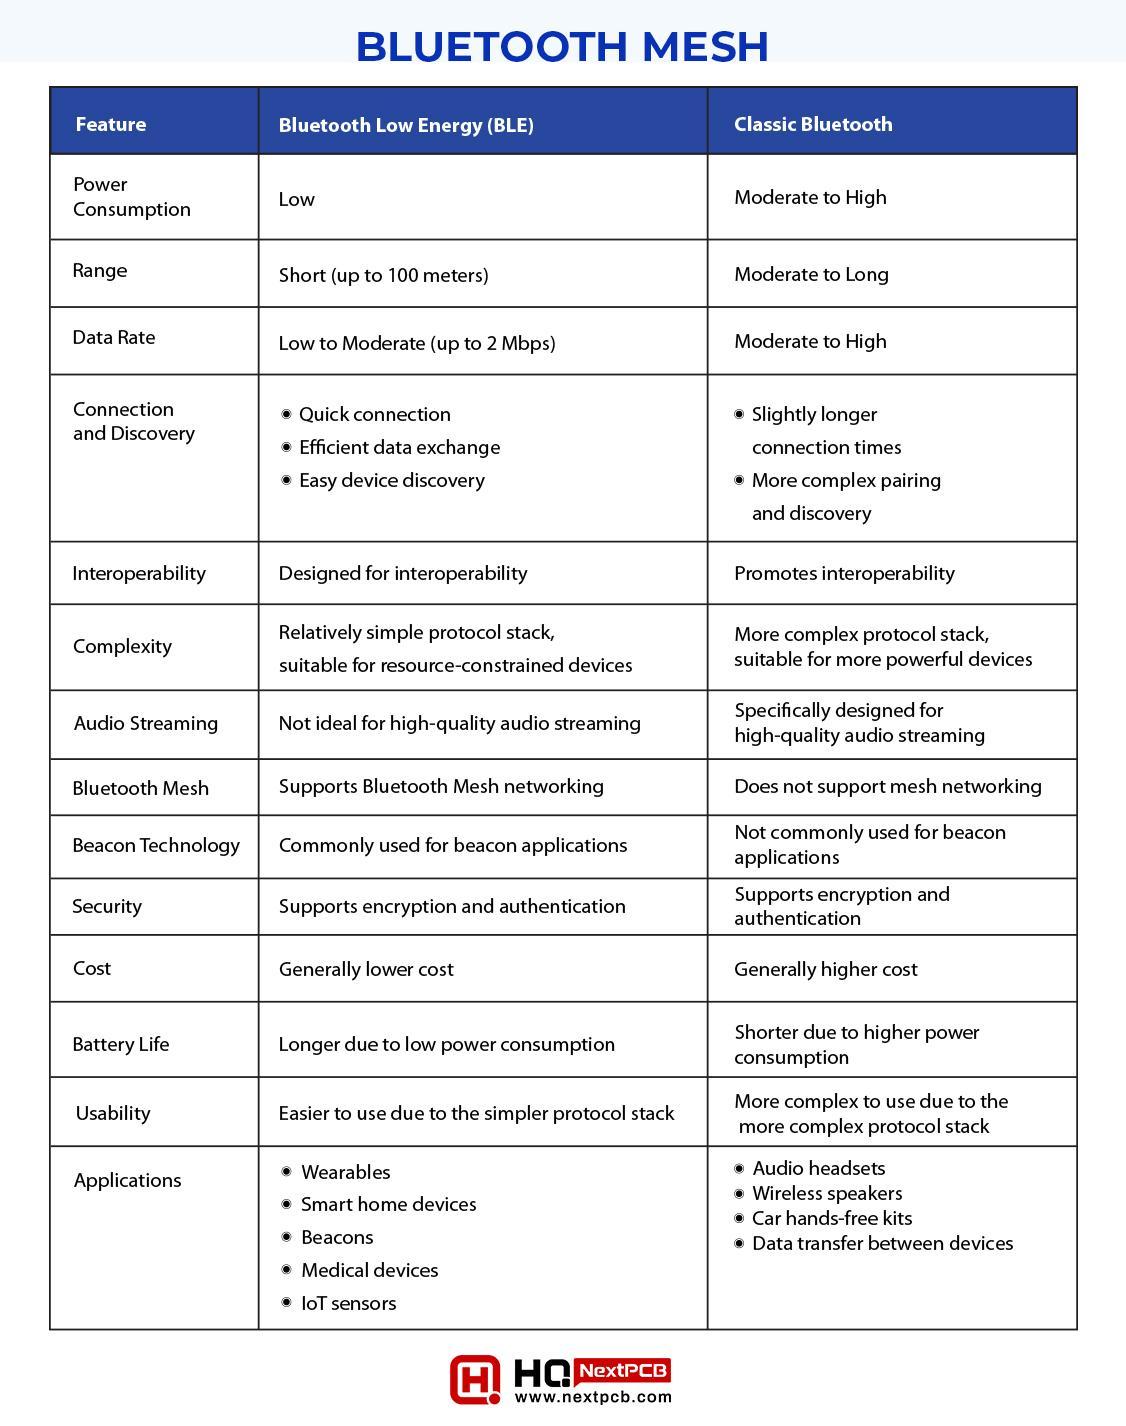
There are two types of Bluetooth in the ESP32 (as mentioned in the previous session) Bluetooth Low Energy (BLE) and Bluetooth Classic. Both of these are developed by the Bluetooth Special Interest Group (SIG) and are wireless technologies for the transmission of data among devices. However, these have different characteristics that make them suitable for different types of devices. It is better to understand the workings and features of BLE by comparing it with classic Bluetooth. Classic Bluetooth is an older technology; therefore, I will discuss its functionality first and then BLE so the reader may know what’s new in the Bluetooth technology. Here is the comparison between these:
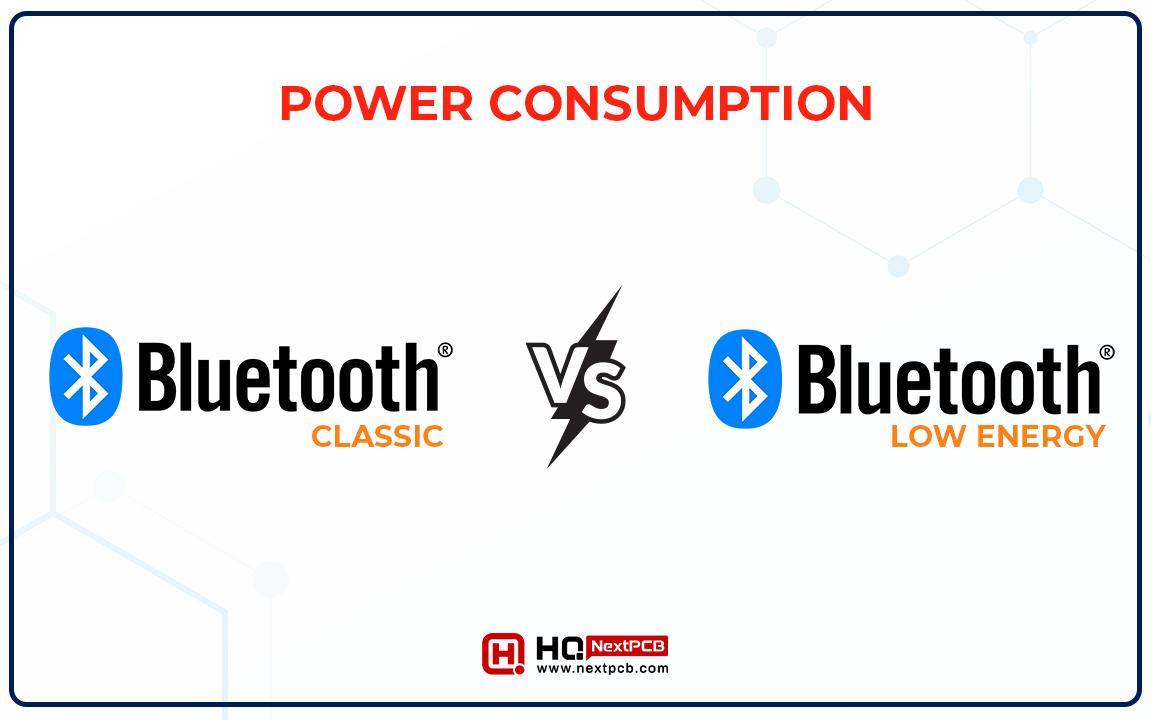
The power consumption of classic Bluetooth is higher than that of BLE. This is the main difference between these two. It is suitable for applications such as audio streaming where a continuous power source is attached. It consumes around 30-50 mA in its active mode and 10 mA in standby mode.
On the other hand, BLE is designed to work with battery-oriented devices; therefore, it consumes low power. It has a power consumption of less than 10 mA in its active mode and even less than 5 µA in sleep mode.
The Bluetooth Classic has a longer range as compared to the BLE, depending on the type of Bluetooth Classic (class 1, class 2, class 3). Typically, it can share the data at a distance of up to 100 meters in open environments and up to 10 meters indoors. The range of BLE is usually less than this.
The complexity of Bluetooth Classic is more complex than that of BLE. It is designed for more powerful devices; therefore, it has a complex protocol stack. On the other hand, BLE is well-suited for resource-constrained devices and has a simple protocol stack.
The Classic Bluetooth does not have the feature of Bluetooth mesh; therefore, it can not create a large cell network of devices, which is an important feature of BLE.
|
|
|
|
|
|
|
|
|
|
|
|
|
|
|
|
|
|
|
|
|
|
|
|
|
|
|
|
|
|
|
|
|
|
|
|
|
|
|
|
|
|
|
|
|
|
|
|
|
|
|
|
|
|
|
|
|
|
|
|
There are some concepts that must be clear before using the BLE for the transmission of data. Here are the basics of BLE:
BLE supports two types of communication modes:
As mentioned before, the mesh mode is the advantage of using the BLE over the Classic Bluetooth. This has made the BLE versatile and provided a wide range of project options.
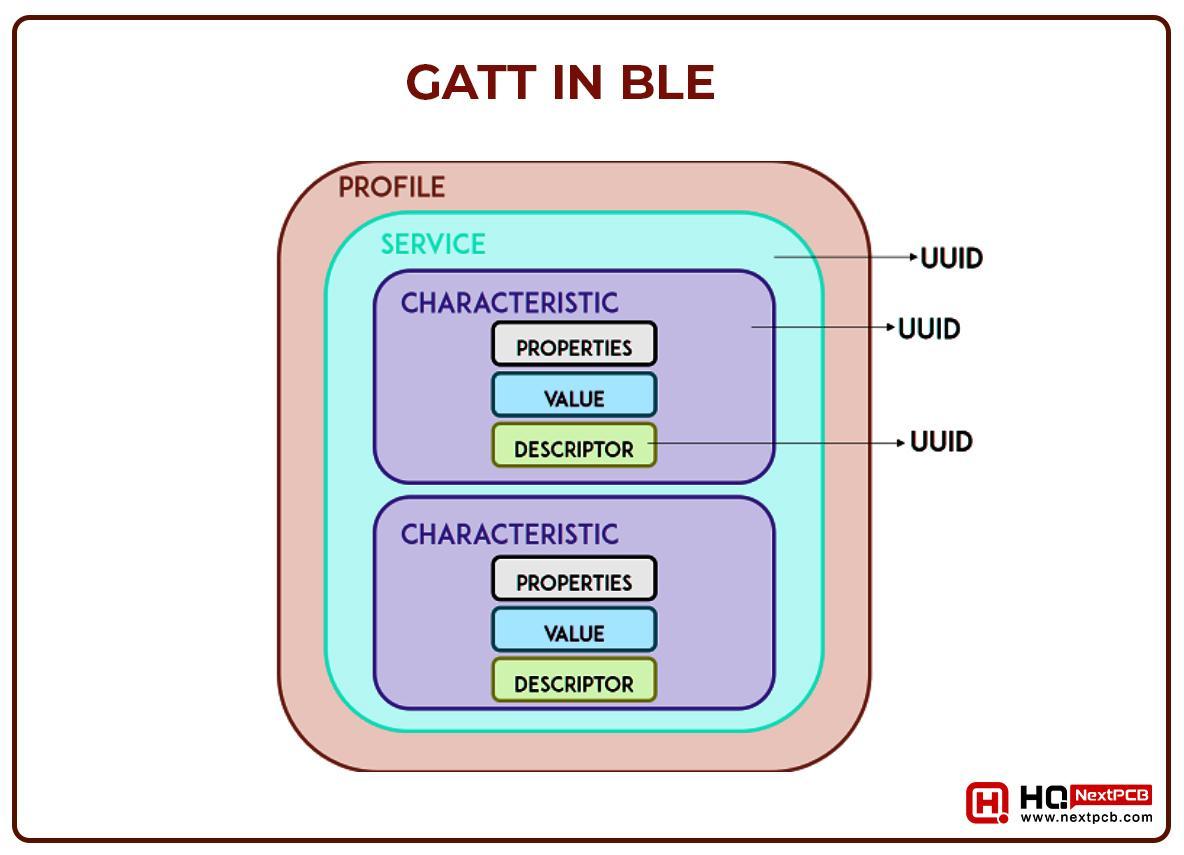
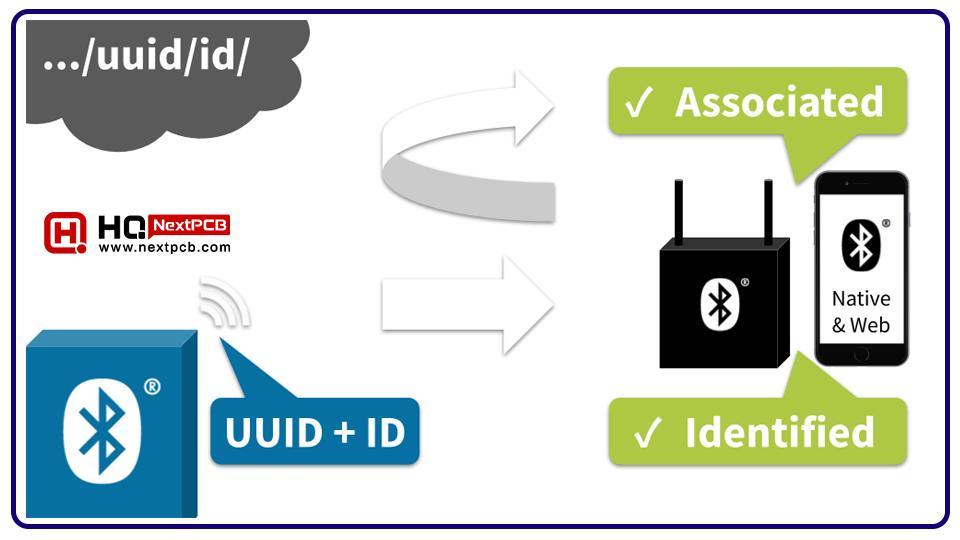
Generic attribute (GATT) is the data structure that defines the way in which two BLE devices can send and receive the data. Through this, the user can set up the connection according to the project. The following hierarchy is important to understand in order to establish the connection between BLE devices.
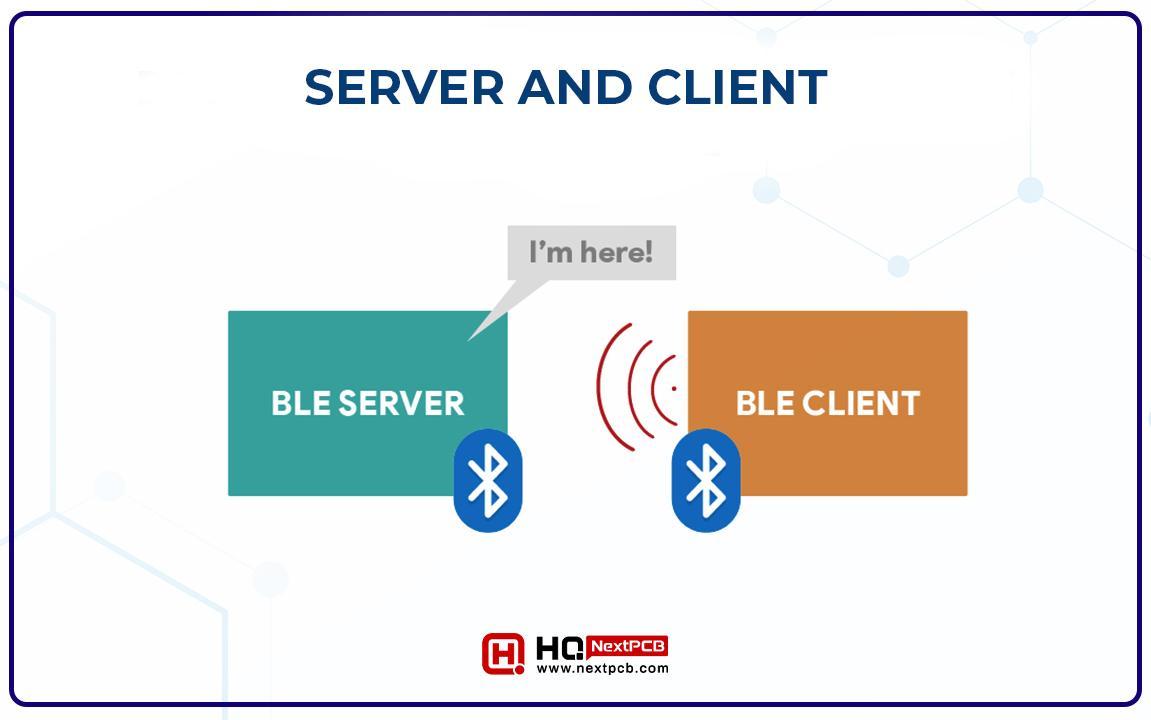
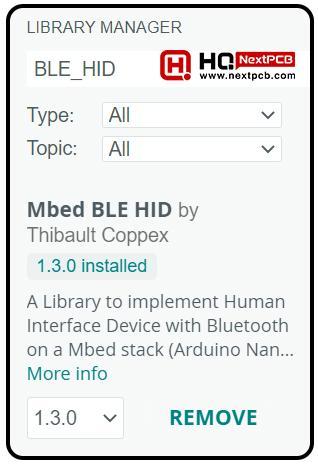
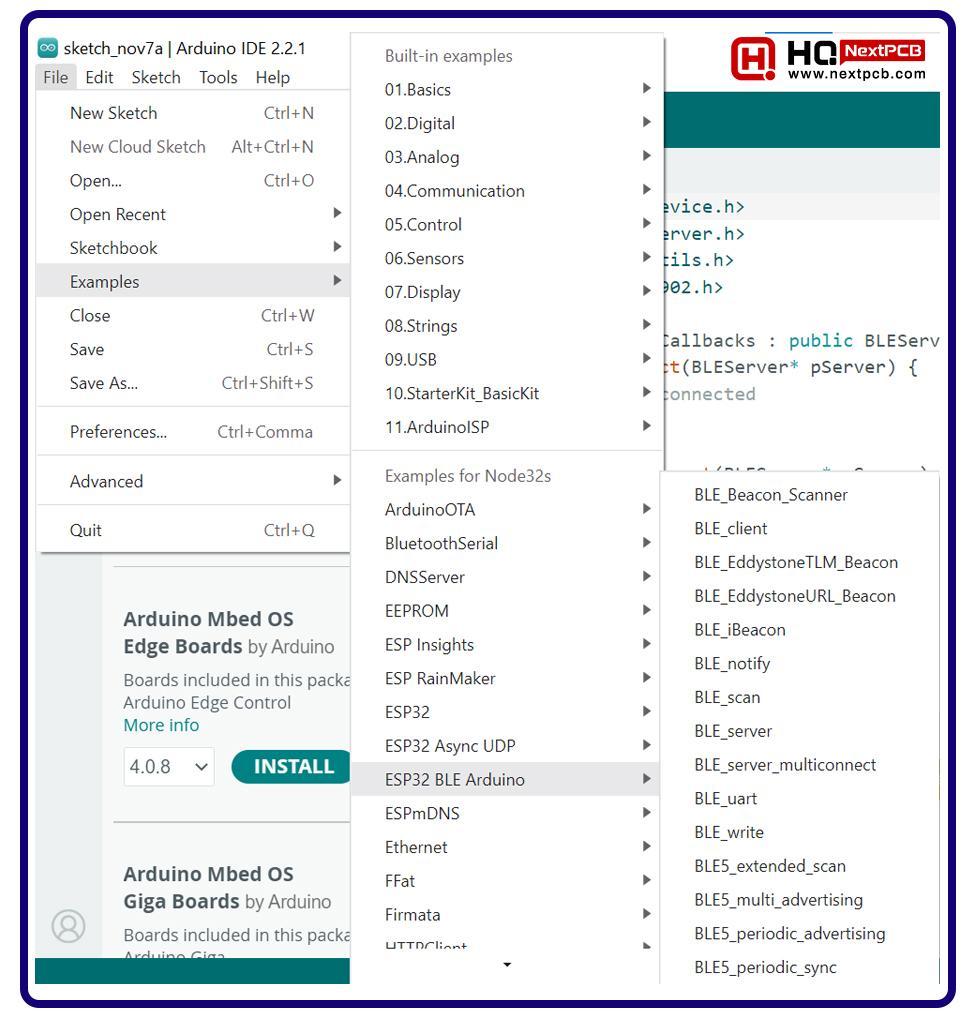
The ESP32 is a microcontroller that can be used either as a client or server. In the previous session, Getting Started with ESP32, we made changes to the default settings of the Arduino IDE to make it compatible with the ESP32. We installed the board, port, and libraries for ESP32. Now, we are going to set the ESP as a server and for this, we have to make some other changes. Follow the steps given next to use ESP32 as a server using the Arduino IDE.
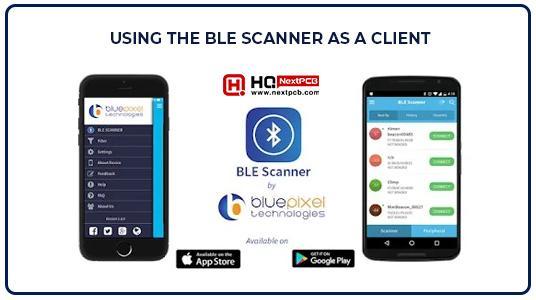
There are different ways to perform this experiment. As said earlier, the ESP32 can act either as a server or as a client. In this experiment, we will use the app to carry on the communication. This is an easier method and usually, students prefer to control the Bluetooth through a proper interface.
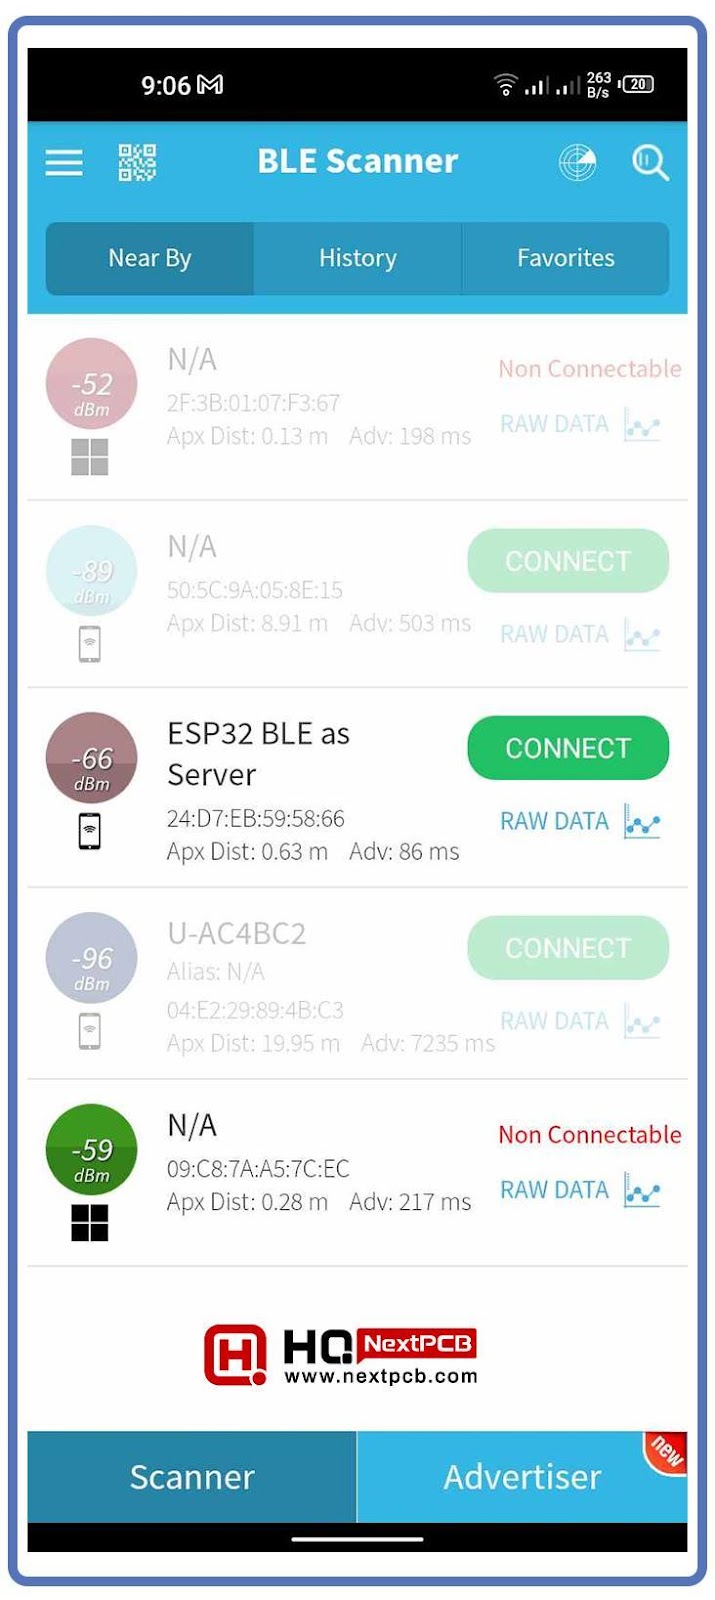
Once the Arduino IDE is ready, the user has to install the mobile app to create the connection between mobile/iPhone and ESP32. In this way, the ESP32 will act as a server and the mobile app will be the client. Follow the steps to get the app:
#include
#include
#include
#include
int ledPin = 2; // GPIO pin connected to the built-in LED on the ESP32
class MyServerCallbacks : public BLEServerCallbacks {
void onConnect(BLEServer* pServer) {
// Device connected
}
void onDisconnect(BLEServer* pServer) {
// Device disconnected
}
};
BLEServer* pServer = NULL;
BLECharacteristic* pCharacteristic = NULL;
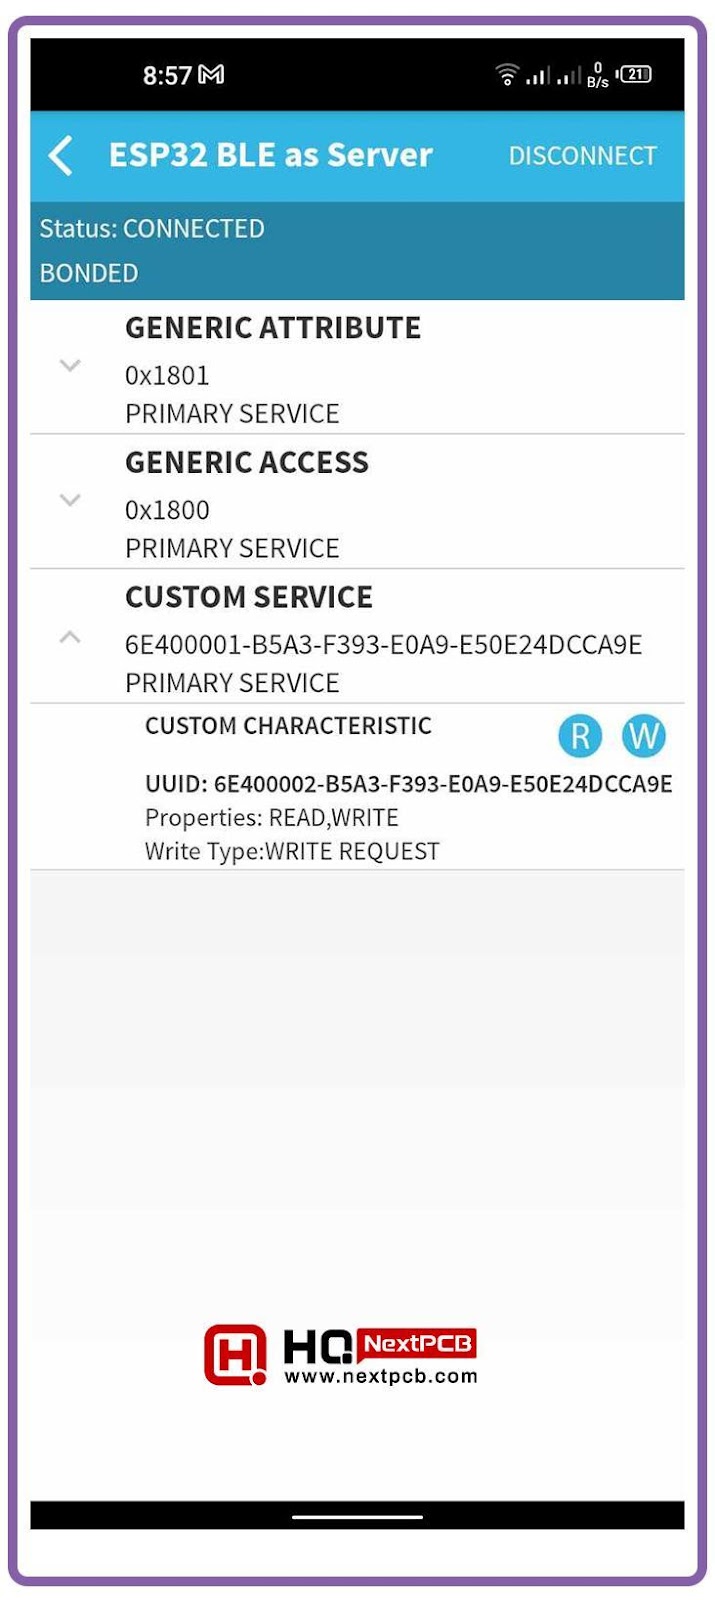
#define SERVICE_UUID "6E400001-B5A3-F393-E0A9-E50E24DCCA9E"
#define CHARACTERISTIC_UUID "6E400002-B5A3-F393-E0A9-E50E24DCCA9E"
void setup() {
Serial.begin(115200);
pinMode(ledPin, OUTPUT); // Set the LED pin as an output
digitalWrite(ledPin, LOW); // Turn off the LED initially
BLEDevice::init("ESP32 BLE as Server");
pServer = BLEDevice::createServer();
pServer->setCallbacks(new MyServerCallbacks());
BLEService* pService = pServer->createService(SERVICE_UUID);
pCharacteristic = pService->createCharacteristic(
CHARACTERISTIC_UUID,
BLECharacteristic::PROPERTY_READ | BLECharacteristic::PROPERTY_WRITE
);
pCharacteristic->setValue("Hello from ESP32 Server TEP");
pService->start();
pServer->getAdvertising()->start();
}
void loop() {
// The main code can run here
}
void toggleLED() {
digitalWrite(ledPin, HIGH); // Turn on the LED
delay(500); // Delay for half a second
digitalWrite(ledPin, LOW); // Turn off the LED
}
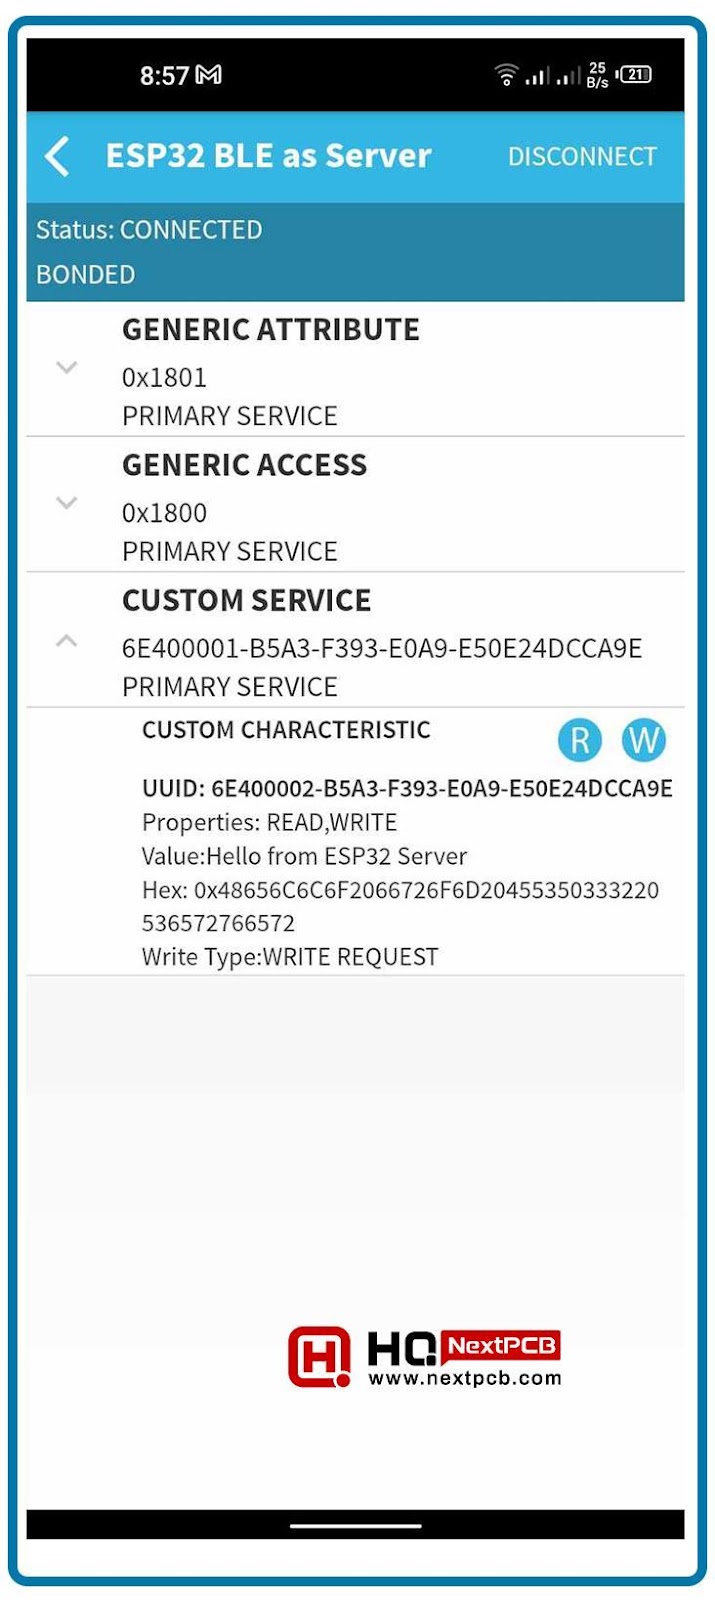
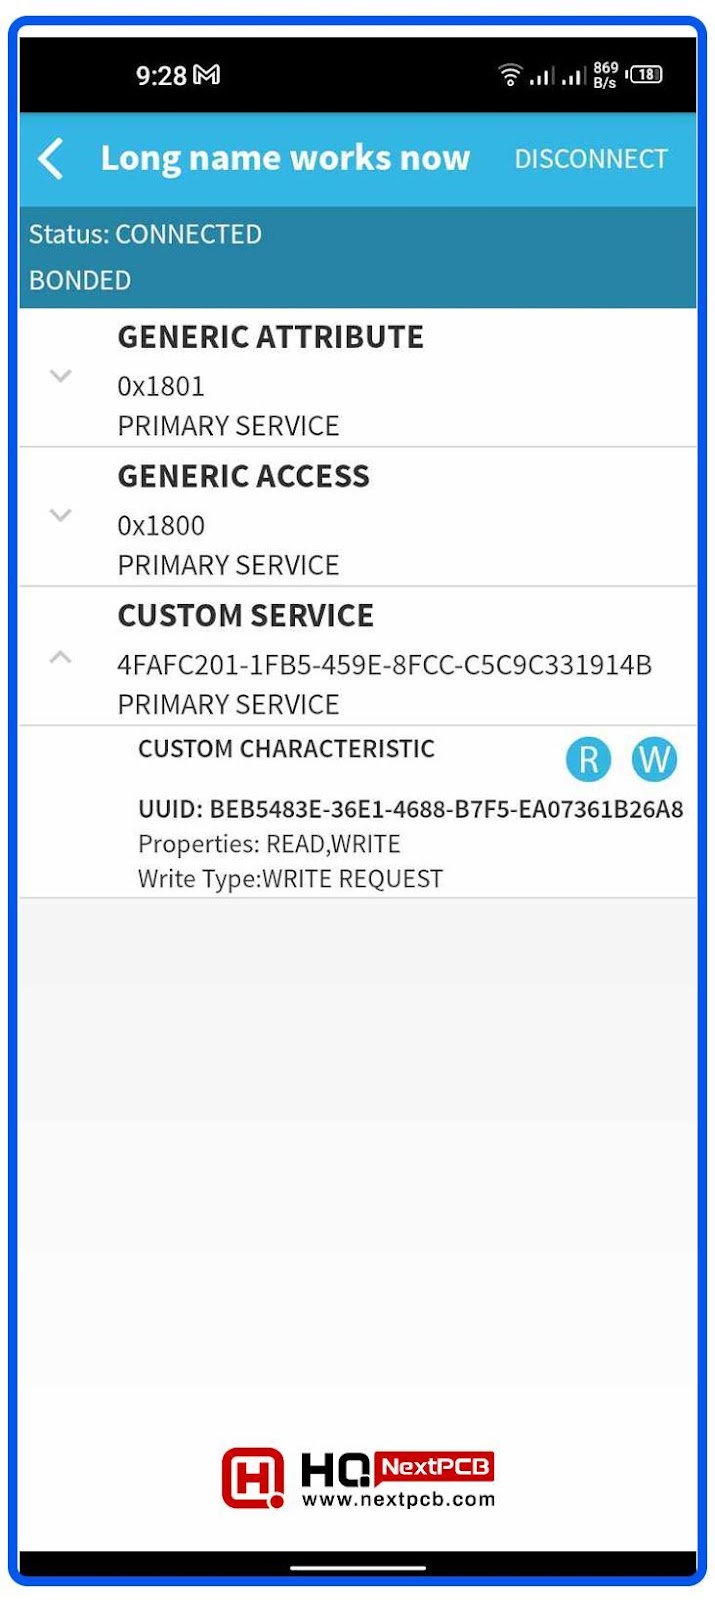
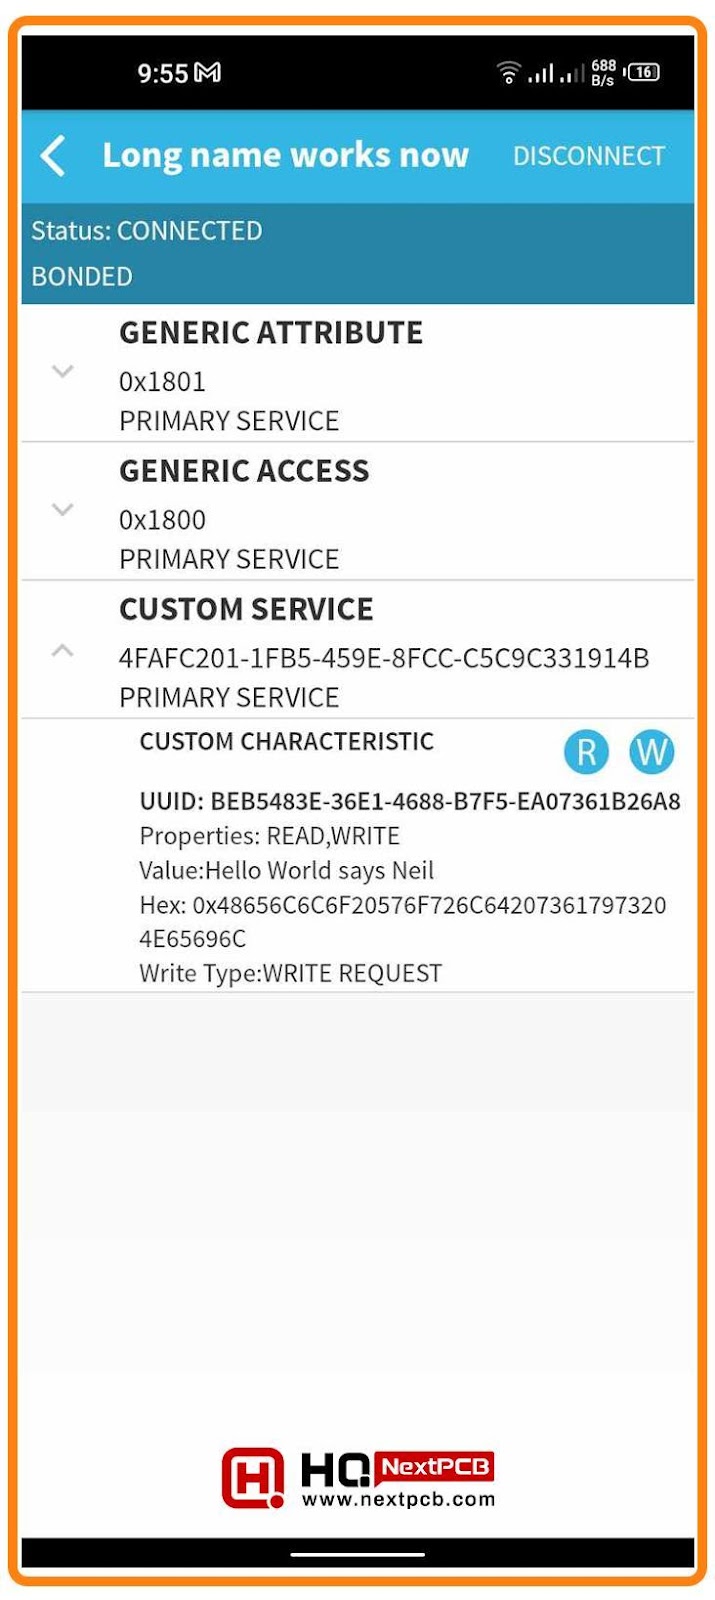
You can see the message “Hello from the ESP32 Server” on the screen. This message can be changed by the user through code.
This time, the Name of the device is “Long name works now” as mentioned in the built-in examples. Click on it.
Hence, we have read a lot about the ESP32 in this tutorial. In the previous session, we read the basics and today, we have seen the concept of Bluetooth Low Energy in the ESP32. The ESP32 has two modes, Bluetooth and BLE, which have the latest features, such as being more effective, less power consumer, and low latency module. We have compared it with the Classic Bluetooth and read about the concepts, such as GATT, UUID, and other characteristics of BLE. In the end, we saw the ESP32 BLE in Arduino IDE. We implemented an example to do so and used the BLE Scanner app for this. In the end, we saw how the built-in examples of Arduino IDE can perform the tasks. I hope it was a helpful tutorial for you but still, if you are stuck at any point, you can ask in the comment section.
- Autumn Offer: Get $30 off PCB orders over $100 with NextPCB
- Free PCB Assembly Offer is Now Live
- HQ NextPCB Introduces New PCB Gerber Viewer: HQDFM Online Lite Edition
Still, need help? Contact Us: support@nextpcb.com
Need a PCB or PCBA quote? Quote now


 Surface