NextPCB Capabilities
Printed Circuit Boards
NextPCB Capabilities
Printed Circuit Boards
 PCB Assembly
 Layer Buildup
 SMD-Stencils
 PCB Design-Aid & Layout
 Mechanics
 Quality
 Drills & Throughplating
 Factory & Certificate
 PCB Assembly Factory Show
Certificate
PCB Assembly Factory Show
Certificate
Support Team
Feedback:
support@nextpcb.com


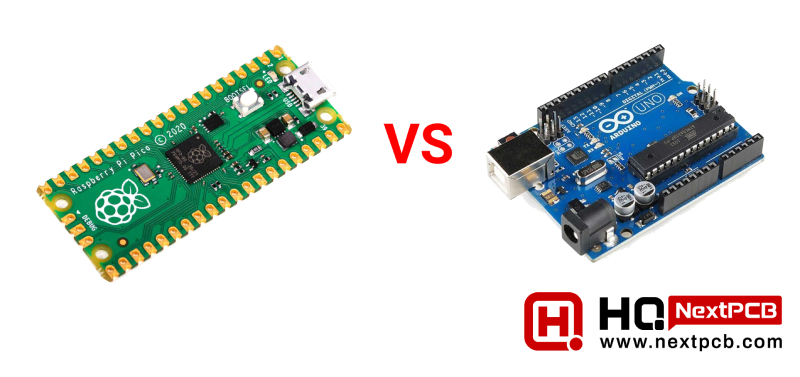
As of today, two prominent microcontrollers have garnered immense popularity among electronics enthusiasts and hobbyists – the Raspberry Pi Pico and Arduino. These compact devices serve as the brains behind countless DIY projects, providing the processing power and connectivity required to bring innovative ideas to life. In this article, we will delve into the features and capabilities of both the Raspberry Pi Pico and Arduino to help you make an informed decision on which microcontroller is best suited for your project.
When it comes to processing power, the Raspberry Pi Pico boasts a dual-core ARM Cortex-M0+ processor running at 133 MHz, making it a formidable contender in the microcontroller arena. On the other hand, Arduino boards vary in terms of processing capabilities, with some featuring simpler architectures than others. The choice between the two may depend on the computational requirements of your specific project.
Over the years, Arduino boards have improved so much that a clock speed of 20 MHz is now considered very slow. The fastest Arduino board as of today is the Arduino Giga R1 WiFi which boasts a clock speed of up to 480 MHz.
If you’re looking for an Arduino board that matches the price point of the Raspberry Pi Pico, we’ll, you’re out of luck. The cheapest Arduino costs around three times as much as the Pico. So if you factor price with processing power, it’s the Raspberry Pi Pico, hands down.
Components Free Worldwide Shipping
A crucial aspect of selecting a microcontroller is understanding its hardware specifications. The Raspberry Pi Pico comes equipped with 26 general-purpose input/output (GPIO) pins, allowing for versatile connectivity options. Arduino boards, such as the Arduino Uno, also offer a range of GPIO pins, but the specific features may vary among different models. Examining the hardware details is essential to ensure compatibility with your project's requirements.
The Arduino NANO Every is the board closest to the Pico’s form factor so it is a worthy comparison. The NANO has 22 GPIO pins, 8 of them analog input pins and 5 PWM pins. The NANO has two ground pins, one on each side, and 3.3V and 5V power pins. The Pico meanwhile has four ground pins on each side, and 5V (via VSYS or VBUS) and 3.3V power pins.
One of Arduino's notable advantages is its extensive ecosystem of shields – add-on boards that provide additional functionalities. Shields can enhance connectivity, offer wireless capabilities, or add sensors to your project. This modularity is a significant factor to consider, especially if you plan to expand your project's capabilities through these add-ons.
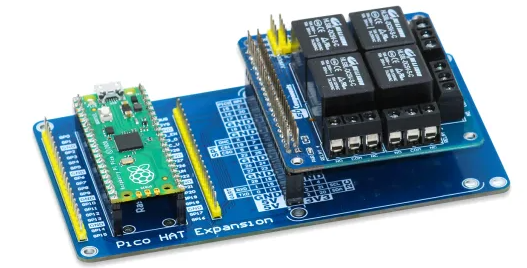
Third-party manufacturers have also created “hats” for the Raspberry Pi Pico. These expansion boards can add additional functionalities such as motor control, LCD, WiFi, etc. However, the number of hats is very few compared to Arduino shields.
Arduino enthusiasts benefit from a variety of board variants catering to different needs. The classic Arduino Uno, the compact Arduino Nano, and the powerful Arduino Mega are just a few examples. This diversity allows users to select the board that best aligns with their project requirements, ensuring optimal performance and scalability.
As of now, there are only two Raspberry Pi Pico boards: the W and the H. Raspberry Pi Pico is the version with wireless capabilities like WiFi and Bluetooth. What’s good about this is that the W version is still cheap compared to any Arduino with wireless features. But when it comes to board variants, nothing can beat Arduino.
Both Raspberry Pi Pico and Arduino have carved a niche in the Internet of Things (IoT) landscape. The ability to connect to the internet and communicate with other devices is crucial for IoT applications. The Raspberry Pi Pico has proven itself in this domain, while Arduino boards like the Arduino Uno R4 WiFi and Arduino Nano RP2040 Connect specifically cater to IoT needs.
The Arduino Uno R4 WiFi is a notable member of the Arduino family, offering built-in WiFi connectivity. This feature simplifies the integration of IoT capabilities into your project, enabling seamless communication with other devices or online services. It is a versatile microcontroller board that combines the classic design of the Arduino Uno with integrated WiFi connectivity. It features the ATmega4809 microcontroller at its core, providing a balance of processing power and energy efficiency. The built-in WiFi module allows seamless communication with other devices or the Internet, making it an excellent choice for Internet of Things (IoT) applications. With 14 digital input/output pins, 6 analog inputs, and a variety of communication interfaces, the Arduino Uno R4 WiFi maintains the familiar form factor of the Uno while adding the convenience of wireless connectivity, making it an attractive option for projects that require both Arduino compatibility and internet connectivity.
The Raspberry Pi Pico W, an enhanced version of the Pico, features integrated wireless connectivity, making it a strong contender for IoT applications. Its built-in support for MicroPython further facilitates quick and efficient programming. At its heart is the RP2040 microcontroller, a dual-core ARM Cortex-M0+ processor running at 133 MHz. The addition of wireless capabilities, including Wi-Fi and Bluetooth, makes the Pico W well-suited for projects that demand wireless communication and control. With 26 general-purpose input/output (GPIO) pins, support for MicroPython, and the ability to connect to the internet, the Raspberry Pi Pico W offers a powerful and flexible platform for a wide range of applications, from IoT projects to prototyping.
The Pico W's compact size, coupled with its wireless capabilities, opens up opportunities for remote monitoring, control, and data exchange. Whether you're a beginner experimenting with electronics or an advanced user working on complex projects, the Raspberry Pi Pico W provides a convenient and capable solution for incorporating wireless connectivity into your creations.
The Arduino Nano RP2040 Connect is a feature-rich microcontroller board that combines the power of the RP2040 microcontroller with additional components to offer enhanced functionality. Powered by the Raspberry Pi Foundation's RP2040 chip, the Nano RP2040 Connect features a dual-core ARM Cortex-M0+ processor running at 133 MHz, providing ample processing power for a variety of applications. What sets this board apart is its built-in features, including a 6-axis IMU (Inertial Measurement Unit) for motion sensing, a microphone for audio input, and a secure element for added security in communication protocols. This combination of advanced sensors and security features makes the Nano RP2040 Connect well-suited for projects requiring a mix of connectivity and advanced functionalities.
Designed to cater to the demands of modern projects, the Arduino Nano RP2040 Connect offers connectivity options through its onboard Wi-Fi and Bluetooth modules. This connectivity, coupled with the additional sensors, makes it an ideal choice for applications ranging from IoT projects and wearables to robotics. The compact form factor of the Nano RP2040 Connect allows for versatility in design, making it a powerful tool for both beginners and experienced developers looking to create innovative and connected devices.
The Arduino Nano ESP32 is a compact and powerful microcontroller board that combines the versatility of the Arduino Nano form factor with the advanced features of the ESP32 chipset. At its core is the ESP32 microcontroller, which provides both Wi-Fi and Bluetooth capabilities, making it an excellent choice for projects requiring wireless communication. With a dual-core processor, ample GPIO pins, and various communication interfaces, the Arduino Nano ESP32 offers a potent platform for a wide range of applications, from IoT devices to robotics.
The integration of Wi-Fi and Bluetooth in the Arduino Nano ESP32 opens up possibilities for remote control, data exchange, and connectivity with other devices. This board caters to both Arduino enthusiasts and those looking for the specific advantages of the ESP32 chipset. Its small size and compatibility with the Arduino IDE make it a convenient choice for developers and hobbyists who seek a balance between compact design and robust wireless capabilities in their projects.
The Integrated Development Environment (IDE) is a crucial aspect of the programming experience. Both Raspberry Pi Pico and Arduino have user-friendly IDEs, but the choice may come down to personal preference. Arduino uses the Arduino IDE, while the Raspberry Pi Pico can be programmed using Thonny, MicroPython, or C/C++ using the official SDK.
Visual Studio Code (VS Code) is a popular open-source code editor that supports a variety of programming languages and frameworks. Both Arduino and Raspberry Pi Pico can be programmed using VS Code through extensions that provide tailored support for their respective development environments.
Install the PlatformIO Extension: PlatformIO is a powerful open-source ecosystem for IoT development with support for over 950 embedded boards. The PlatformIO extension for VS Code allows Arduino development seamlessly. Install the extension from the VS Code marketplace.
Arduino Framework: PlatformIO provides a comfortable environment for Arduino development within VS Code. You can create and manage Arduino projects, write code, upload firmware, and monitor serial output directly from VS Code.
Library Management: PlatformIO simplifies the process of managing libraries for Arduino projects. You can easily search, install, and update libraries using the extension.
Raspberry Pi Pico with Visual Studio Code:
Install C/C++ Extension: Raspberry Pi Pico is typically programmed using C/C++. To set up VS Code for Pico development, install the "C/C++" extension by Microsoft.
Install Pico-SDK and CMake Tools: Raspberry Pi Pico utilizes the Pico-SDK for development. You'll also need the CMake Tools extension in VS Code. Pico-SDK provides the necessary libraries and tools for Pico development.
Configure CMakeLists.txt: Create a CMakeLists.txt file in your Pico project, specifying build settings. VS Code, along with CMake Tools, will use this configuration for building your Pico project.
Build and Flash: Utilize the VS Code interface to build your Pico project and flash it onto the Raspberry Pi Pico. The extension simplifies this process, allowing for easy compilation and deployment.
Both Arduino and Raspberry Pi Pico can benefit from the rich features of Visual Studio Code, such as code highlighting, autocompletion, and integrated terminal support. By leveraging the appropriate extensions, developers can streamline their workflow and enjoy a seamless programming experience, whether working with Arduino microcontrollers or the Raspberry Pi Pico.
While the Arduino IDE is traditionally associated with Arduino boards, it is also possible to program the Raspberry Pi Pico using the Arduino IDE, thanks to the support for the RP2040 microcontroller provided by the Arduino community. Here are the steps to set up and program the Raspberry Pi Pico using the Arduino IDE:
After the boards package installation, you'll find "Raspberry Pi Pico" listed under "Tools" -> "Board." Select the appropriate Pico board variant (e.g., Raspberry Pi Pico) from the menu.
Choose Programmer:
Under "Tools" -> "Programmer," select the appropriate programmer for your setup. For Raspberry Pi Pico, "Raspberry Pi RP2040" is the common choice.
Write and Upload Code:
Write your Arduino code in the IDE. Arduino code for the Raspberry Pi Pico is typically written in C/C++.
Monitor Serial Output:
Using the Arduino IDE to program the Raspberry Pi Pico provides a familiar environment for Arduino enthusiasts and simplifies the process of writing, compiling, and uploading code. It also allows users to leverage the extensive Arduino library ecosystem while working with the Raspberry Pi Pico microcontroller. Keep in mind that this support is made possible by the efforts of the Arduino community and may be subject to updates and improvements over time.
In conclusion, the choice between the Raspberry Pi Pico and Arduino depends on the specific requirements of your project. If you prioritize processing power and versatility, the Raspberry Pi Pico might be the ideal choice. Arduino, with its diverse range of boards and shields, is a solid option for those seeking a modular and expandable ecosystem. Consider your project's needs, compatibility, and the available features to determine which microcontroller is the perfect fit for bringing your creative ideas to fruition.
- How to Get Started With Raspberry Pi
- Raspberry Pi 4 vs Raspberry Pi 3B+
- Free Worldwide Shipping on Over 600,000 Electronics Components with HQ Online
- Free PCB Assembly Offer is Now Live: Experience Reliable PCB Assembly from HQ NextPCB
- HQ NextPCB Introduces New PCB Gerber Viewer: HQDFM Online Lite Edition
Still, need help? Contact Us: support@nextpcb.com
Need a PCB or PCBA quote? Quote now


 Surface