
 NextPCB Capabilities
Printed Circuit Boards
NextPCB Capabilities
Printed Circuit Boards
 PCB Assembly
 Layer Buildup
 SMD-Stencils
 PCB Design-Aid & Layout
 Mechanics
 Quality
 Drills & Throughplating
 Factory & Certificate
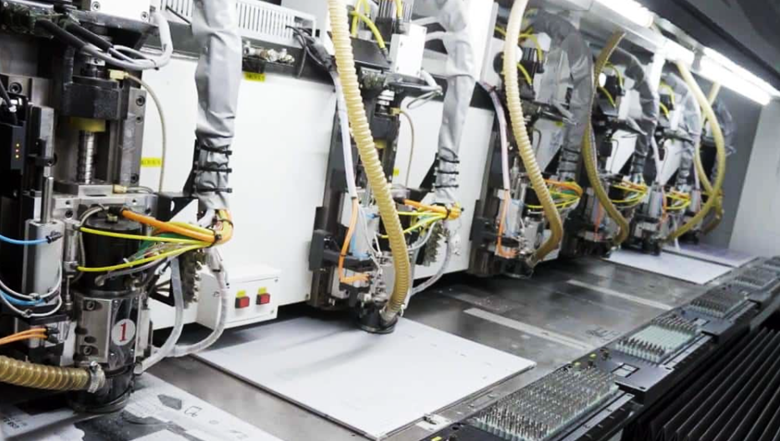
 PCB Assembly Factory Show
Certificate
PCB Assembly Factory Show
Certificate
Support Team
Feedback:
support@nextpcb.com


PCB drilling includes multiple aspects and features both from technical and business views. Therefore, it is a very fascinating area to explore. However, improper techniques of drilling the PCBs can damage your electronic circuit or cause harm to it. Hence, it is always good to strengthen your knowledge about it to avoid such scenarios.
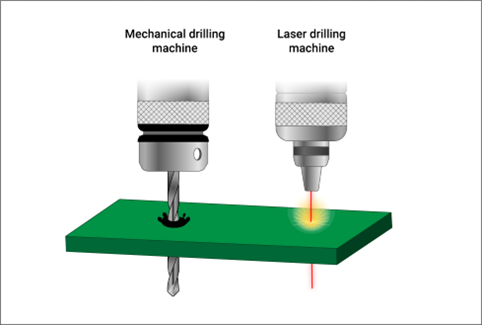
The PCB drilling process is a process of making cavities like holes and slots into a printed circuit board prior to soldering the electronic components onto the board. Mechanical drilling techniques such as laser cutting, punching, or drilling as well as electrochemical etching, and chemical milling are commonly in functioning to perform such tasks.
Nowadays, first, the PCB driller is used to drill small holes with the required size and electrochemical etching is used to clean up the holes by removing the remaining debris from it. These two mechanical and chemical processes are known as the 2D and 3D drilling of PCBs.
The commonly available drillers in the market cannot use to drill holes in the PCBs. Therefore, specific drillers like twist drills or slotting drills are currently functioning for this purpose. The twist drill can use to drill holes having sizes of 0.1-4.0mm while the slotting drill can use to drill 1.5mm and 2.5mm hole sizes. There are several main parts that are clearly identifiable in a typical drill. Such as a drill chuck to clamp the bit and spin it when the force is applied to the driller, and the arbour to connect the drill bit and the shaft.
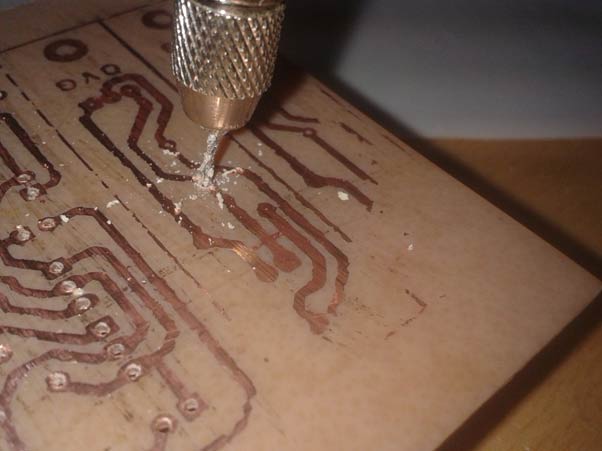
Drilling holes into a sheet of copper or another metal to implement electronic connections circuit boards. To prevent damage to any such components, the procedure calls for meticulous accuracy and precision for each hole as well as precise planning of where each drill bit may go. Here are steps to make drilling PCBs a simple operation.
As the initial step, pilot hole drilling should be the early step before the actual drilling. By doing this, you may prevent the drill bit from "walking," which is when it starts drilling in one place and then proceeds in the opposite direction of what you planned. It can carry out manually with a tiny drill bit or automatically using a drill press.
If a drill press created a pilot hole the tool removes the drill bit heads one by one. Also, the size of the PCB determines how many bits are needed for this operation. For instance, four of them may take out for a single hole when a 0.2 mm drill bit is used for the work. As each head is removed, a little metal mark is often left on the PCB as well.
Straight drill bits are an excellent technique for drilling at an angle. Drill bits often come in sets and are available in various diameters. The following sizes are among them:
Ensuring the drill bit, you use for your PCBs is the correct size is very crucial. Because the parts in your circuit board drill have the possibility of damage if the bit is too large. If it is too tiny, though, wires will not fit through the holes you drill.
How quickly or slowly a hole is possible to make in metal depends on the force and speed of your drill. The most typical choices are:
The finest option for ensuring that you have the highest possibility of drilling precise holes is a drill press. They typically utilize industry-standard bits and can drill at least four times as quickly as a hand-held drill. If you want to take this route, your only choice is to purchase a new one.
Depending on their price and features, drill presses are different, but they always function by applying just the proper amount of pressure to drill through metal. When the user exerts more force, a hole can drill more quickly. The terms "cross drilling," "plunge drilling," "ventilated holes," and "inclined ends" are only a few of the numerous forms of drilling that exist. The faceplates of the most popular kind of drill press are perpendicular (a metal plate with drill holes facing up at an angle). When using this kind, make sure the drill bit is pointing upward and the angle fits the PCB holes.
A drill press can use to drill every stage of PCBs. It is of considerable assistance, especially when accurately and precisely drilling holes is necessary. If you utilize your drill press properly, it will eventually pay off even if it takes some time to become set.
Without the proper materials and tools, drilling holes in a circuit board may get difficult. When drilling holes, it's crucial to take your time and be patient because speeding the job might harm the board. Make sure your drill bit is not rotating too quickly or slowly whenever you are drilling. Additionally, it's crucial to wear goggles during drilling to prevent vision loss.
After you have completed drilling your board, you need to use a brush and solvent to clean the holes. Any metal shavings that may produce when drilling holes in PCBs can remove by using the solvents. By doing this, you may get confident that your board will be ready for use.
Drilling your PCB can do by applying solder to the new holes and melting them using a soldering iron with a tiny tip. Therefore, run a wire from one of the holes and apply heat to make sure the solder adheres properly. By doing this, the solder will not leak through the perforations. After that, give it a gentle downward squeeze to make sure whether it is fastened or not.
Once you have the proper drill bits, all you need to do to create a hole or a slot on your PCB is to make sure they are clear of tiny chips and dirt. If there are any chips or debris on the bit, this might interfere with drilling and lead to unfavourable outcomes.
Drilling PCBs can do safely without running the risk of breaking your drill bit if it is done appropriately. You may effortlessly hole your PCBs using these suggestions.
Cautions - If your mechanical components come into touch with the bit while the machine is operating, they might sustain damage. Just too many things may go wrong during a PCB drilling procedure. Since certain harmful vapours can generate throughout your drilling session, you should always remember to wear protective clothing, such as gloves, goggles, and masks.
Anyone can create their own PCBs if they have the necessary equipment and supplies. You may quickly and easily master this highly useful talent. In order to finish your circuit boards in time for your projects, it is critical to always have the proper tools close at hand. Drills, drill presses, saws, and PCB solder stencils are some of the best tools for PCB hole drilling.
Still, need help? Contact Us: support@nextpcb.com
Need a PCB or PCBA quote? Quote now


 Surface

