NextPCB Capabilities
Printed Circuit Boards
NextPCB Capabilities
Printed Circuit Boards
 PCB Assembly
 Layer Buildup
 SMD-Stencils
 PCB Design-Aid & Layout
 Mechanics
 Quality
 Drills & Throughplating
 Factory & Certificate
 PCB Assembly Factory Show
Certificate
PCB Assembly Factory Show
Certificate
Support Team
Feedback:
support@nextpcb.com


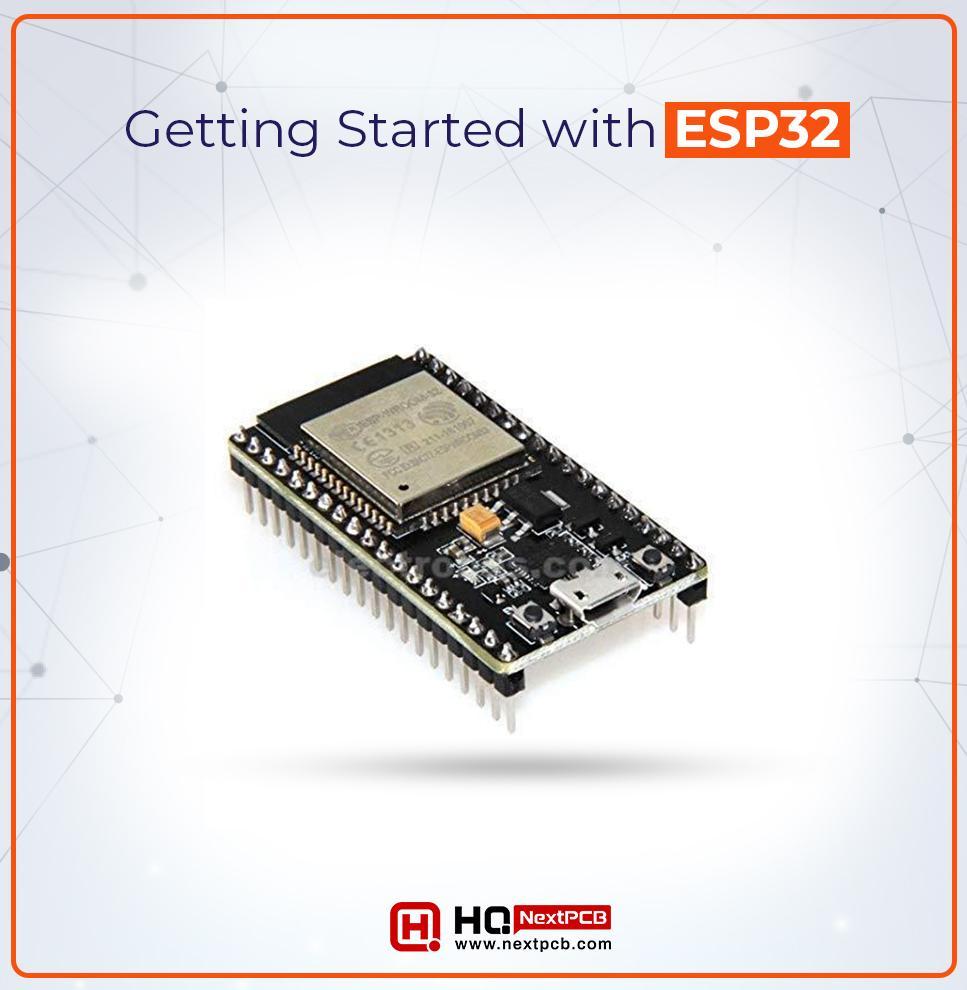
Hey learners! I hope you are doing great. Today, I am excited because I am going to share the introduction of a versatile and popular microcontroller board named "ESP32 development board”. This has caused a revolution in the world of the Internet of Things (IoT), and we will discuss all the information and concepts from scratch. The ESP32 is a series of low-cost and low-power boards that not only provide the best functionalities but also have more advanced features than its other family members.
In this article, we will start the discussion with the introduction of the ESP32 board; therefore, even if you are new to the development boards, you will get all the concepts clearly. After that, we will discuss the type of projects where ESP32 is used and the specifications and pinouts of this board. Moreover, we will discuss the type of integrated development environment (IDE) that is used to program the ESP32. Once all is clear, we will move towards the Arduino and start with the installation, setting, and getting the Arduino IDE ready for ESP32. Finally, we will run a code of LED blinking to learn the coding process in this IDE. This is going to be lengthy but interesting so let’s start learning.
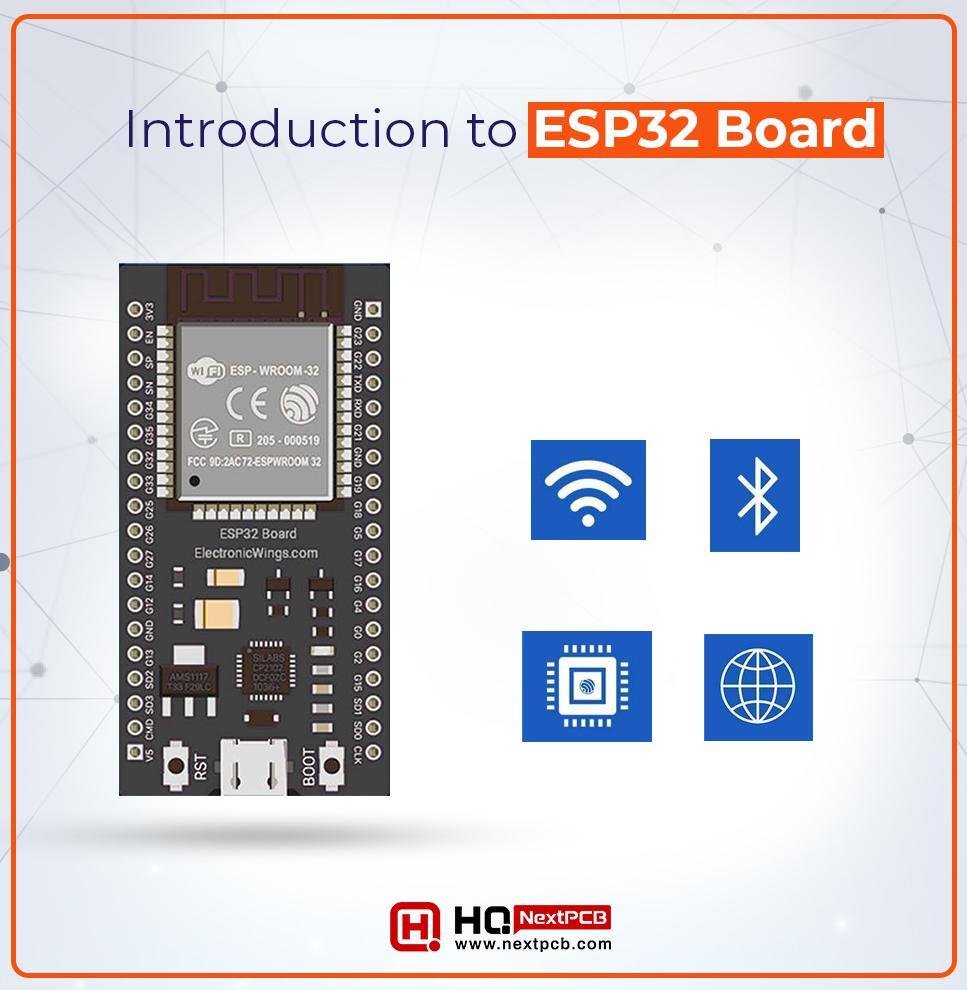
Some important features of the ESP32 are given next:
ESP32 is considered one of the best boards for IoT projects because of the versatility and latest features that are in demand for such projects. The following features will help you understand the functionalities of ESP32.
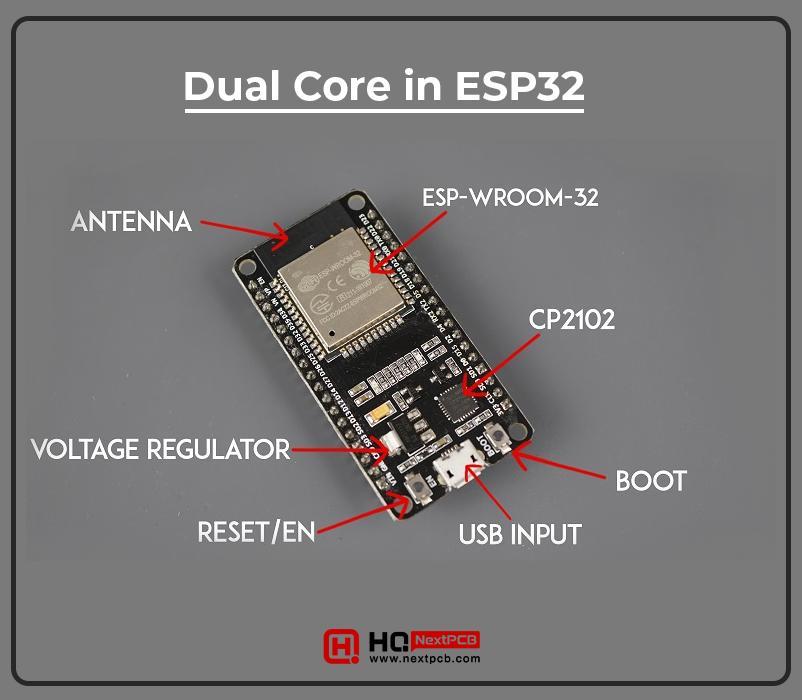
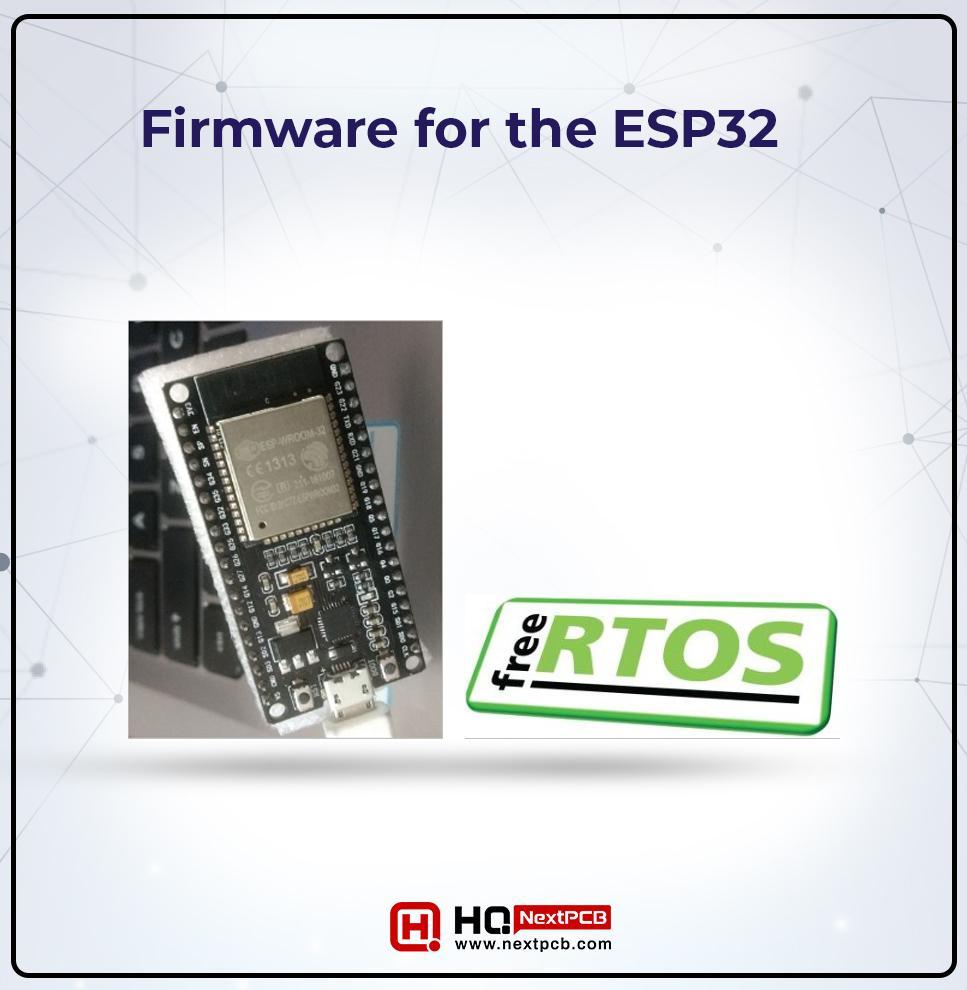
The ESP32 is a dual-core microcontroller which means it has two cores that run separately. This makes it suitable for multitasking as we can access the ESP32 Dual Cores. Moreover, this feature makes it suitable for tasks that require high processing power. This feature is enabled with the help of a real-time operating system (RTOS).
The ESP32 supports a large number of peripheral I/O. This is the reason behind the versatility of this board. Some basic peripherals of this board are:
We will discuss some of these peripherals in detail in just a bit.
There are multiple options of programming languages to work with ESP32, such as C++, C, Micropython, etc. But usually, people prefer to use C++, because it is easy to install and understand. For this, the Arduino IDE is used for the coding with some special settings. This makes it a perfect choice for users who are working on Arduino and require some additional features to deal with their projects.
All these features are responsible for the rapid popularity of this board among people interested in the projects of the Internet of Things (IoT). Not only this, ESP323 has multiple types of projects in other fields as well. Here are some important types of projects for the ESP32 development board.
The ESP32 is one of the best choices for microcontroller boards in different fields of technology. The built-in WiFi and Bluetooth capabilities have made them suitable for a large range of projects. Here is a list of a few categories of the hardware industry where ESP32 is extensively used.
Home automation is a trending topic in the Internet of Things (IoT) because these are making life easier, and boards like the ESP32 have made it possible to get the best connectivity at a lower price. Here are some examples of some projects:
The ESP32 is compatible with the use of different sensors, such as PIR sensors, smoke sensors, etc. These can be used for the design of security systems either at home, in the office, or in other places. These are known as DIY security systems, and collectively, multiple sensors can be used to create a foolproof and effective security system. For instance, the motion detector on the windows and doors can detect the motion and notify the user on their smartphone apps about any suspicious motion in the place.
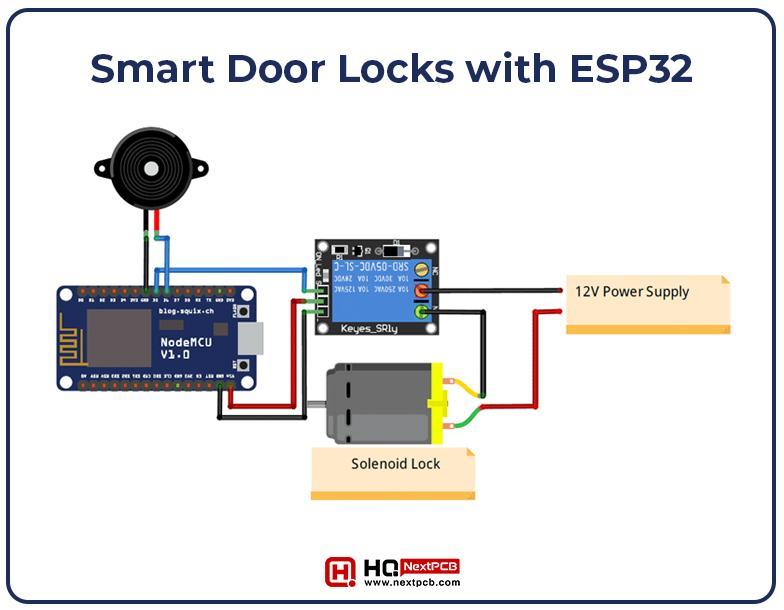
In this technical era, every place is becoming smart. The smart door locks are designed with the help of the ESP32 development board to enter sensitive and private places by using security codes and other means. These systems grant access to only related people, and these smart doors are locked instantly when any unwanted person tries to enter the place. Moreover, the admins can get notifications on their smart app about the entry and exit of every person.
The ESP32 has different versions, and users get them according to their project type. The price of each type varies. Here is the general price range of different packages of ESP32:
There are some other options as well for the users, such as specialized boards and commercial boards. The price of these boards depends on the scale of production and the special features of these boards. The total price also depends on the quality of the product and the brand of the ESP32.
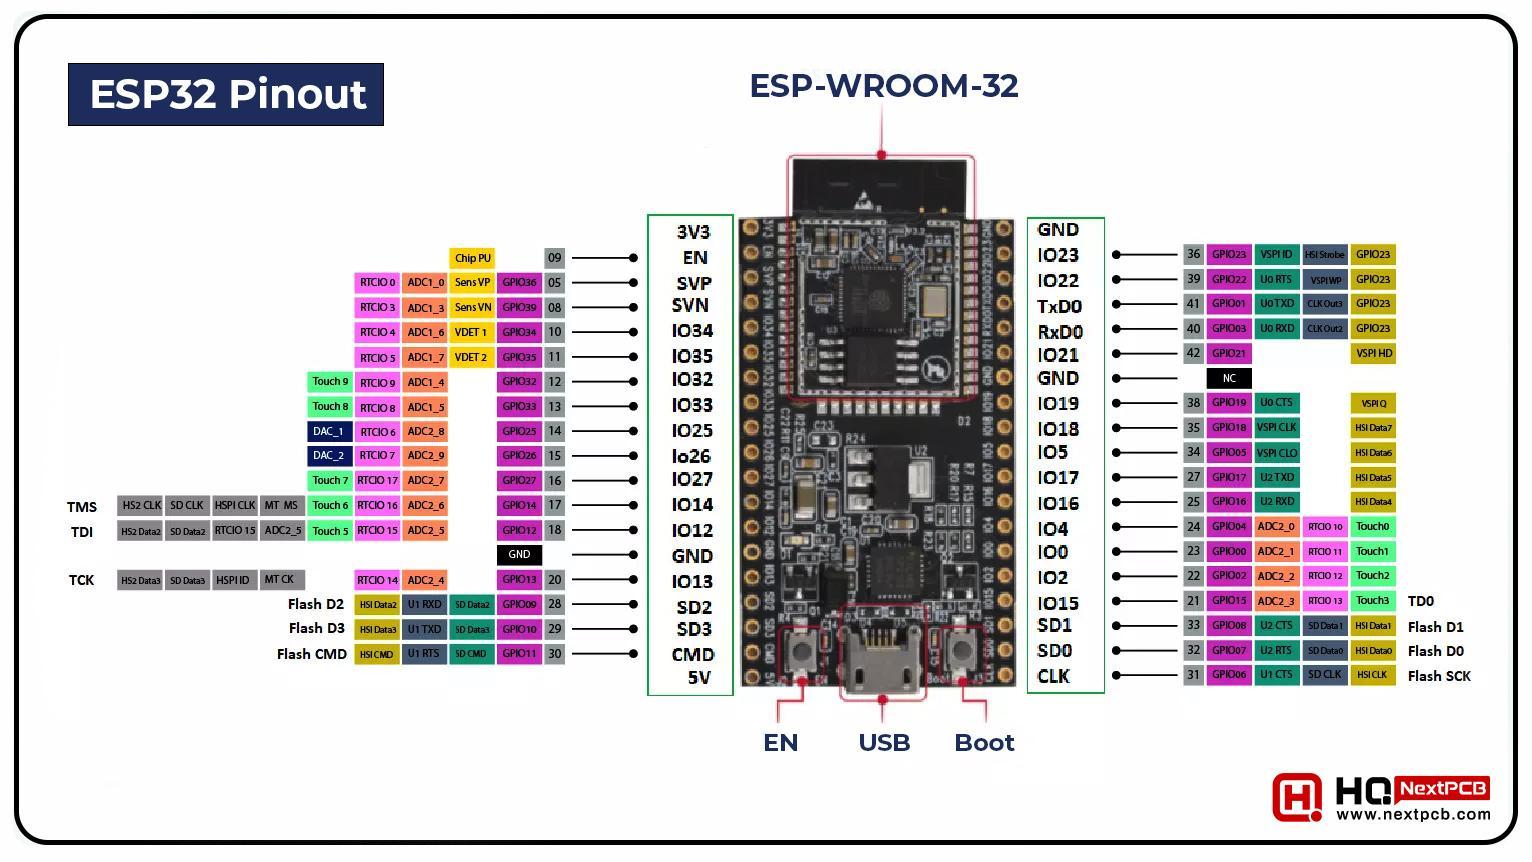
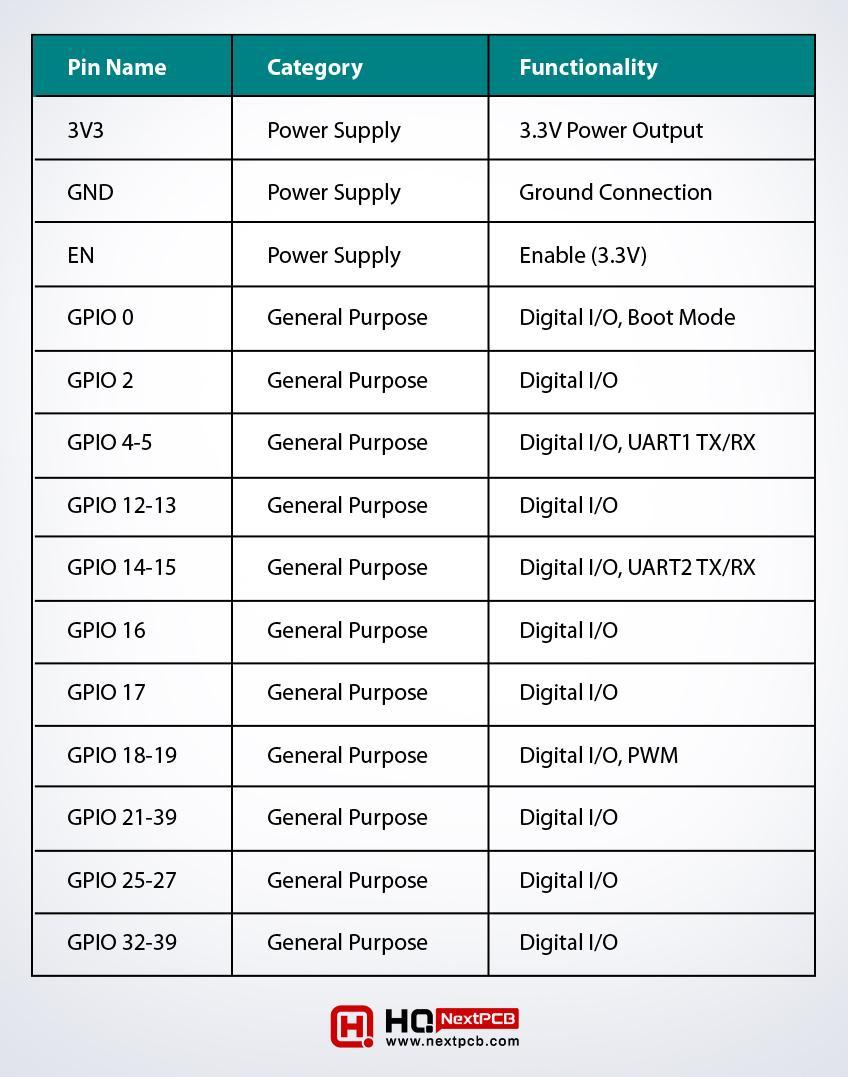
The ESP32 has a total of 40 pins, and these are divided into different categories according to their functionalities. Here is an overview of these:
The following table will make the concept clearer about these pins:
|
|
|
|
|
|
|
|
|
|
|
|
|
|
|
|
|
|
|
|
|
|
|
|
|
|
|
|
|
|
|
|
|
|
|
|
|
|
|
|
|
|
|
|
|
|
|
|
|
|
|
|
|
|
|
|
|
|
|
|
Note that this is a general description of each pin, and the order of the pins may be changed in some models. But the functionalities and the workings remain the same.
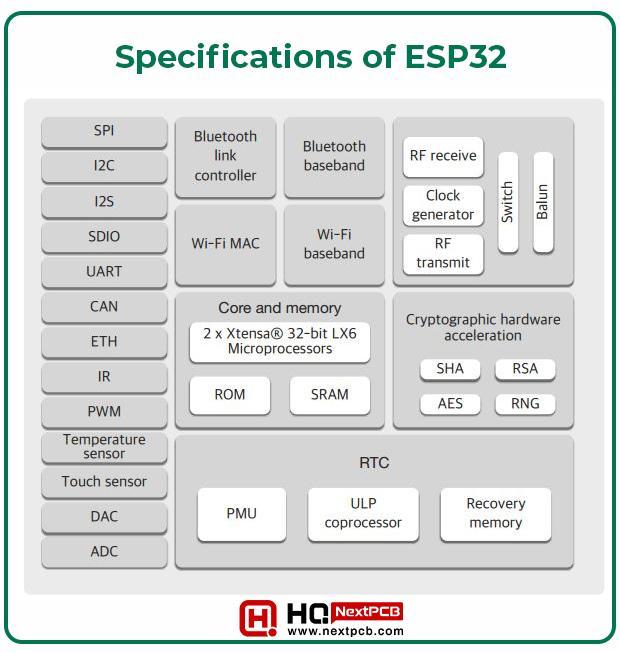
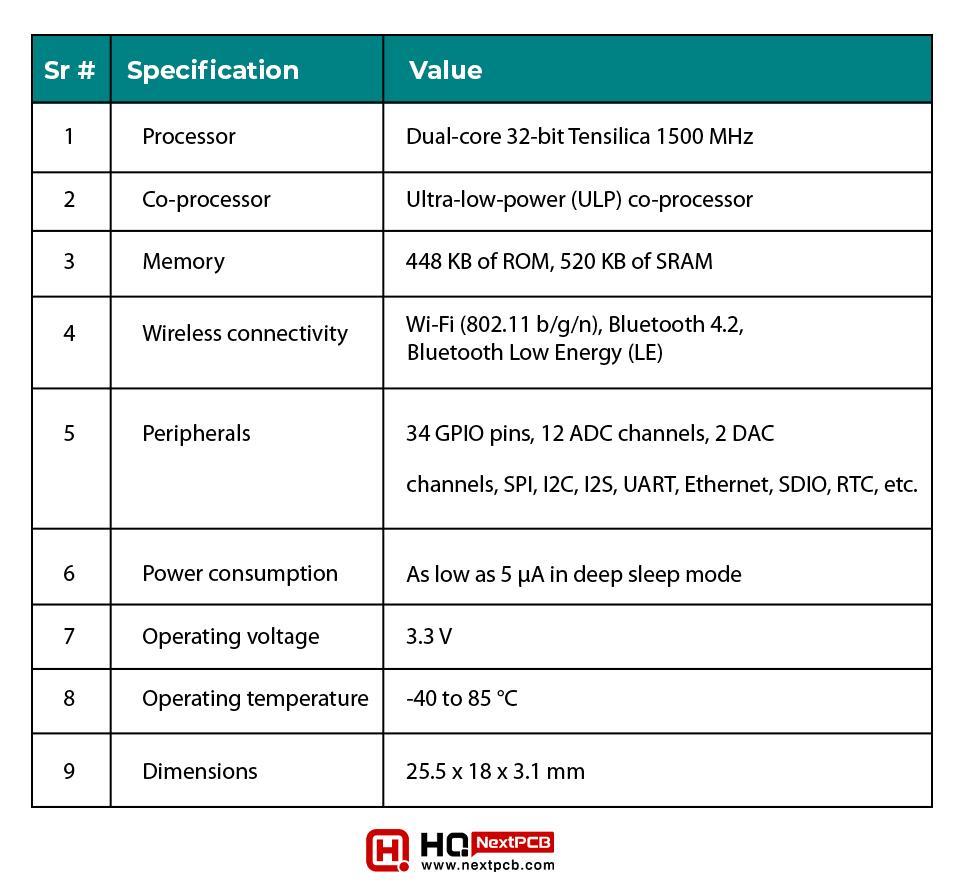
The ESP32 is a relatively inexpensive and versatile board that is well-suited for a wide variety of projects. One of the reasons is its pinouts which we have just discussed with you. The other reason is its specifications, which make it more attractive. Here are some important specifications for this development board:
|
|
|
|
|
|
|
|
|
|
|
|
|
|
|
|
|
|
|
|
|
|
|
|
|
|
|
|
|
|
|
|
|
|
|
|
|
|
|
|
|
|
|
|
This is a general overview of specifications. If you want to go into the details of these, then you must visit the datasheet on the official website. These specifications make the ESP32 ideal for different projects in multiple fields.
Just like other modules, the ESP32 has to be programmed in the integrated development environment to be used according to the project. Just like the Arduino, the programming language for the ESP32 is C++. There are multiple programming IDEs that are compatible with the ESP32. The basic introduction to all these is given next:
The Arduino IDE is developed by the Arduino company for different boards. This is an easy-to-use and user-friendly development environment for microcontrollers like the ESP32. It has a vast library system and is an ideal choice for ESP32 development boards.
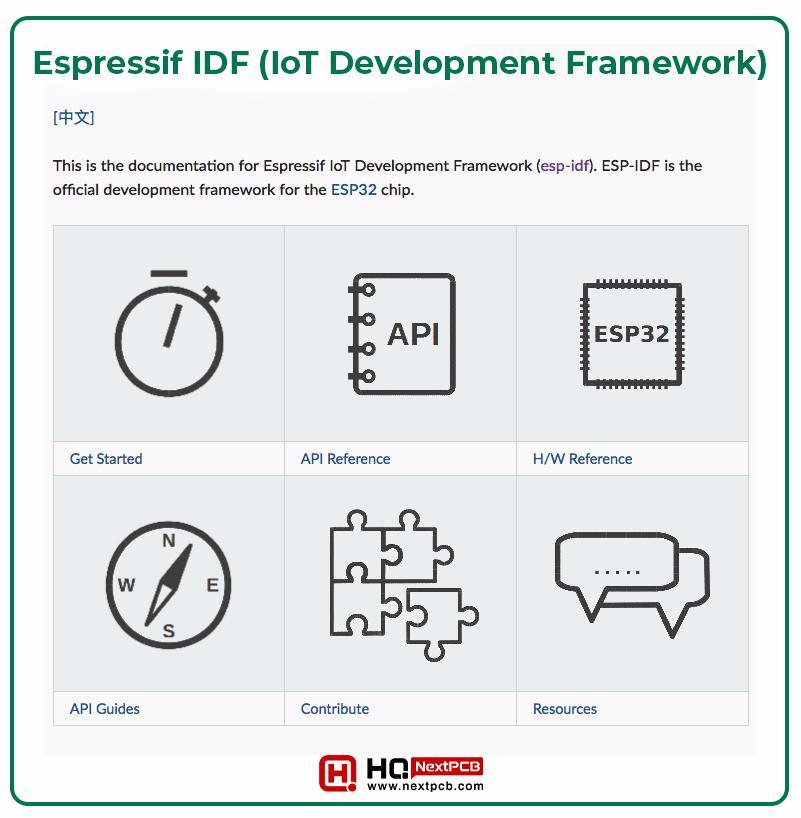
This is Espressif’s official development framework, designed for simple microcontrollers such as the ESP32 and ESP8266. This comprehensive tool is best for the relatively complex projects of ESP32 and provides full access to the hardware. This is a good choice for such boards, but it is not suitable for absolute beginners.
This is an extension of the Visual Studio code and has a built-in debugging tool and a library manager. It is an open-source ecosystem that is ideal for IoT projects and, therefore, is suitable for multiple development boards such as ESP32. This can be downloaded from the official website of PlatformIO. It is a powerful and flexible platform for the ESP32.
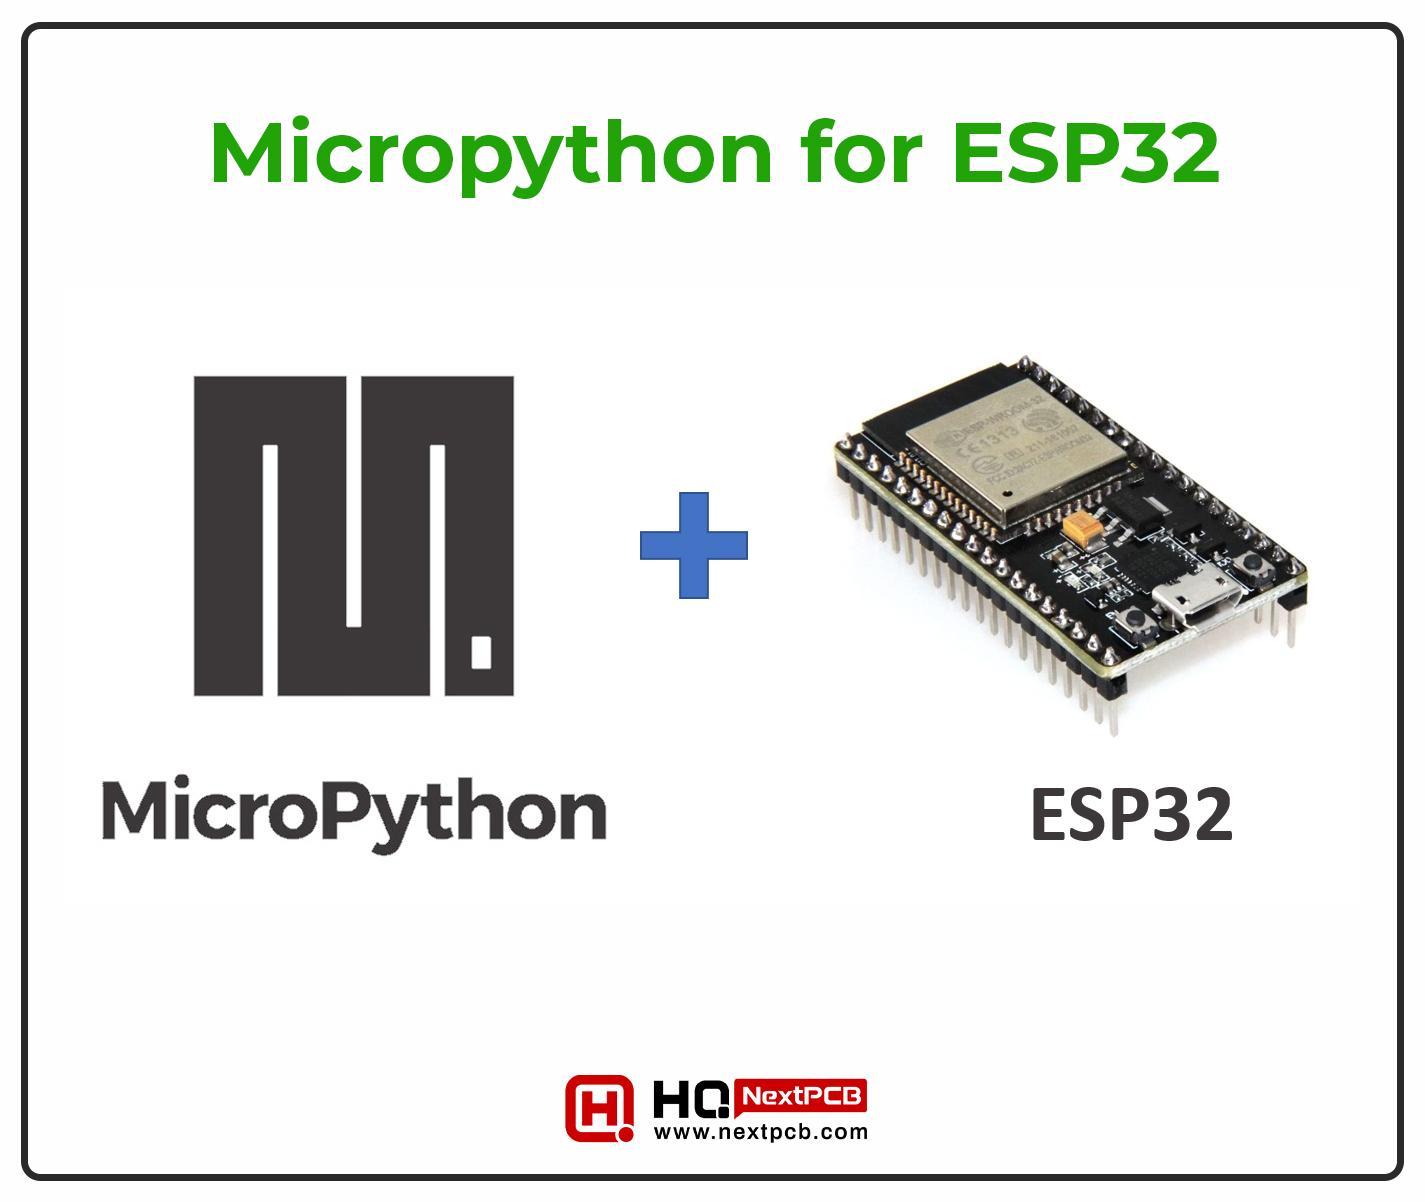
MicroPython is a lightweight Python interpreter for microcontrollers like the ESP32. This is an efficient tool for writing code in Python for the projects of ESP32. This makes the ESP32 more accessible for users who prefer Python programming for the ESP32.
Similarly, Thonny is the Python IDE that has integrated the Micropython shell. It is designed for beginners and is an excellent choice for the ESP32 programmers' practical.
In addition to all these, tools like Mongoose OS are also available for ESP32 programming. All these are popular choices for this task, but among them, the most suitable for beginners is Arduino IDE, and we will work on it for our simple beginner program.
The ESP32 can create versatile projects, and basically, we need multiple types of components, but because this is a beginner’s tutorial, we are starting with the project requiring the least components. We will create a project to blink the LED light on the ESP32 board. Here is the list of the components required for this project:
I hope you have the first three components. Let us go for the IDE.
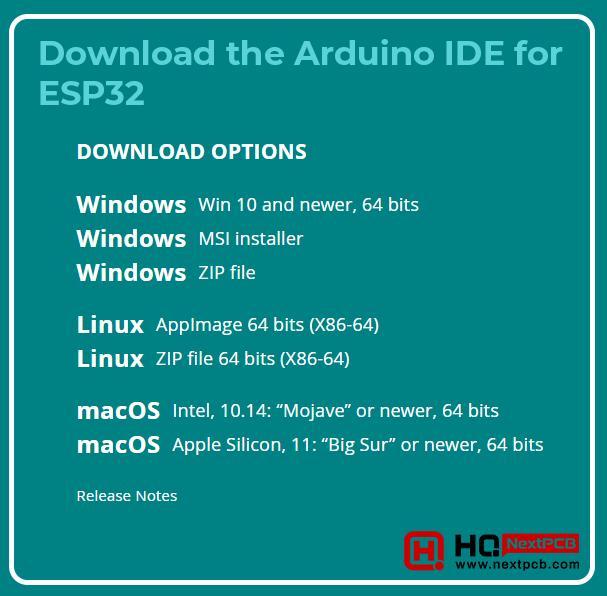
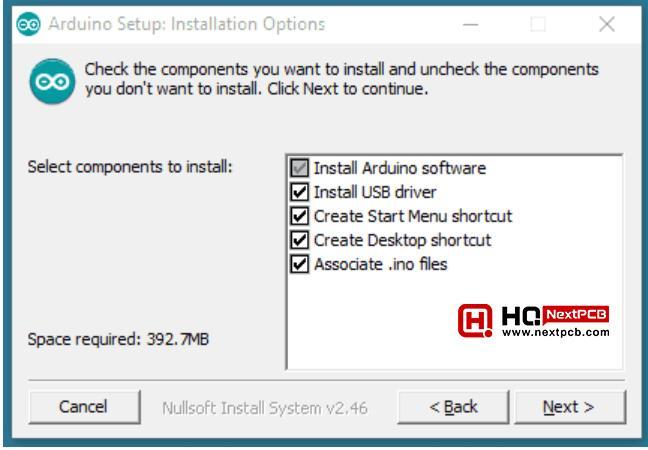
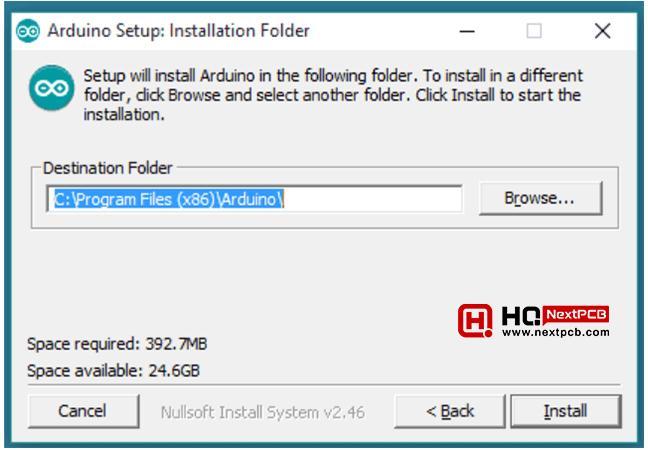
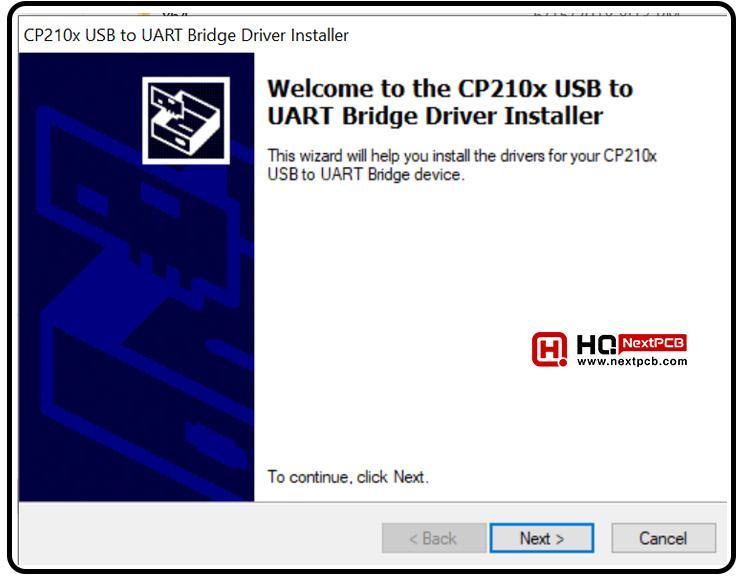
The installation process for the Arduino IDE is simple. The user has to follow the steps given next:
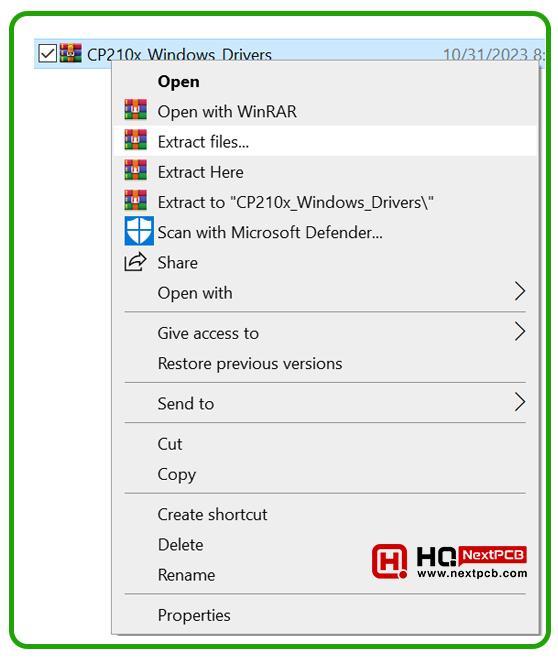
Once the zip file is downloaded, go to the folder where it was saved and extract it to the required location.
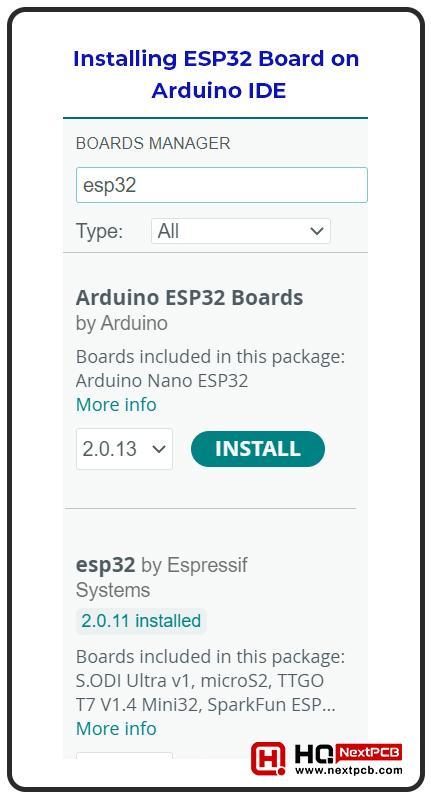
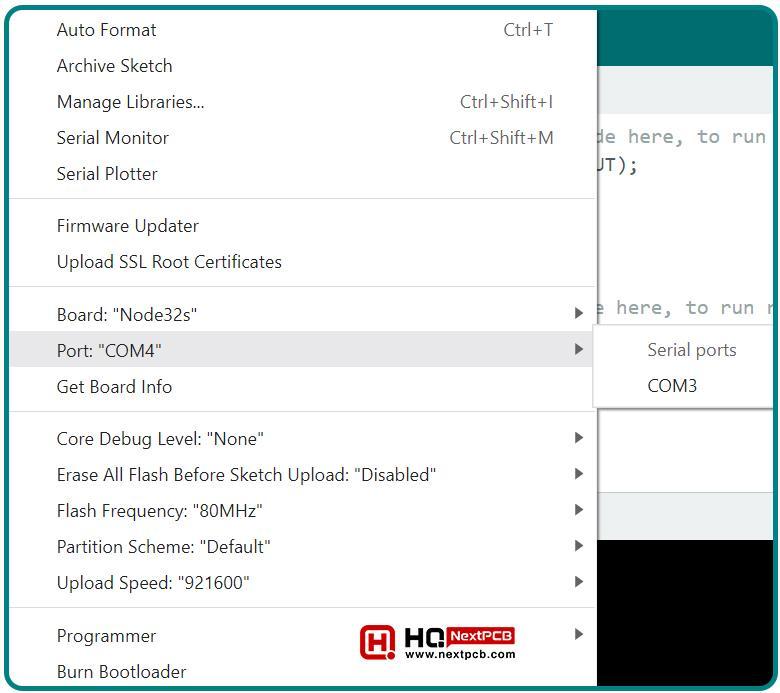
At this point, the Arduino is not ready to work with the ESP32. The board and port for the ESP32 are not present in the IDE. The user has to make some changes to get the right working.
The Arduino IDE is designed to work mainly with the Arduino board. To use it with the ESP32, we have to install the right board and port. For this, follow the steps given next:
By default, the Arduino IDE is only compatible with the Arduino board, so to make it ready for ESP32, follow the steps:
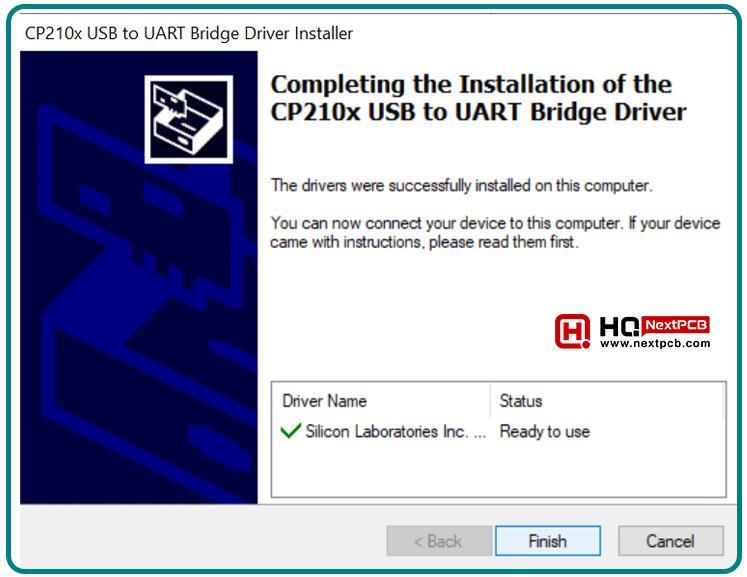
In the below eps32 by Espressif System section, click the install button.
The console on the lower side of the screen will show the downloaded information.
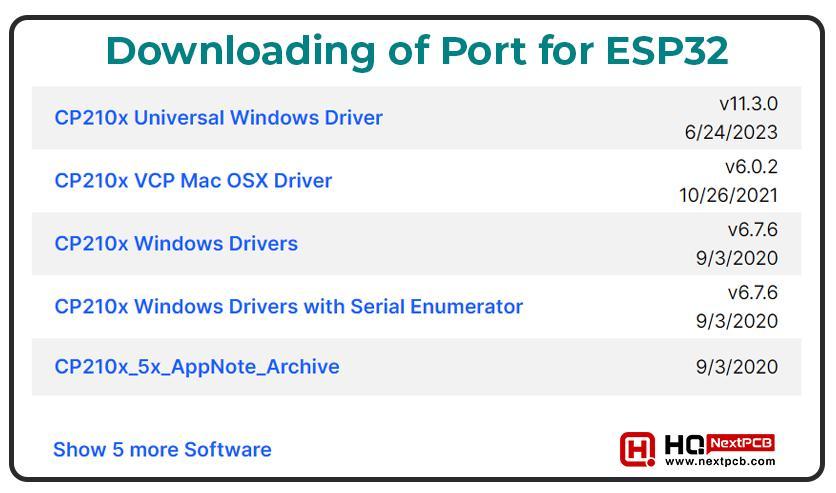
Once your downloading process is complete, you can choose the port and board to move forward.
The Arduino is now ready to use the code for the ESP32. By default, it has some pieces of code. Copy all and delete. Now, paste the following code there:
//Creating an integer named ledPin and assigning it the value 2
int ledPin=2;
void setup() {
//declaring the LED pin as output.
pinMode(ledPin, OUTPUT);
}
void loop() {
//Creating the LED pin high so the LED will turn on
digitalWrite(ledPin, HIGH);
//creating a delay time of 1 second so we can see the blinking light
delay(1000);
//Creating the LED pin low so the LED will turn off
digitalWrite(ledPin, LOW);
//creating a delay time of 1 second so we can see the blinking light
delay(1000);
}
The ESP32 is a low-cost, low-power, microcontroller board that is a perfect choice for students, hobbyists, and professional users. This is a perfect development board for projects like home automation, security systems, smart locks, and other IoT-based projects. The price of this board depends on the type of ESP32. Usually, the development board is used and can be bought at a low price.
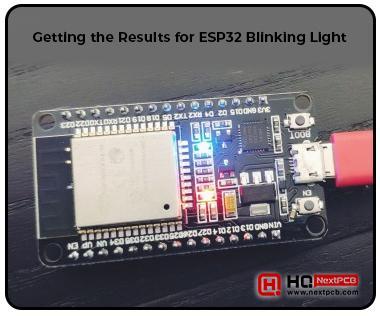
This 40-pin board has great specifications that make it one of the most versatile microcontroller boards. There are multiple IDEs to program, but we have used the Arduino IDE for this tutorial. Multiple settings are required to make the Arduino IDE ready for ESP32, and we have discussed all of these in detail. In the end, we have made a project in which a blue LED on pin 2 blinks after every one second. I have tried to make a guide for the engineers to learn the use of ESP32 from scratch. If you are facing any issues, you can ask questions in the comment section.
- Autumn Offer: Get $30 off PCB orders over $100 with NextPCB
- Free PCB Assembly Offer is Now Live
- Types of Arduino Boards: Comparison of Specification and Features
Still, need help? Contact Us: support@nextpcb.com
Need a PCB or PCBA quote? Quote now


 Surface