
 NextPCB Capabilities
Printed Circuit Boards
NextPCB Capabilities
Printed Circuit Boards
 PCB Assembly
 Layer Buildup
 SMD-Stencils
 PCB Design-Aid & Layout
 Mechanics
 Quality
 Drills & Throughplating
 Factory & Certificate
 PCB Assembly Factory Show
Certificate
PCB Assembly Factory Show
Certificate
Support Team
Feedback:
support@nextpcb.com


Removing solder from a circuit board is a delicate operation that requires specialized tools. A desoldering pump, also known as a solder sucker, uses suction to remove solder, while a desoldering braid, also known as a solder wick, uses capillary action to pull the molten solder away from the connection. Both tools are relatively inexpensive and suitable for most DIY projects. For specialized applications, you may need additional tools such as a hot air gun, a soldering iron, or a heat gun. Whichever tool you choose, it's important to make sure that you follow the manufacturer's instructions and safety guidelines to ensure that you don't damage the circuit board.
In this article,
Method 1 - Using the Desoldering Pump
Method 2 - Using a Desoldering Braid
Method 3 - Using the other tools
There are 3 main techniques currently popular among industrial employees. They are as follows,
The above three methods help all people, from hobbyists to industrial workers.
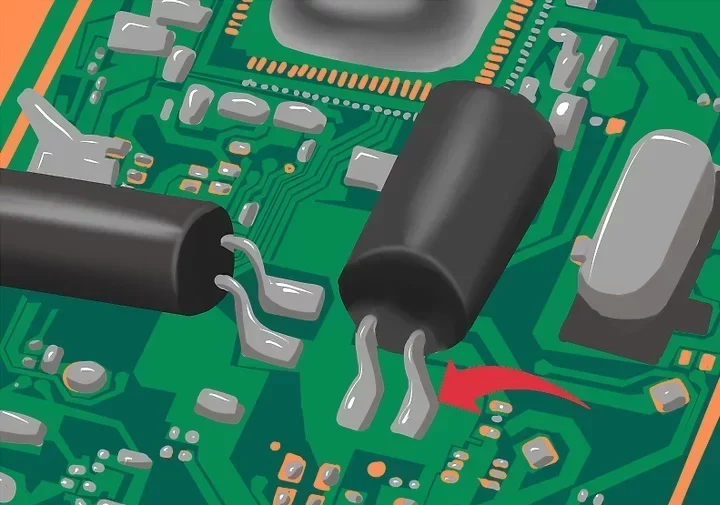
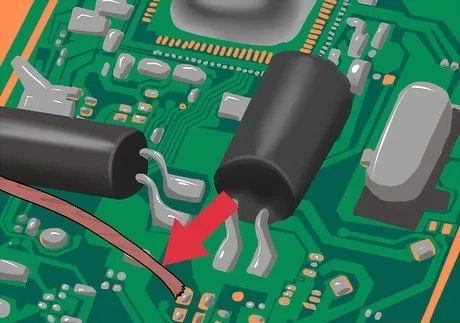
To remove components from a circuit board, locate the terminals for each component and desolder them with a soldering iron. Be careful to insert the iron only where the solder is already melted. If you don't separate each component from its specific terminal completely, the solder will melt again and reattach itself to the board, making it hard to remove all of the components at once.
Most of the cases, desoldering pump is for the Through Hall Components. You can use it for the Surface Mounted Components, also. But the process is very ineffective.
Never desolder a circuit board if you are unsure what you are doing. It is easy to separate the board layers, ruining your PCB and possibly damaging other components on the board.
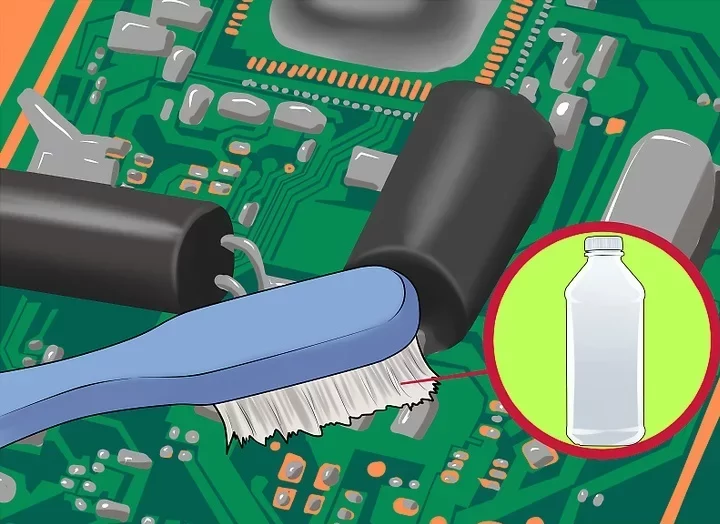
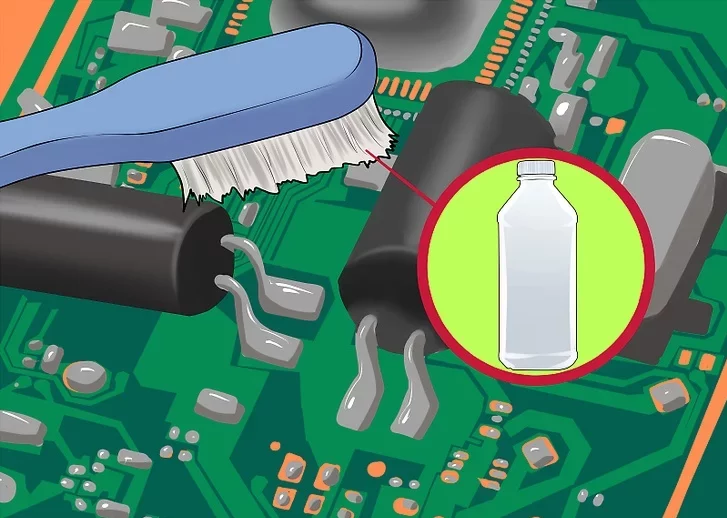
Gently clean the terminals of the component(s) to be removed using isopropyl alcohol on a toothbrush. Only clean the terminals on the soldered side of the board, and do not touch anything on the component side.
Although soldering heat can be intense, some simple precautions can keep it from damaging components. Clip a metal alligator clip between the component and the terminal you plan to desolder.
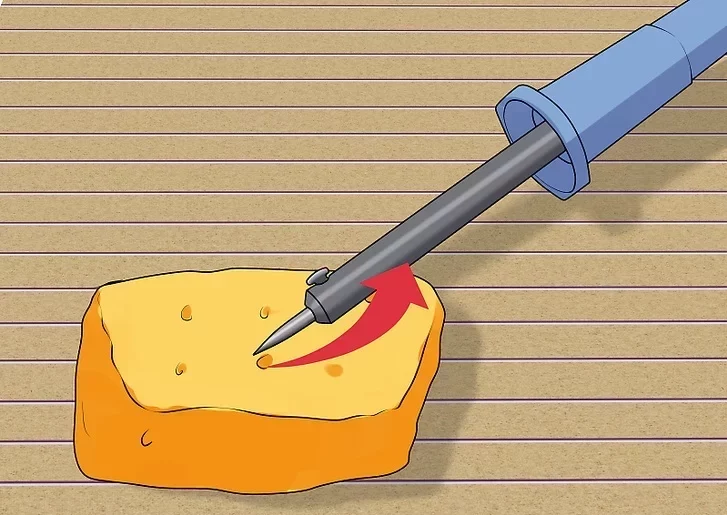
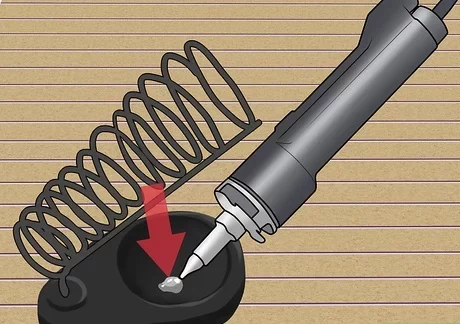
Let your soldering iron warm up for about three minutes. Then, using a wet sponge, make quick passes from base to tip over your iron to clean it. You may see a tiny bit of smoke as you pass the sponge, but it's just from the moisture in the sponge.
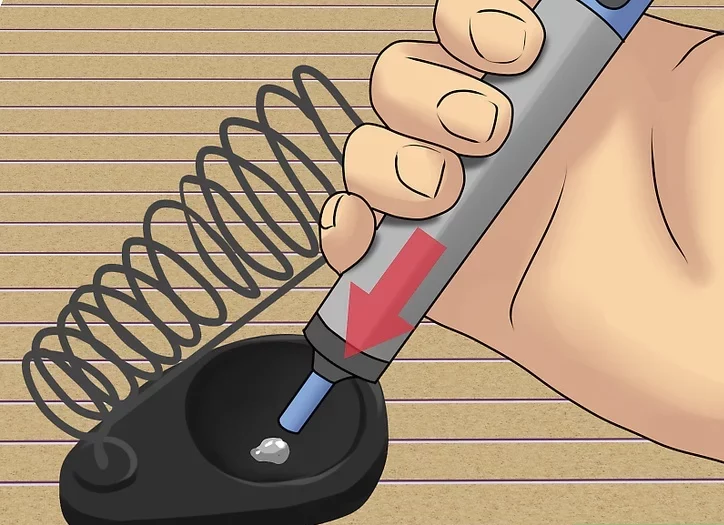
To place the pump into place, press the end of the pump until it clicks into place. This compresses a spring and latches it in the depressed position.
Heat the solder on the joint to remove a component until it melts. Then, use an old soldering iron if you have one to push at the same time as you use your soldering iron tip to free the component from its hold.
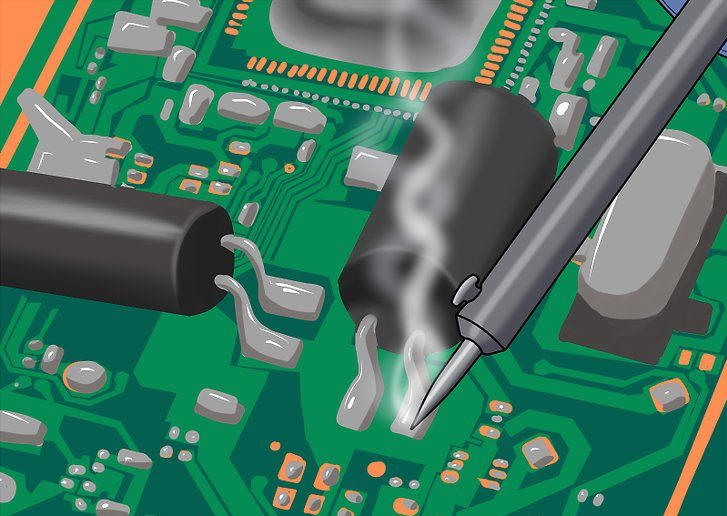
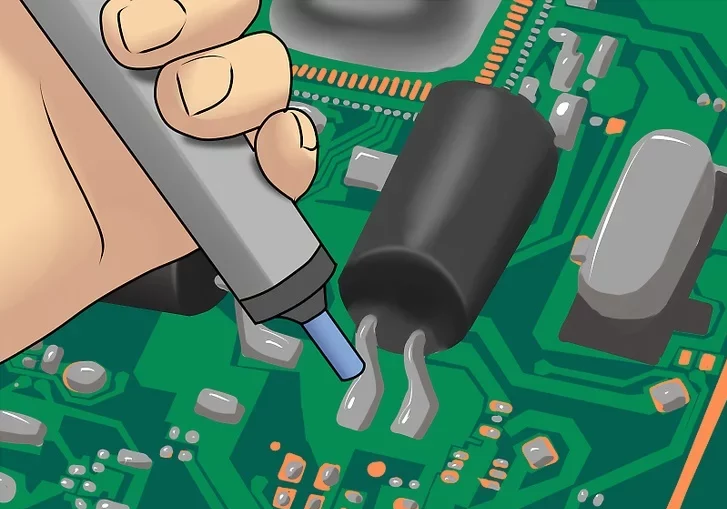
Put the tip of a desoldering pump on the solder pad and let it melt. Don't apply pressure or try to pull the solder out by hand—you'll just make a mess. Instead, release the spring (usually by pushing a button on the side), and the piston will shoot back quickly. This creates a vacuum which pulls the melted solder up into the pump.
The tip of the pump may melt a little during use. Most pumps either have replaceable tips or are cheap, to begin with, but if it's still melting, try pausing for a moment after heating the solder.
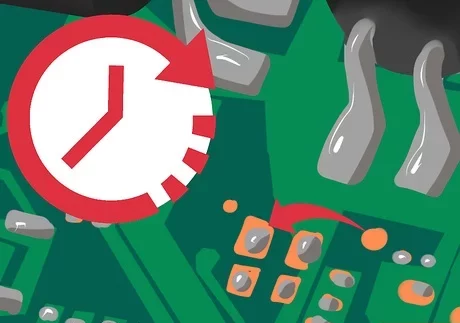
When molten solder hardens, it can sometimes harden again quickly. Work with only one terminal at a time. Hold the soldering iron in one hand and keep the desoldering pump ready in the other for the greatest efficiency.

After each use, push the pump over a trash can again to re-arm it and clear out the solder in the tube. If you leave old solder in there, it can leak back out as you go to vacuum a terminal.
When soldering, you may notice brown resin on the surface of the solder pad. This can melt when heated, so scrape it away with a small flat-head screwdriver or steel wool. Finish by cleaning the area with isopropyl alcohol and a toothbrush dampened in alcohol.
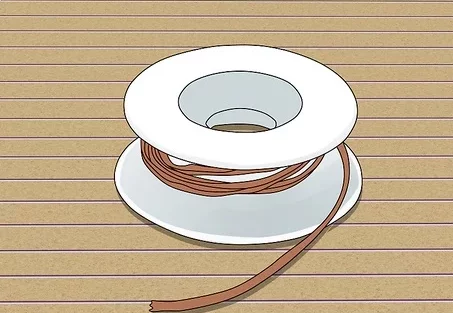
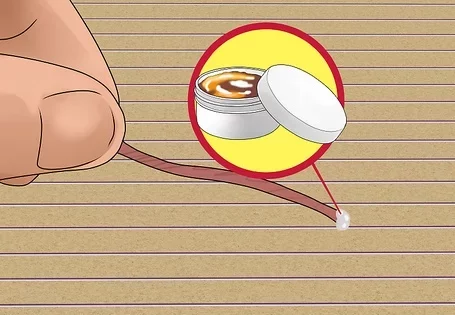
Also called a solder wick, this tool is a braid of fine copper wires. Choose a braid that is the same size or smaller than the solder pad on your circuit board and slightly wider than the tip of your soldering iron. If the braid is too large, it may take too long to heat up and could burn through the circuit board or not heat up at all.
This method works best on through-hole attachments or cleaning up excess solder after removing a component using a pump or other method. You can try it on surface-mounted components in a pinch, but the process may be difficult or time-consuming for those unfamiliar with desoldering.
Most desoldering braids already have powdered flux distributed on their wires, which wicks up the solder so that it can be melted away. You can also brush a little liquid flux onto the end of the braid to help it make better contact with the soldering iron.
Desoldering braids usually already have powdered flux distributed on the fine copper wires to prevent the solder from sticking. You can also brush a little liquid flux onto the end of the braid to make it more effective. Once you have plugged in and heated your soldering iron, it's helpful to melt a tiny bit of extra soldering wire onto the terminal so that old, hard solder will melt more easily. Withdraw your iron once you've done this.
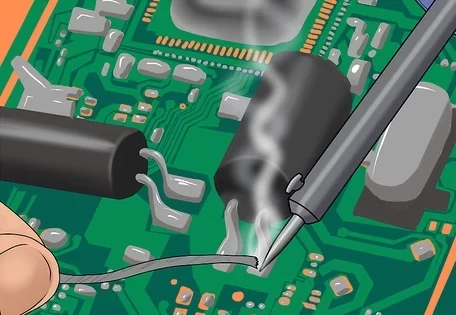
To remove the solder, place the end of the braid over the terminal.
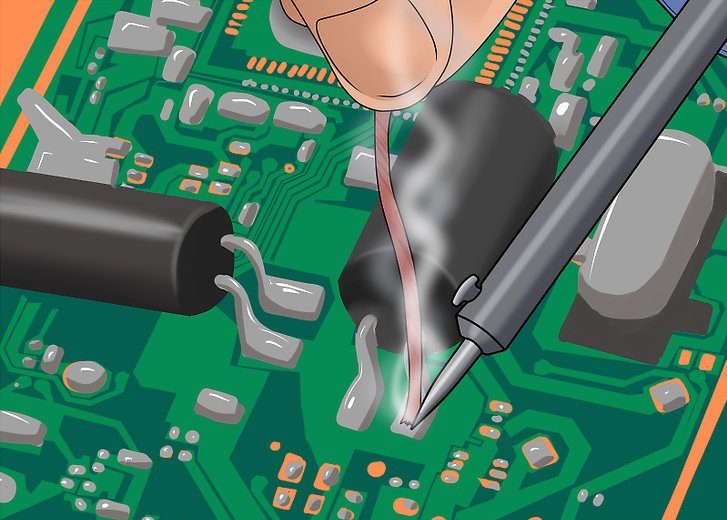
Let the iron rest on the braid without additional pressure to avoid pushing the solder pad out of place. Wait a few seconds for the heat to pass through the braid and melt the solder. Once the solder has melted, remove your iron and wait until it cools before proceeding.
The braid may get too hot to touch. If the solder isn't melted, it could be because too much heat is dissipating up the braid. Try cutting off the end of the braid and, using that instead, holding it in place with a soldering iron.
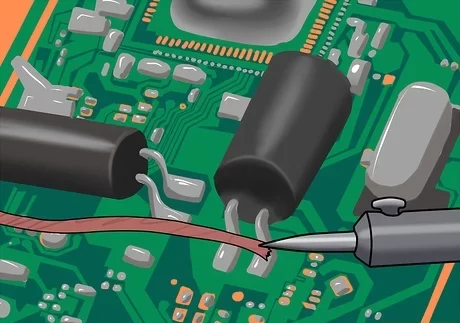
When flux coating is used up and solder is absorbed, the braid will change colour. Spool out more of the braid and continue to the next terminal. If needed, apply more liquid flux to the braid.
You may need to remove the solder around the component, even on through-hole attachments. If you plan to reuse the component and don't want to damage it, keep a heat-resistant tool away from it so as not to melt the solder.
After removing all the solder, allow the area about thirty seconds to cool. Then remove it by hand.
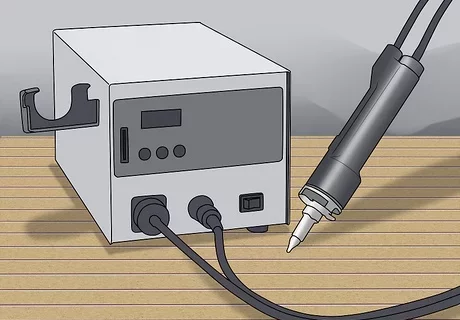
If you plan to work with circuit boards, consider purchasing a soldering station that includes higher-quality versions of a soldering iron and desoldering pump. The station should allow you to choose a temperature appropriate for each project so you can avoid damaging heat-sensitive components.
Although the brute force method using a standard heat gun is quick, it will almost surely damage delicate components (capacitors, microchips, etc.). A hot air rework station is required if you want a more precise method. This includes a small, high-temperature heat nozzle so you may swiftly melt the solder with little risk to the adjacent components. Only those who intend to desolder frequently and have some salvage boards to practice on are advised to use this pricy, heavy instrument.
Use a desoldering pump or the vacuum nozzle on the rework station to remove the molten solder.
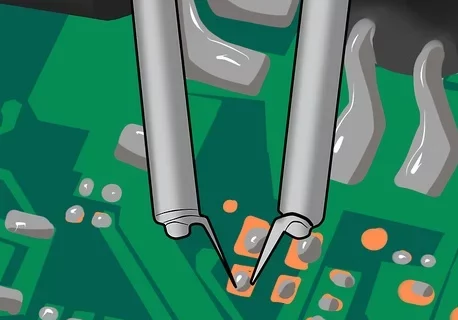
These "tweezers" have soldering irons as their pincers. Simply pinch each pin to melt the solder on a surface-mounted resistor, diode, or other tiny components.
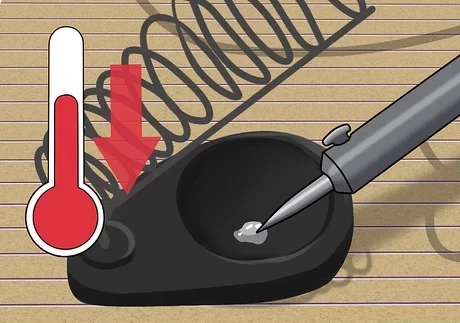
A few businesses manufacture a unique type of solder that melts at low temperatures and is supplied only for desoldering. This produces an alloy that reduces the melting temperature when melted onto existing solder. By doing this, the solder will stay liquid longer and be simpler to remove with a pump or braid.
Desoldering a surface-mounted component with numerous pins attached one at a time will be time-consuming and challenging. To raise the pins instead, melt the solder on one side all at once with a tiny wire before the solder solidifies again.
Desoldering can be challenging; thus, many people have developed unique methods for discretely removing components from a circuit board. There are numerous ways to desolder various kinds of circuits, but this article mainly discussed how to remove through-hole components.
Solder can be removed in a variety of other methods, though. For instance, you can use the fundamental desoldering technique of grinding and scraping to remove solder from circuit boards.
Another method is milling the solder out, although this requires high expertise.
You can use chemical stripping to remove the solder from copper plates. Also, you might occasionally need to micro-blast your PCB in order to remove solder from a sizable surface area.
Certainly, you must choose your approaches carefully; however, knowing the above methods will be quite beneficial as you will be able to choose which method is most appropriate for your task.
The techniques described on this page are a great place to start learning how to desolder.
Still, need help? Contact Us: support@nextpcb.com
Need a PCB or PCBA quote? Quote now


 Surface

