
 NextPCB Capabilities
Printed Circuit Boards
NextPCB Capabilities
Printed Circuit Boards
 PCB Assembly
 Layer Buildup
 SMD-Stencils
 PCB Design-Aid & Layout
 Mechanics
 Quality
 Drills & Throughplating
 Factory & Certificate
 PCB Assembly Factory Show
Certificate
PCB Assembly Factory Show
Certificate
Support Team
Feedback:
support@nextpcb.com


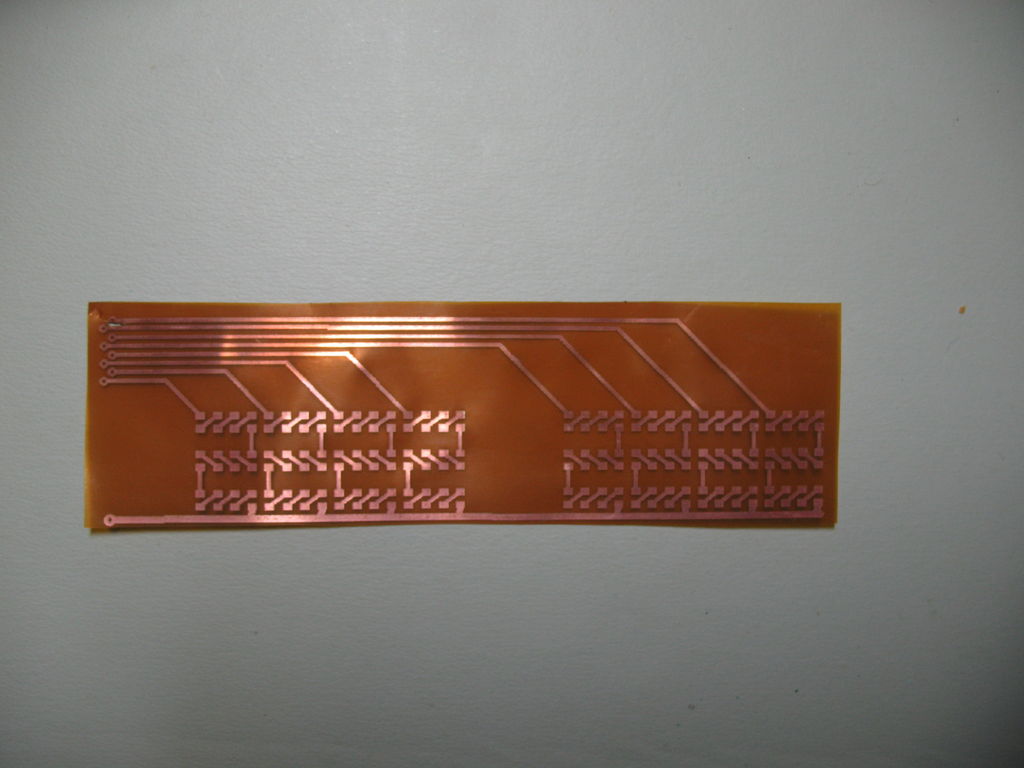
A Print Circuit Board (PCB) mechanically sustains and also electrically links digital parts making use of conductive tracks, pads as well as various other functions engraved from copper sheets laminated flooring onto a non-conductive substratum. PCBs can be solitary-sided (one copper layer), dual-sided (2 copper layers), or multi-layer. Conductors on various layers are gotten in touch with plated-through openings called vias. Advanced PCBs might have parts - capacitors, resistors, or energetic tools - ingrained in the substratum.
Create your very own single-sided adaptable published circuits utilizing a strong ink printer, copper-coated polyimide film, and also typical circuit card etching chemicals.
You will certainly locate flex PCBs inside a lot of mobile phones or comparable miniaturized devices. Flex PCBs work for making little cable televisions as well as very lightweight circuits.
Obtain some slim sheets of polyimide which have copper on one or both sides. Polyimide is a yellow polymer with a high melting temperature level and also is occasionally called Kapton. A usual kind of copper-coated polyimide is DuPont "Pyralux" product.
Pyralux sheets can be found in several selections of polyimide density, copper density as well as glue density (the "glue" is in between the copper as well as polyimide holding whatever with each other.) Copper density is given up oz per square foot, while sticky as well as Kapton density is given up mil (1 mil =0.001 inches).
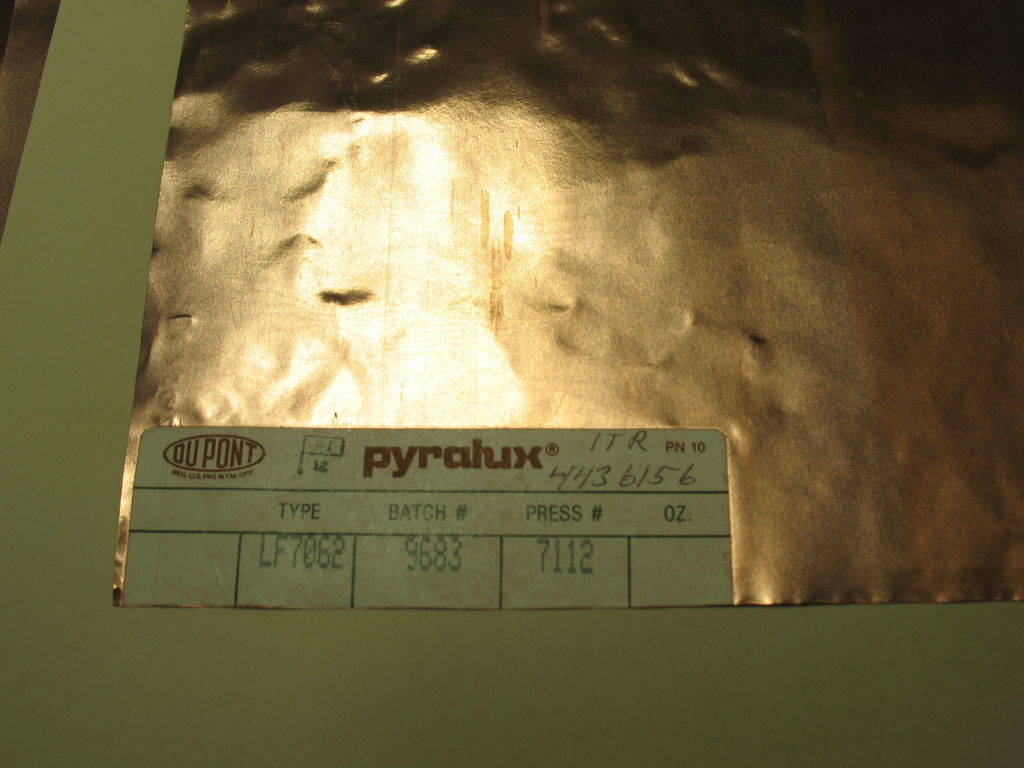
Pyralux LF7062 (envisioned) has 1/2 oz Cu, 1/2 mil adhesive, and also 1 mil Kapton. This function ALRIGHT however is a little bit slim as well as crinkly for the printer to deal with.
LF9120 has 1 oz Cu, 1 mil adhesive as well as 2 mil Kapton - appears to function best in the printer LF9210 has 2 oz Cu, 1 mil adhesive and also 1 mil Kapton - stiffer, however, functions OK, Various other choices are dual-sided copper (a sandwich of Cu/Kapton/Cu held together with glue) as well as a roughened surface area, signified by R at the end of the component number.
The roughened sheets as well as dual-sided sheet job OK. Nevertheless, Pyralux with 2 oz or thicker copper can be hard to feed to the printer, specifically if there is copper on both sides.
See if you can obtain a totally free example from DuPont. Sometimes, Pyralux sheets show up on ebay.com.
Cut the Pyralux sheets to 8.5 x11 or 8.5 x14 inches with scissors or a blade. Stay clear of smearing the copper with fingerprints or oil, which can obstruct the etch option later on. To shield the printer, attempt to maintain the sides reasonably level and also without burrs.
For straight printing on the copper film, situate a solid-ink printer. These are frequently perplexed with printer, yet rather print dissolved wax. Unlike the majority of inkjets, the wax makes an excellent safety layer for copper etching, as well as unlike printers, strong ink printers do not count on in your area billing the paper surface area, which could be frustrating when the paper is changed by a copper sheet.
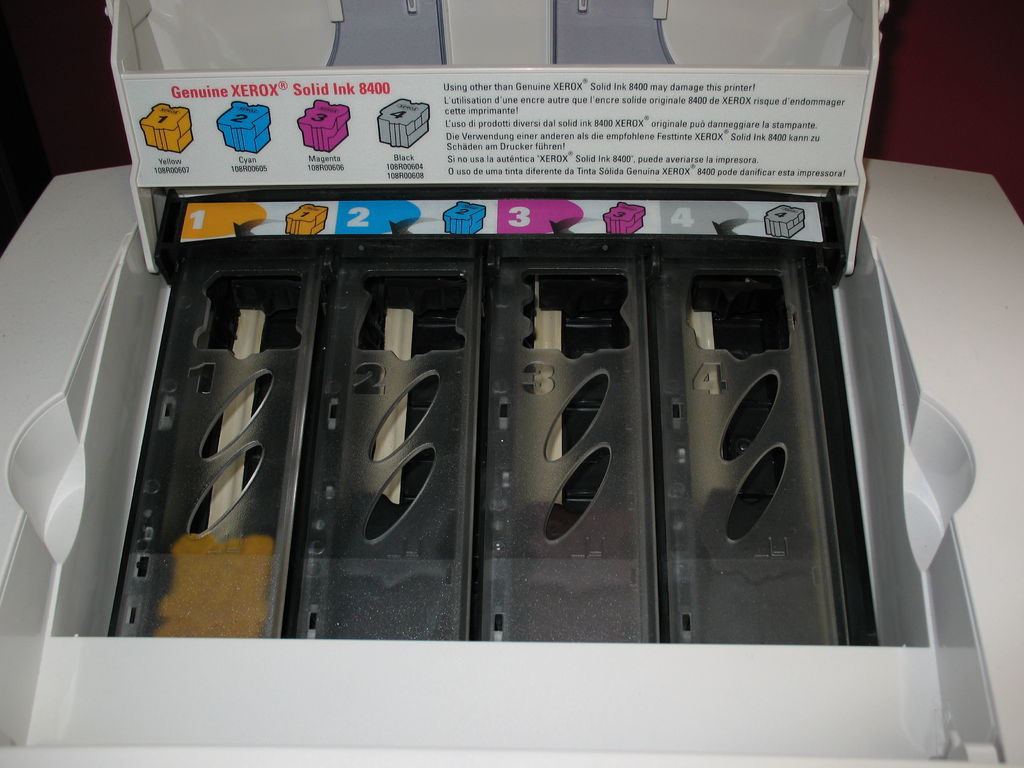
Some versions are Tektronix Phaser 840, 850, 860, and also Xerox Phaser 8200, 8400, 8500, 8560, as well as 8860. You may discover one in the workplace. Many Phaser versions are regular printers, so inspect under the hood for the strong ink blocks (envisioned) if you're unsure.
If you do not have accessibility to a strong ink printer, the "printer toner transfer" iron-on approach, making use of a laser-printed layout, might change this action.
Create a style in any type of graphics program, after that utilize the hands-on feed tray to publish it on your Pyralux sheet in black. Cyan, magenta, yellow, eco-friendly (50/50 cyan+ yellow), red (50/50 yellow+ magenta) likewise appear to function, simply prevent light tones that are made up of little dots on a white history. Printed locations will certainly be safeguarded with wax, as well as end up as copper traces on your design.
Keep in mind included 3-7-08: Make use of the "high resolution" or "image" setting when printing. This printer setup is commonly readily available in the "Publish Arrangement" food selection of your graphics program. High-resolution setting prints extra gradually as well as appears to advertise far better attachment of wax to copper.
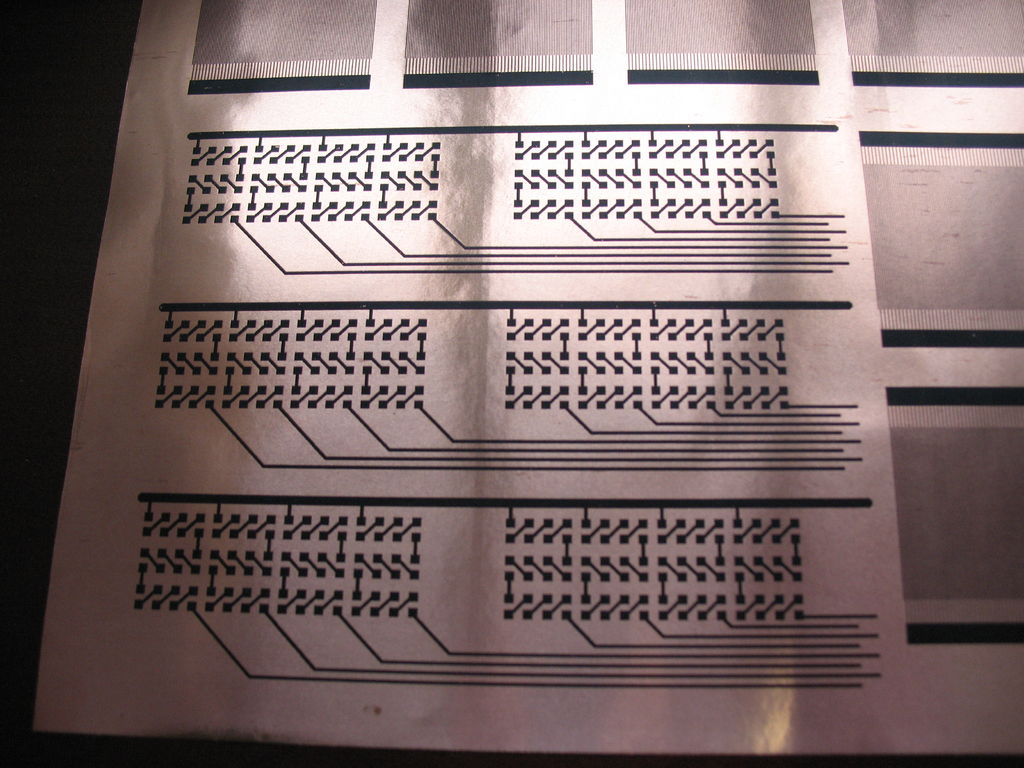
10 mil (250-micron) vast lines as well as areas were published from a Tektronix Phaser 850, which is an older version.
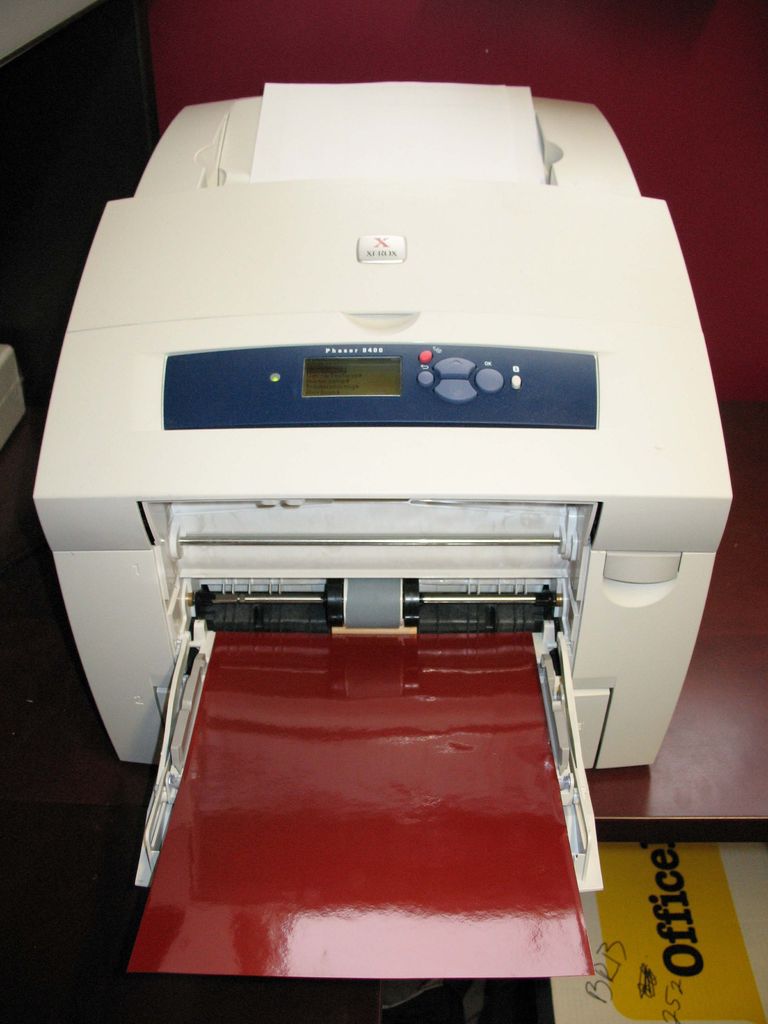
In many Phasers, the copper side ought to face down when it enters the hands-on feed and also appears upside-down. Offer a little press if the hands-on feed gear has a problem ordering onto the sheet (most likely with thicker sheets).
Why Choose NEXTPCB Manufacturer
Place the published sheet in ferric chloride (copper etchant) for at the very least 5 mins. Maintain the etchant from jumping on your eyes and also skin. The etch time will certainly depend upon temperature level, copper density as well as various other problems, using up to 25 mins, so keep watching for copper locations to liquefy and also the polyimide film to appear. Gurgling with a fish tank pump, as well as warming up to 35-40 C will certainly aid the etch to continue faster as well as extra equally.
The continuing to be wax can be rubbed off with a ScotchBrite pad and also cozy water, or isopropyl alcohol (massaging alcohol). This can take some initiative.
The flex PCB is currently all set to cut apart right into tiny circuits (if that's your strategy) and also to solder. You can tape it onto an item of steel or a routine fiberglass circuit card to hold it stable while servicing it. "Tintin" nickel layering option or comparable can be utilized to make it less complicated to solder to, yet the newly engraved and also cleansed flex PCB is conveniently soldered as is.
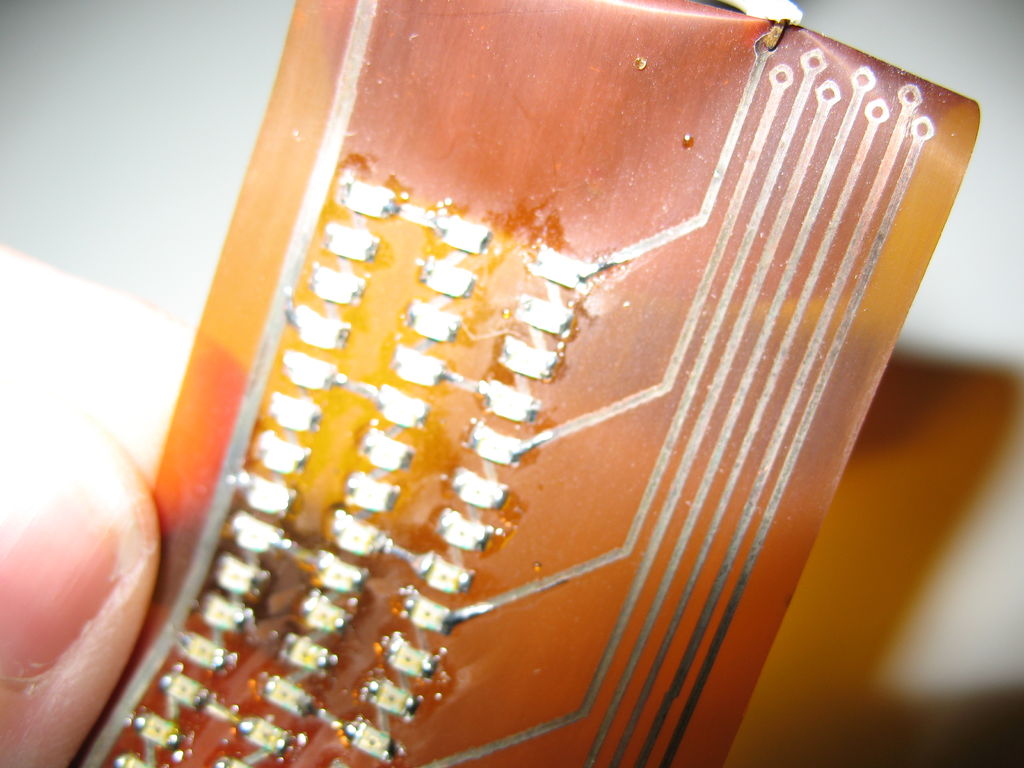
Since it is a 1-sided PCB, without openings, it is most beneficial as a small wire or as a board for surface area place components. Usage jumpers if essential for traces to go across on your design.
Still, need help? Contact Us: support@nextpcb.com
Need a PCB or PCBA quote? Quote now


 Surface


Jame
NIce flex pcb DIY project!