Introduction
The Raspberry Pi is a Trendy single-board PC (Personal Computer) that is Typically used for Many projects related to Objects such as home automation, robotics, media centers, and more. While the Raspberry Pi has built-in wireless networking Abilities, Attaching to your network via a wired Ethernet connection offers more stable and reliable connectivity comparison to WiFi. In this post, we will go through the steps needed to connect your Raspberry Pi to your Windows PC (Personal Computer) using an Ethernet cable so that you can control and approach the Raspberry Pi remotely through SSH or VNC.
What Will You Need for Connecting Raspberry Pi to Ethernet
To associate your Raspberry Pi to your PC by means of Ethernet, you will require the accompanying things:
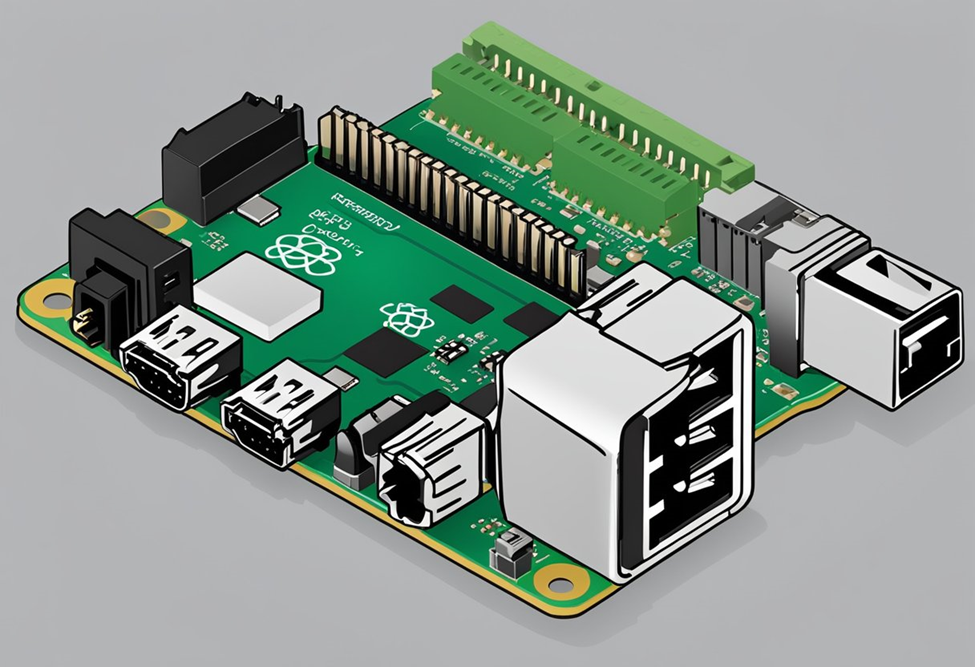
- Raspberry Pi single board PC - Any model of Raspberry Pi will work for this like the Raspberry Pi 3B+, 4, or 400.
- Ethernet cable - A standard Cat5e or Cat6 Ethernet cable with RJ45 connectors on the two closures. The cable ought to be something like 3 feet in length however something like 100 feet for best execution.
- Network adaptor (optional) - On the off chance that your PC doesn't have an Ethernet port inherent, you'll require a USB or PCIe Ethernet connector.
- Power supply for Raspberry Pi - Make a point to have the authority Raspberry Pi power supply or a viable outsider one.
- Windows 10 PC - The computer you are connecting the Raspberry Pi to should be running Windows 10. Other work area working frameworks ought to work in basically the same manner also.
- SD card with Raspbian operating system introduced - The Raspberry Pi needs a SD card with the Raspbian working framework introduced to work.
That covers the basic hardware requirements. Make sure to gather all the necessary components before proceeding with setting up the Ethernet connection between your Windows PC and Raspberry Pi.
Get Free PCB Assembly
Connect Your Raspberry Pi Using the PC Ethernet Port
When you have every one of the necessary things assembled, follow these moves toward interface the Raspberry Pi straightforwardly to your windows PC utilizing an Ethernet port:
- Embed the microSD card with Raspbian operating system into the Raspberry Pi and turn it on. Permit the Pi to completely boot up.
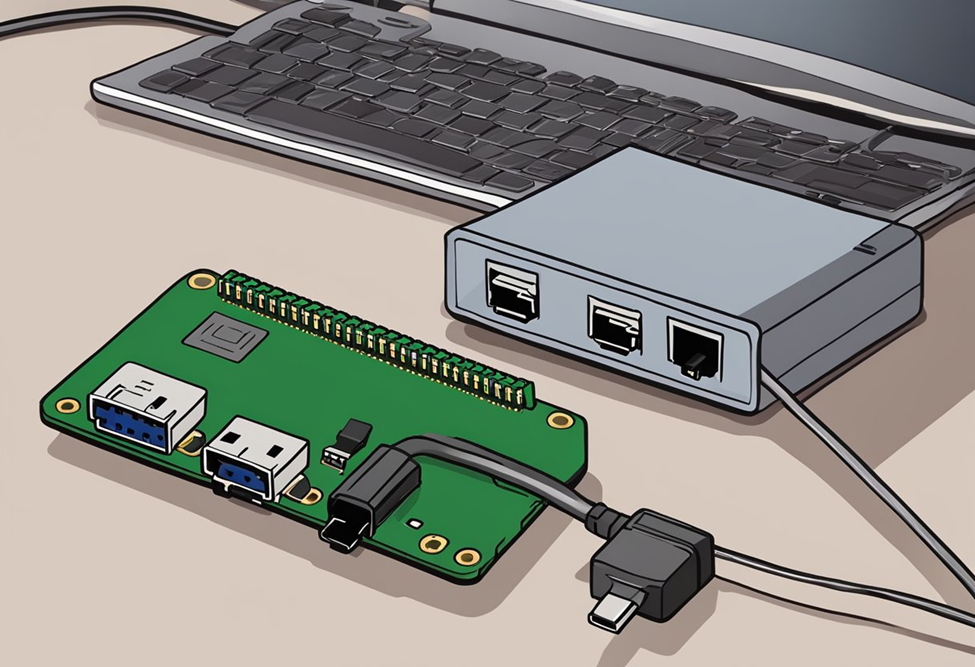
- Plug one end of the Ethernet cable into the Ethernet port on your Windows PC. The port is typically located on the back or side of the desktop tower.
- Plug the opposite finish of the Ethernet cable into the Ethernet port situated on the Raspberry Pi board. It's the space second from the left edge on most Pi models.
- Provide power to the Raspberry Pi using the official power supply. Make sure to only use high quality power adapters rated for 5V/3A minimum.
- The Raspberry Pi should now be directly connected to your Windows computer network via the Ethernet cable. No additional configuration is needed on the Pi side.
- Check that the Ethernet LED on both the Pi and your PC Ethernet port are lit up, indicating a physical network connection is established.
You now have a basic wired network set up between the Windows computer and Raspberry Pi. We will configure the networking settings on Windows next to enable access to the Pi remotely.
Open Windows Settings
To arrange the systems administration settings on your Windows 10 PC, first open the Settings application by squeezing Windows key + I. This will open the Settings window. Then follow these steps:
- Click on "Network & Internet" from the left sidebar menu.
- On the following screen, select "Ethernet" on the left under "your organization status".
- This will show you the Ethernet connection properties window. Note the IP address your PC has been alloted under "IPv4 settings.
Make a note of this address as you will need it later.
Network and Sharing Center
Now we need to navigate to the classic Network and Sharing Center to enable internet connection sharing:
- Click on "Network and Sharing Center" which is located near the bottom center of the window opened earlier.
- This will open the Network and Sharing Center window. From here, select "Change adapter options" on the left sidebar.
- This brings up the list of network adapters on your PC. Right click on your active Ethernet connection and select "Properties".
Modify Your Wi-Fi Sharing Settings
To allow your Raspberry Pi to access the internet through your computer's wireless network connection, you need to modify the sharing settings:
- In the Ethernet properties window, select the "Sharing" tab.
- Select the "Allow other network users to connect through this computer's internet connection" option.
- Under "Home networking connection:" select your active Wi-Fi network adapter from the drop-down list. Click "OK".
- You may see a pop-up window asking to enable network discovery and file sharing. Allow these optional features if desired.
Open Wi-Fi Properties
Presently how about we adjust the settings on your Wi-Fi network connector:
- Return to the fundamental Organization Associations window and right-click your Wi-Fi network connector.
- Select "Properties" from the menu.
- Select the "Sharing" tab in the new window.
- Check the "Permit other organization clients to interface through this PC's Web association" box.
- Select your Ethernet adapter name from the drop-down next to "Home networking connection". Click OK.
This completes the Internet Connection Sharing (ICS) setup to allow your Raspberry Pi to access the web through your computer's Wi-Fi connection.
Modify the ICS Settings
There is one more ICS related setting we need to modify:
- Open the Organization Associations window once more and right-click the Ethernet connector.
- Select "Properties" and go to the "Web Convention Form 4 (TCP/IPv4)" properties.
- Select "Acquire an IP address naturally" and "Get DNS server address consequently".
- Click "OK" to save the settings.
This configures the Ethernet port as a client to your home network instead of functioning as its own separate network segment.
Check Your Ethernet Connection Properties
Let's verify the settings on the Ethernet connection:
- Right-click the Ethernet adapter and open Properties again.
- Go to the "Sharing" tab and ensure "Allow other network users..." is ticked.
- Check that your Wi-Fi adapter name is selected under "Home Networking Connection".
Everything should now be configured correctly to share your Wi-Fi internet connection over Ethernet.
Check Your IPv4 Settings
To finish configuration, we need to check the IP settings:
- Go into the Ethernet adapter properties and select "Internet Protocol Version 4 (TCP/IPv4)".
- Ensure both addresses are set to "Obtain automatically".
- Check that the default gateway matches your home router IP.
- Write down the Ethernet adapter IPv4 address shown - this is the gateway IP address your Raspberry Pi will use to access the internet.
Your windows computer is now set up to share its internet connection with the Raspberry Pi over the wired network.
SSH into Your Pi
From your Windows PC, you can now SSH into the Raspberry Pi to remotely arrange and control it:
- Open the Order Instant as Executive via looking for it.
- Type "ssh pi@" where is the IPv4 address of your PC's Ethernet adapter noted earlier.
- When prompted, type "raspberry" for the Pi user password.
- You should now be logged into the Raspberry Pi command line interface remotely. Type commands as normal.
- To log out, type "exit" and close the Order Brief window.
You have now successfully connected your Raspberry Pi to your Windows computer using Ethernet and accessed it remotely via SSH. Nice work!
Get Free PCB Assembly
Additional Configuration
A few other optional configurations to consider:
- Set a fixed IP address on the Raspberry Pi for Secure connectivity. Edit /etc/dhcpcd.conf.
- Install VNC server on the Pi for graphical remote access in addition to SSH. Run 'sudo apt install realvnc-vnc-server'.
- Create dynamic DNS hostname to access Pi over the internet. Services like noip.com provide free dynamic DNS.
- Configure firewall rules on Windows and RPi for secure remote access only from trusted IPs.
- Install Samba to easily transfer files between Windows and RPi over the network share.
- Enable internet sharing on other devices like mobile phones to route through RPi as a WiFi hotspot.
- Install home automation software like Home Assistant on RPi to centrally control smart home devices.
- Add additional peripherals to RPi like cameras, displays, sensors etc for DIY projects.
- Set up a Pi cluster or install cluster computing software for resource intensive tasks.
There's a lot you can do once your Raspberry Pi is directly connected to your local network. Experiment and have fun!
Troubleshooting Tips:
- If the internet sharing is not working, double check the ICS configuration settings on both the Ethernet and WiFi adapters
- Try disabling any antivirus/firewall temporarily on the Windows PC to rule out any blocking
- Refresh IP settings by releasing and renewing on both devices if IPs are not being assigned properly
- Use ping tests between devices to test network connectivity at each stage
- Check Ethernet cable and ports for signs of damage if the physical connection doesn't work
- Performance Benefits of Ethernet:
- Wired connections are more stable with less chance of dropped connections than WiFi
- Max achievable speeds are higher - up to 1Gbps for modern Ethernet vs 600Mbps for WiFi 6
- Lower latency for applications requiring responsive network access like games and video calling
- Reduced network congestion impact from other nearby wireless devices
- More suitable than WiFi for bandwidth intensive uses like large file transfers or video streaming
Raspberry Pi Configuration:
Explain how to check the Pi's IP address - ifconfig or ip addr in command line
- Recommend setting a static IP address in /etc/dhcpcd.conf for stability
- Configure WiFi country to avoid legal issues when using a wireless dongle
- Increase swapfile size for memory intensive tasks like building code
- Enable SSH login by default for easy remote access on first boot
- Set hostname to identify the Pi clearly on the local network
Get Instant Online Quote
Using Raspberry Pi as a Router/Gateway:
- Install packages like hostapd and dnsmasq to turn it into an access point
- Wireless devices can connect to the Pi and route through the wired network
- Can assign IP addresses using DHCP and provide basic networking functions
- Useful for extending WiFi coverage or experimenting with router concepts
Add more real-life examples or step-by-step guides on projects like building a home media server, monitoring home automation with MQTT/Home Assistant, setting up a retro gaming console or programming IoT devices. Let me know if any part needs further expansion.
Accessing Raspberry Pi Remotely:
- Explain how to enable SSH login by default in Raspbian for headless access on first boot. Edit ssh file in /etc/default/
- Recommend installing VNC server such as RealVNC to remotely control the desktop interface with mouse/keyboard. Useful for GUI apps.
- Configure dynamic DNS service like NO-IP to provide a DNS name that points to a home IP address for accessing over the internet.
- Hardening tips for SSH like disabling root login, changing port, setting up key authentication for secure remote access.
- Option of installing XRDP to access Pi desktop using Remote Desktop Protocol, similar to RDP on Windows.
Using Raspberry Pi as a Home Server:
- Walk through installing and configuring Samba to set up-network shared folder to access files from any device on the LAN.
- Examples of hosting network services like Plex Media Server, cloud storage with Nextcloud/Owncloud, downloading with Transmission, and more.
- Automate tasks using Python or Bash scripting. Schedule backups, download torrents, run programs daily etc. Cron jobs and systemd timers.
- Install Docker for easy deployment of containerized apps without needing full OS installation for each program.
- Set reverse proxy with Nginx to securely expose internal services to internet through one port with SSL.
- Monitoring and Security:
- Install Pi-hole to set up network-wide ad-blocking and privacy protection at DNS level.
- Use MotionEyeOS for continuous video recording or Motion for motion detection alerts from USB cameras.
- Network scanning tools like Nmap to audit LAN security and inventory connected devices.
- Set up intrusion detection with PiWars Honeypot to detect unauthorized access attempts.
- Monitor system health with Grafana, InfluxDB and telegraf for metrics collection or logging with Linux utilities.
Let me know if any particular topic needs more depth or if you would like me to refine existing content. I'm pleased to provide additional perspectives and Models to expand the scope of the article.
Conclusion
In this article, we walked through step-by-step how to physically connect a Raspberry Pi to your Windows computer using an Ethernet cable and configure networking settings on Windows 10 to share its internet connection over the wired network. We verified the network connection and accessed the Pi remotely using SSH.
About The Author
I am an experienced technical writer with a Master's degree in computer science from BZU Multan University. I have written for various industries, mainly home automation, and engineering. I have a clear and simple writing style and am skilled in using infographics and diagrams. I am a great researcher and is able to present information in a well-organized and logical manner.
You may also be interested in...
- How to turn a Raspberry pi into a Router
- How To Build Physical Projects with Python on the Raspberry Pi
- Free PCB Assembly Offer is Now Live: Experience Reliable PCB Assembly from HQ NextPCB
- HQ NextPCB Introduces New PCB Gerber Viewer: HQDFM Online Lite Edition

 NextPCB Capabilities
 PCB Assembly
 Layer Buildup
 SMD-Stencils
 PCB Design-Aid & Layout
 Mechanics
 Quality
 Drills & Throughplating
 Factory & Certificate
 PCB Assembly Factory Show
Certificate
PCB Assembly Factory Show
Certificate


 Surface

